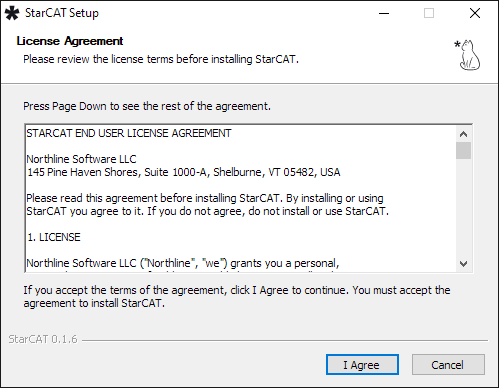
The installer is named StarCAT Setup and the version number, such as StarCAT Setup 0.1.0.exe. It is signed by Northline Software LLC.
Download it from starcatsteno.com.
System requirements
64-bit Windows 10 or 11
~600 MB disk space + additional storage for files
Internet connection to join the beta; offline up to 14 days after
Install StarCAT:
Run the installer (StarCAT Setup).
Read the license and click I Agree.
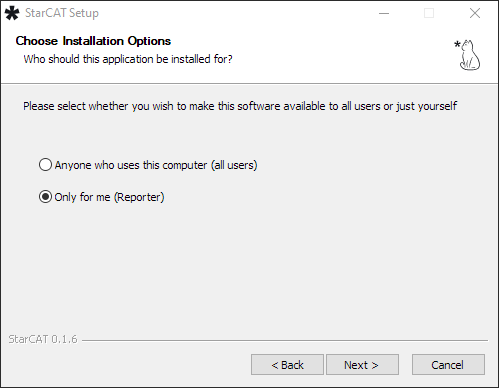
Leave Only for me selected and click Next. StarCAT then needs no administrator rights.
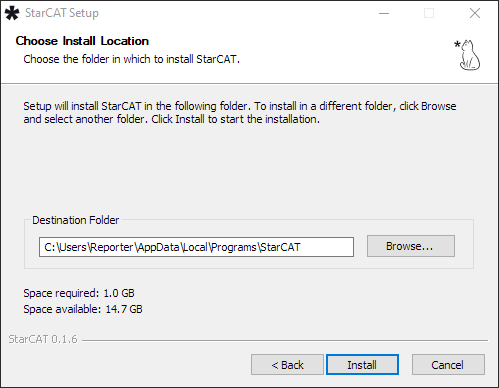
Select the install folder, or accept the one shown.
Click Install. A StarCAT shortcut is placed on the desktop.
LicenseWho StarCAT is installed forInstall folder
One copy of StarCAT runs at a time. Starting it again brings the open window to the front.
StarCAT updates itself. StarCAT checks for a new version when it opens and every six hours, downloads it, and after a minute with no strokes says so: "StarCAT 0.2.0 is ready to install", with the buttons Restart Now and Later. Later is the default; the new version then installs the next time you close StarCAT. An update never installs in the middle of a job. Running a newer installer over the existing installation also updates it.
The update takes about half a minute after StarCAT closes. Opening StarCAT in that time shows "StarCAT is finishing an update." Click OK and open it again in a minute.
To stop StarCAT updating itself, open License and clear Install updates. To look for a new version now, click Check for Updates. To go back to the version you had before an update, click Go Back on the same menu. See Licenses and Editions.
Installing over an existing version keeps the Dictionaries, settings and jobs. They are kept in the Program data folder, not the install folder.
Set up StarCAT the first time:
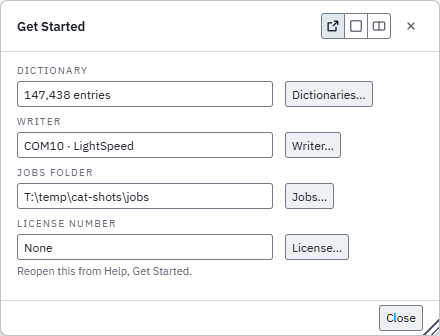
The first time StarCAT starts, the Join the StarCAT Beta box covers the window. After joining, the Get Started menu opens. It shows the Dictionary, writer, Jobs folder and license number, each with a button to its menu.
In the Join the StarCAT Beta box, enter your email, choose the edition and your current CAT software, and click Join the Beta. See Licenses and editions.
Open Realtime > Writer, select the writer and port, and click Connect. See Your writer.
Open Dictionaries and add a Dictionary. A new installation has none. StarCAT reads digitalCAT (.dct), Eclipse (.dix and its .db0 to .db9 backups), Case CATalyst (.sgdct), RTF/CRE (.rtf), Plover (.json and .py) and StarCAT (.cdx) Dictionaries.
Open File > New Job and write.
Get Started menu
Where StarCAT keeps its files
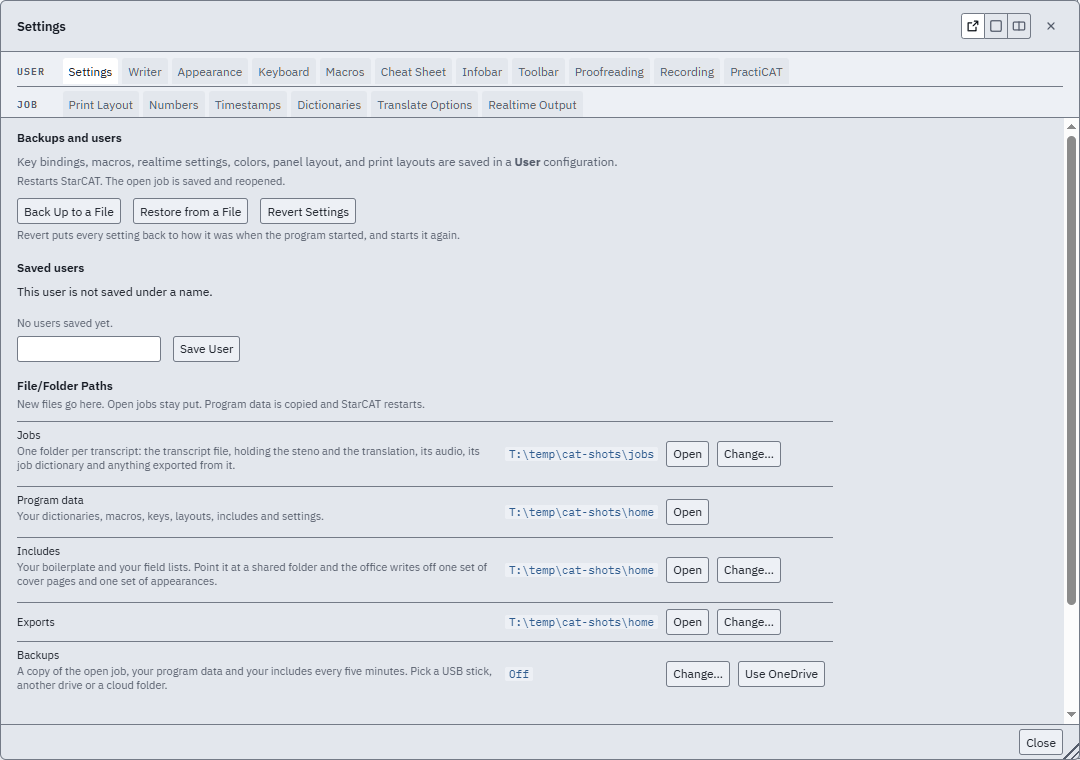
StarCAT uses four folders and a backup folder. Open Backups and Users to see, open or change each one.
Jobs. One folder per job: the .starcat file that opens it, the stroke log with its Steno and edits, the audio, the job dictionary, exhibits, and exports. Default: C:\StarCAT\jobs.
Program data. Dictionaries, macros, keyboard layouts, page layouts and settings. Default: C:\StarCAT\Program Data. Changing this folder copies every file to the new folder and restarts StarCAT.
Includes. Boilerplate/Block files and field lists. Set it to a shared network folder so an office uses one set of cover pages and appearances. Default: C:\StarCAT\Includes.
Exports. Where exported files are written. Default: C:\StarCAT\Exports.
Backups. Off by default. Pick a folder to turn it on. Every five minutes, StarCAT copies the open job, the Program data folder and the Includes folder there. The copy includes the job's audio. Only files that changed are copied. The row shows the time of the last copy, or why the copy failed. The Steno of the open job is copied within a few seconds of each stroke, so a computer that dies mid-job loses seconds, not hours. Pick a USB stick, a second drive, or a cloud folder: if OneDrive, Dropbox, Google Drive or iCloud Drive is on the computer, a Use OneDrive button sets it, and the cloud program syncs the copy off the computer. The audio of a recording in progress is copied once the recording stops.
Once an hour, StarCAT also keeps a dated copy of the open job in the backup folder's Versions folder, the newest 5 for each job. The copy beside it is replaced every five minutes; these are the copies from before, for a job that went wrong an hour ago. They leave out audio, which the main copy has.
Move to a new computer:
Install StarCAT and open it once.
Close StarCAT. Copy the backup's Program Data folder over C:\StarCAT\Program Data, and its Includes folder over C:\StarCAT\Includes.
Copy the job folders into C:\StarCAT\jobs, or open them where they are from the Jobs list.
Open StarCAT and enter the license number.
Colors and panel layout are not in the five-minute copy. Back Up to a File on Backups and Users saves them.
The license is stored in license.json in the Program data folder. A settings backup leaves out the license; restoring it on a new computer does not move the license.
One license number works on one computer at a time, and moves between them. Enter the same number on a laptop and the license moves there; start StarCAT on the desktop and the license moves back. See Licenses and editions.
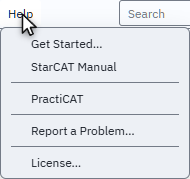
Get Started
Opens the Get Started menu. The menu also opens the first time StarCAT starts. See Set up StarCAT the first time. It shows the Dictionary, writer, Jobs folder and license number. Dictionaries…, Writer…, Jobs… and License… open their menus.
StarCAT Manual
Shift+F1F1
Opens this manual, at starcatsteno.com/manual, in your web browser. On the Help menu.
Help menu
2Licenses and Editions
StarCAT has three editions. The license number sets the edition.
Reporter. The whole program.
Scopist. Everything except Translation, the writer and Realtime. No page limit.
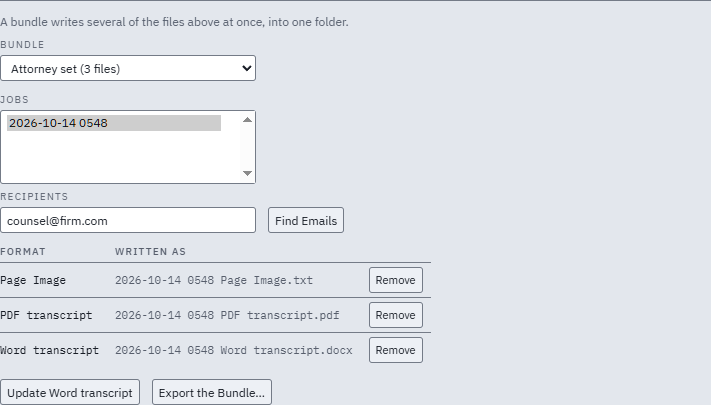
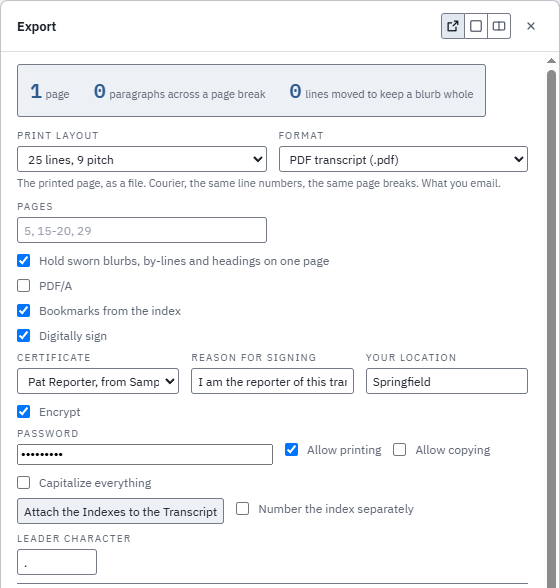
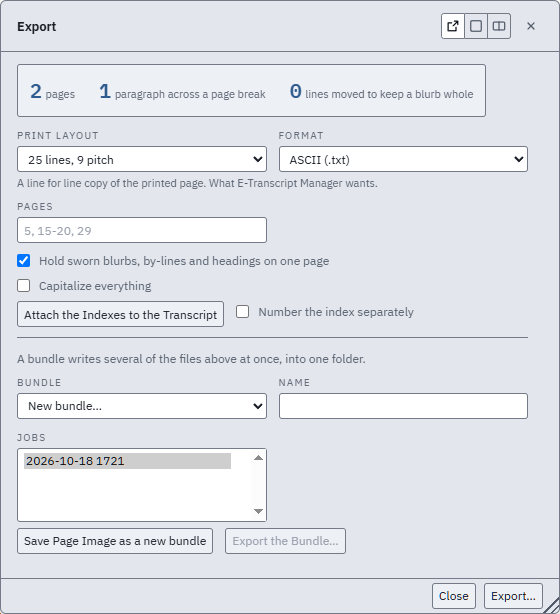
Free. The whole program. Print, export and delivery (a bundle of files exported at once, with Export the Bundle…) stop at 50 pages. An installed copy with no license number runs as the Free edition.
Prices are on starcatsteno.com. During the beta there is no license to buy. Join the beta the first time StarCAT starts.
Join the beta:
Open StarCAT. With no license number entered, the Join the StarCAT Beta box covers the window. Steno is not taken while it is open.
In Email, enter your email address.
In Edition, choose Reporter or Scopist.
In Current CAT software, choose the CAT you write on now. The other fields are optional.
Click Join the Beta. StarCAT contacts the license server and enters a beta license number. If it cannot reach the server, the box says so and stays open; connect to the internet and click Join the Beta again.
The beta is free and has no end date. Jobs written during the beta do not get the Free mark. Each computer and each email address joins once. A second try shows "This computer or this email has already joined the beta."
Free edition page limit
Writing never stops at 50 pages. When a job is longer than 50 pages, print, export and delivery are refused with the message "Free Version prints and exports up to 50 pages."
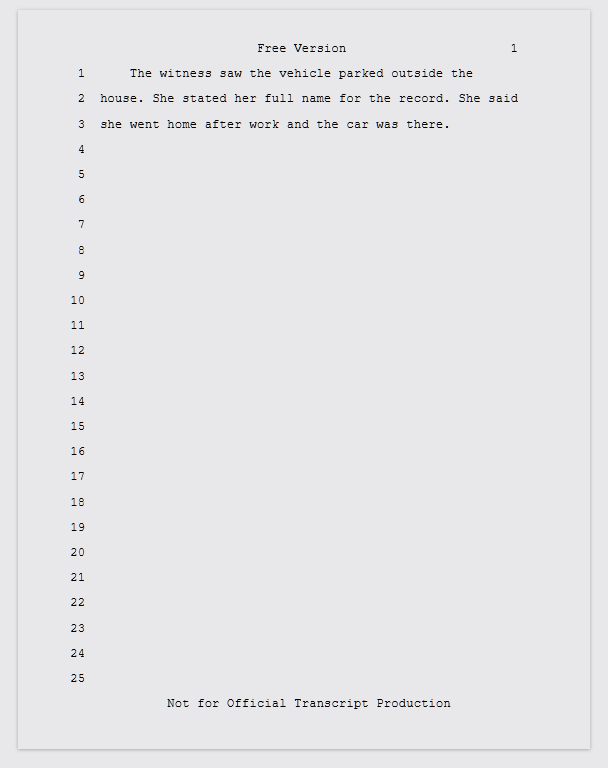
Every page of a job started in the Free edition prints with the header Free Version and the footer Not for Official Transcript Production, added above and below the job's own header and footer. The mark is stored in the job, not in the export. Opening the job in the Scopist edition does not remove it. Opening it on a Reporter license does.
A Free edition page in Print preview
Enter a license number:
Open Help > License.
In License number, type the number, in the form SC-XXXX-XXXX-XXXX-XXXX.
Click Activate. StarCAT contacts the license server. When the number is accepted, the menu shows the edition, the name the license is issued to, and the date the license works offline until.
If the number is not accepted, the menu shows one of these messages:
That license number is not recognized. The number was mistyped or does not exist.
That license number is no longer active. The license was canceled.
StarCAT could not reach the license server. The computer is offline or the server did not answer. Connect to the internet and click Activate again.
StarCAT could not save the license. Check that its folder can be written to. The license is saved in the Program data folder, and StarCAT could not write there. If that folder is on a drive that is unplugged or full, plug it in or free some space. Otherwise open Backups and Users, click Change beside Program data and pick a folder on this computer, such as C:\StarCAT\Program Data. Then click Activate again.
Check-in and offline use
A licensed copy checks in with the license server at startup and every six hours while running. Each check-in renews a 14-day offline lease. A check-in with no answer changes nothing; the current lease stands until it runs out.
Three days before the lease runs out, StarCAT shows "Connect to the internet within 3 days to keep StarCAT working." at startup.
One license number works on any of your computers. Write on the laptop in court, then open StarCAT on the office desktop: the license moves to the computer that starts StarCAT, as often as you like.
A license does not cover two computers in use at once. StarCAT counts a day when two computers on the number are written on in the same ten minutes and one of them is offline, such as a laptop offline in court while the office desktop writes. On the third such day in 30, the number loses its offline use: StarCAT then runs only 12 hours without the internet, not 14 days. The license itself is not canceled. To get offline use back, email support@starcatsteno.com.
When StarCAT locks
StarCAT locks only when a job is opened, never in the middle of a job. A locked job opens, but nothing can be added to it. The reason is one of these:
This license is in use on another computer. Restart StarCAT to use it here.
This license number is not recognized. Open Help > License and join the beta again for a new number.
This license number is no longer active. Email support@starcatsteno.com.
StarCAT could not check its license. Connect to the internet and restart StarCAT. The 14-day lease ran out with no check-in.
A copy with no license number never locks.
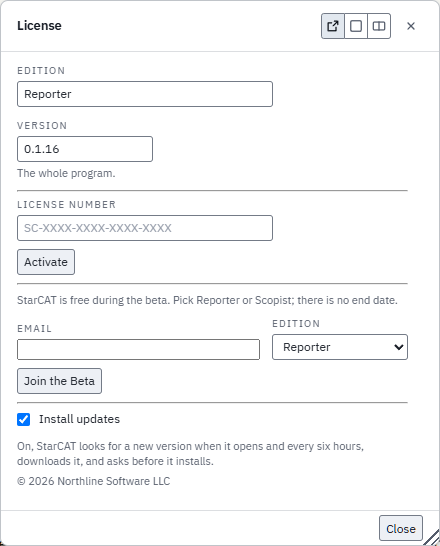
License
Opens the License menu. Shows the edition, the StarCAT version, the name the license is issued to, the license number, and the date the license works offline until. Opens with no job open. See Enter a license number and Join the beta.
The Scopist edition also lists what it does not do. The Free edition says the page count where print, export and delivery stop.
During the beta, Switch to and Switch Edition change a beta license between Reporter and Scopist. Pick the edition, then click Switch Edition. The license number changes; jobs, dictionaries and settings are kept.
At the bottom, Install updates is the update switch. On, StarCAT looks for a new version when it opens and every six hours, downloads it, and asks before it installs. Off, it never looks.
Check for Updates looks now, even with the switch off. A new version downloads and StarCAT asks to install it. This also brings back a version you went back from.
After an update, Go Back returns to the version you had, for example Go Back to 0.1.3, with the date of the update beside it. It downloads that version's installer, closes StarCAT and opens it again as the earlier version. The version you went back from is not offered again; the next one after it is. Dictionaries, settings and jobs are kept.
License menu with no license number entered
3Getting Started
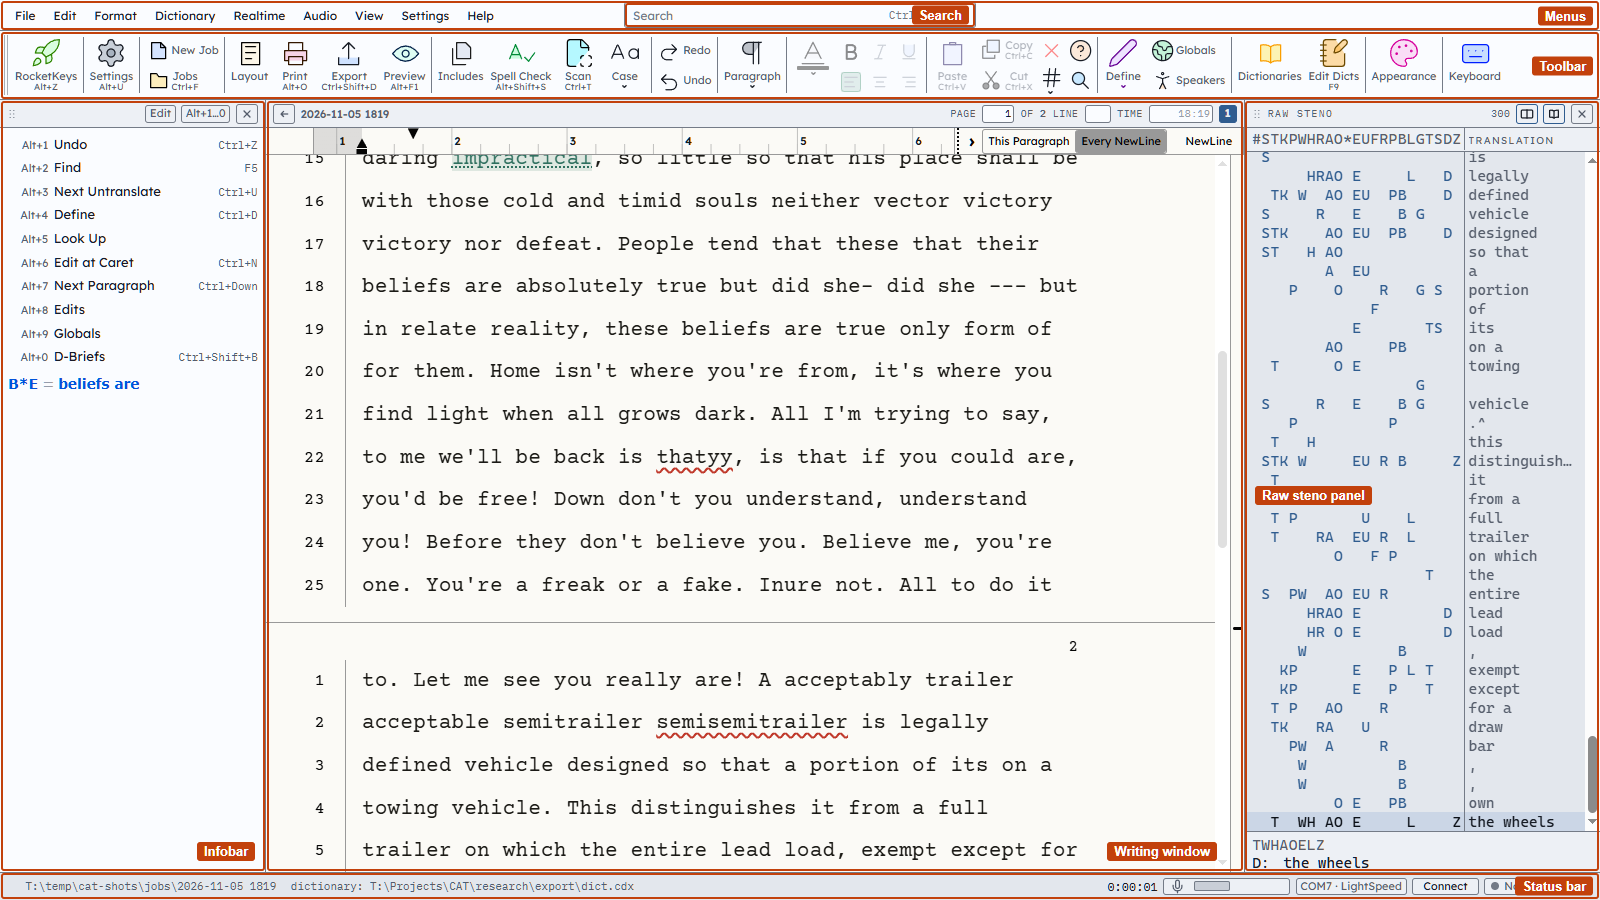
Main StarCAT window
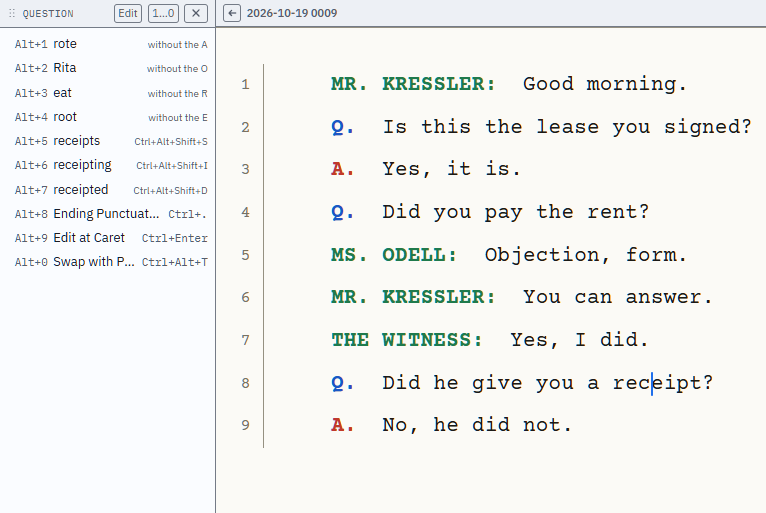
The Infobar is on the left. It lists the commands for what you are doing, with their hotkeys.
Connect a writer:
Plug in the writer and turn it on. Pair a Bluetooth writer in Windows before starting StarCAT.
Open Realtime > Writer.
Select the writer in Machine.
Select the port in COM port. Only usable ports are listed. Click Refresh after plugging in a cable.
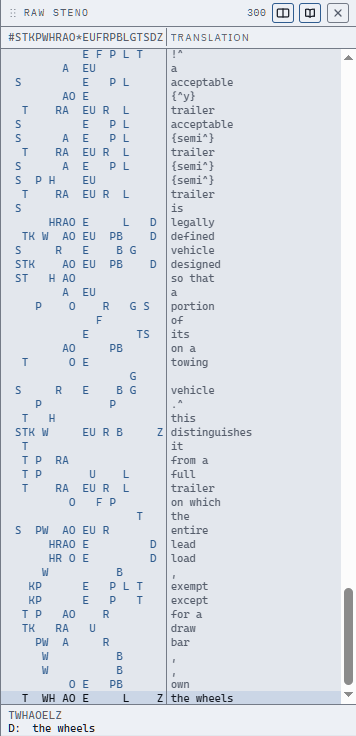
Write a stroke. The Steno appears in the Raw Steno panel.
The writer setup is saved when the fields are set, even if the connection fails. For an unlisted machine, set the writer to TX Bolt mode and select Another writer, in TX Bolt mode.
To write on a keyboard, select Plover HID keyboard in Writer and Keyboard in COM port. Disconnect gives the keys back to the keyboard.
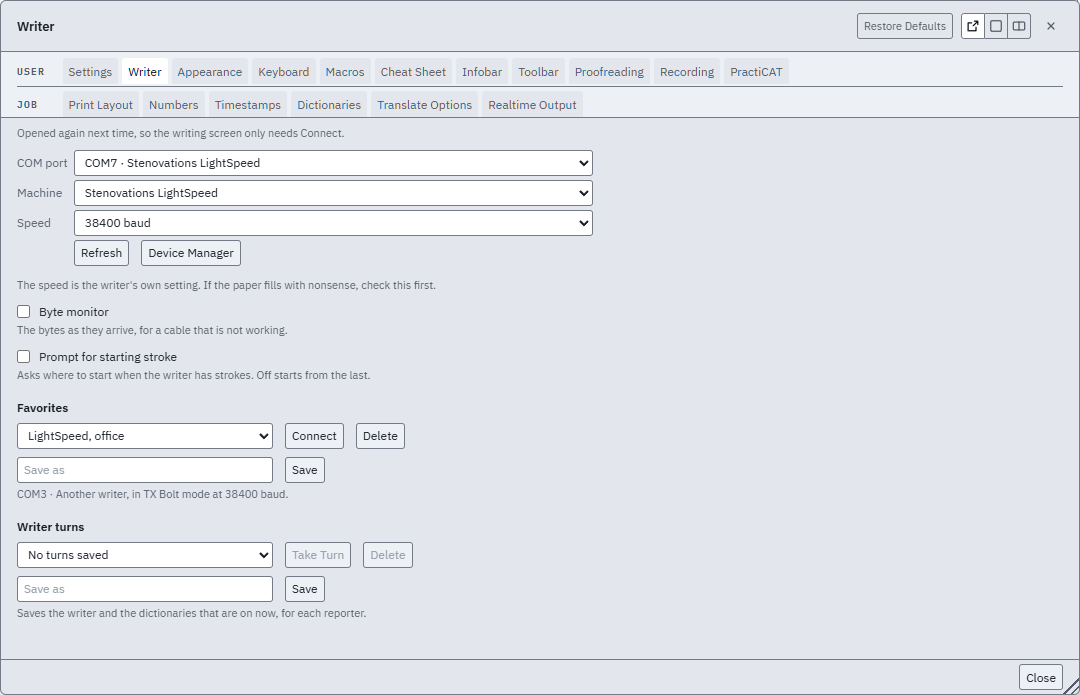
Writer menu
Load a Dictionary:
Open Dictionary > Dictionaries.
Click Add a Dictionary…, at the bottom right of the menu, and select the file. The Dictionary is added to the bottom of the list.
Order the list with the arrows on each row. The first Dictionary with an entry for a stroke supplies the Translation. The job dictionary is read before every Dictionary on the list, whatever the order.
Changes to the list take effect on the next stroke.
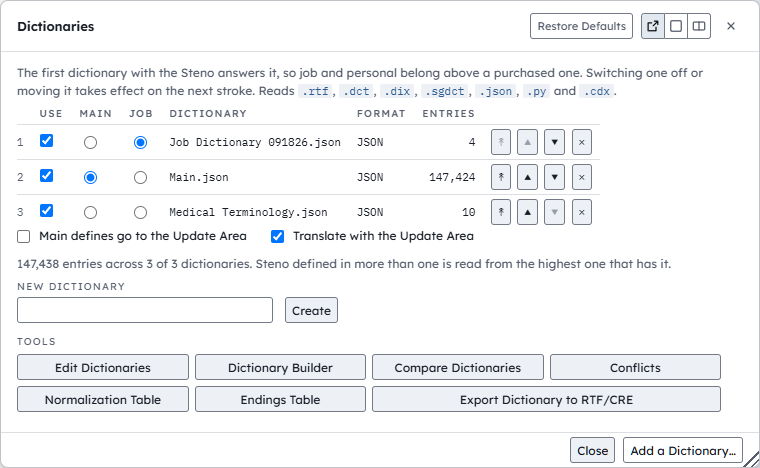
Dictionaries menu with three Dictionaries: the job dictionary, Main.json and Medical Terminology.json
Start a job:
Open File > Jobs.
Type a Job Name and click Start Job.
Write. Strokes translate as they arrive. There is no Save: every stroke and edit is saved as it happens. To define a word as you write, see Realtime define in Defining.
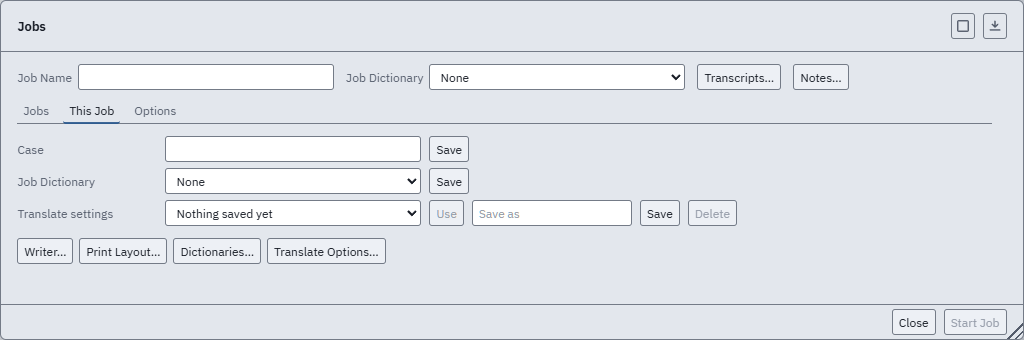
A case groups the jobs of one matter. Set the case on the This Job tab of the Jobs menu.
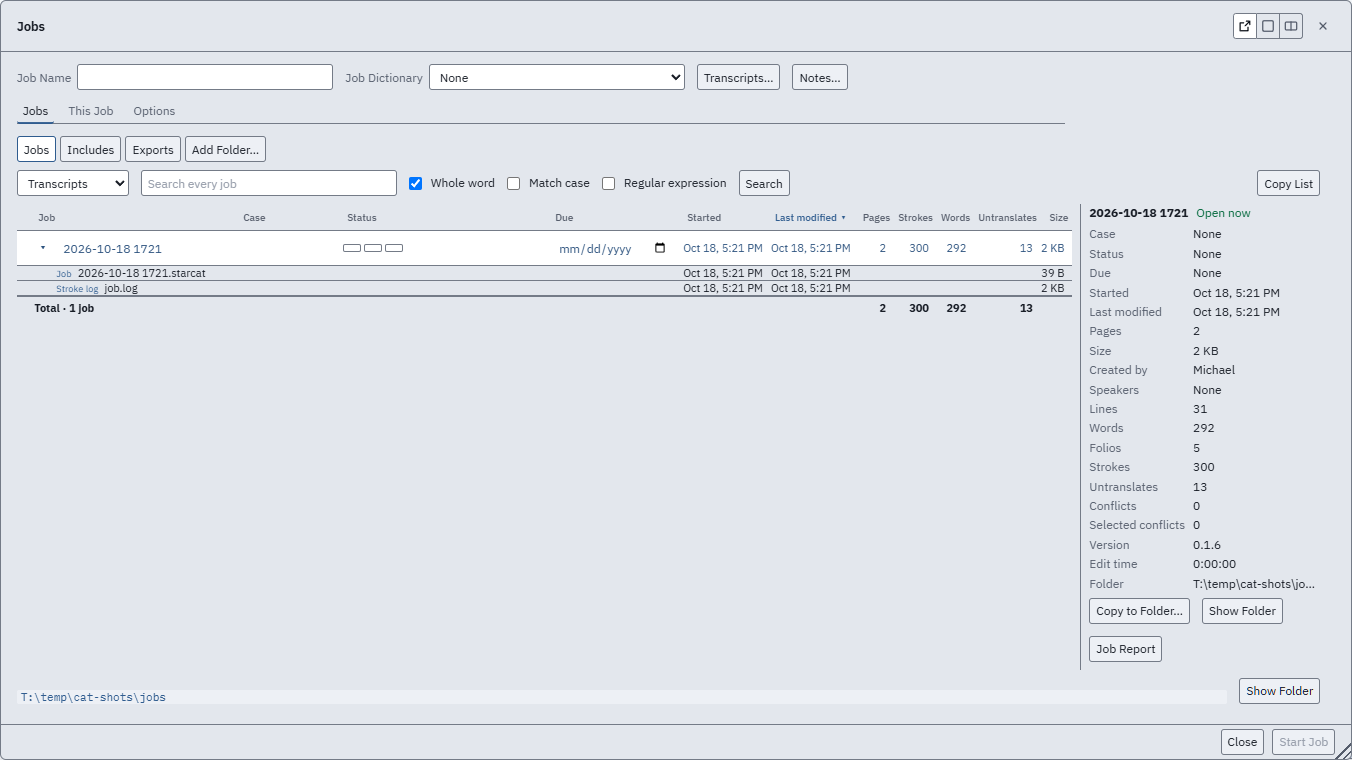
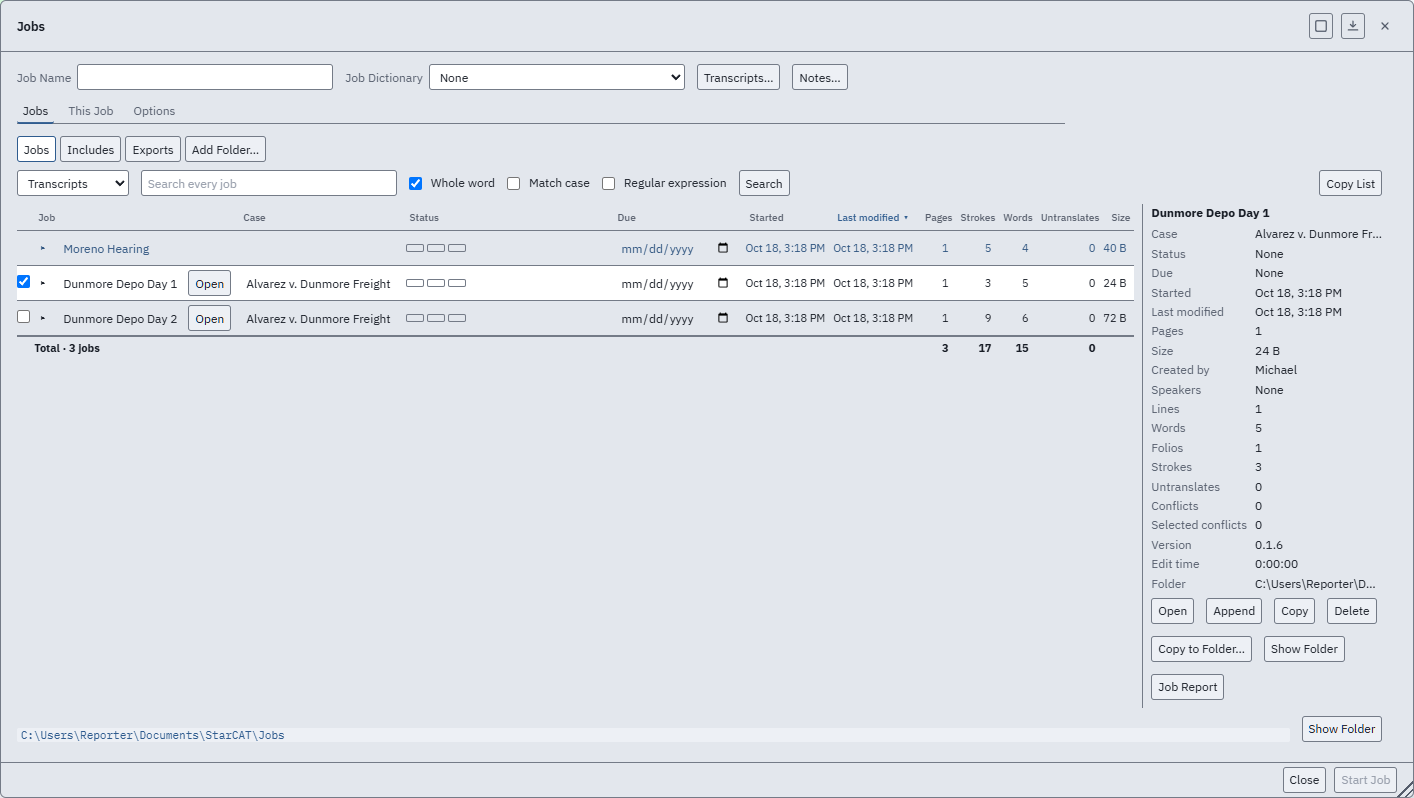
Jobs menu, Jobs tab
Finish a job:
Open File > End Job.
Click a job status, or End Without One. The job closes.
Open File > Export to write the transcript as PDF, RTF, Word, plain text, or pages of Steno.
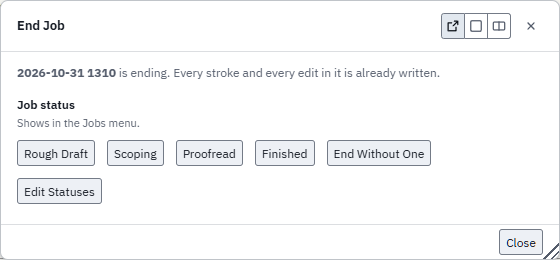
End job menu
Fix a writer that sends nothing:
Check that the writer is on and not in one of its own menus.
Check the port. Unplug the cable, click Refresh, plug the cable back in, and select the port that appears.
Check that the writer is in the selected mode. A writer in TX Bolt mode with a Stentura row selected sends nothing.
On the Writer menu, turn on Byte monitor. Bytes arriving: the cable and port work and the protocol is wrong. No bytes: the cable, port or writer is at fault.
4Your Writer
Change writers during a job:
Click the writer on the status bar to open the Writer menu, then select the other machine and its port. The old port closes and the new one opens.
Write. The job stays open.
A port takes one writer at a time.
Save a writer as a favorite:
Open Writer and set the port, machine and speed.
Under Favorites, type a name in Save as and click Save.
Connect a favorite:
Open Realtime > Writer, select the favorite under Favorites, and click Connect. The three fields are set and the port opens. A favorite whose port is not plugged in connects when it appears.
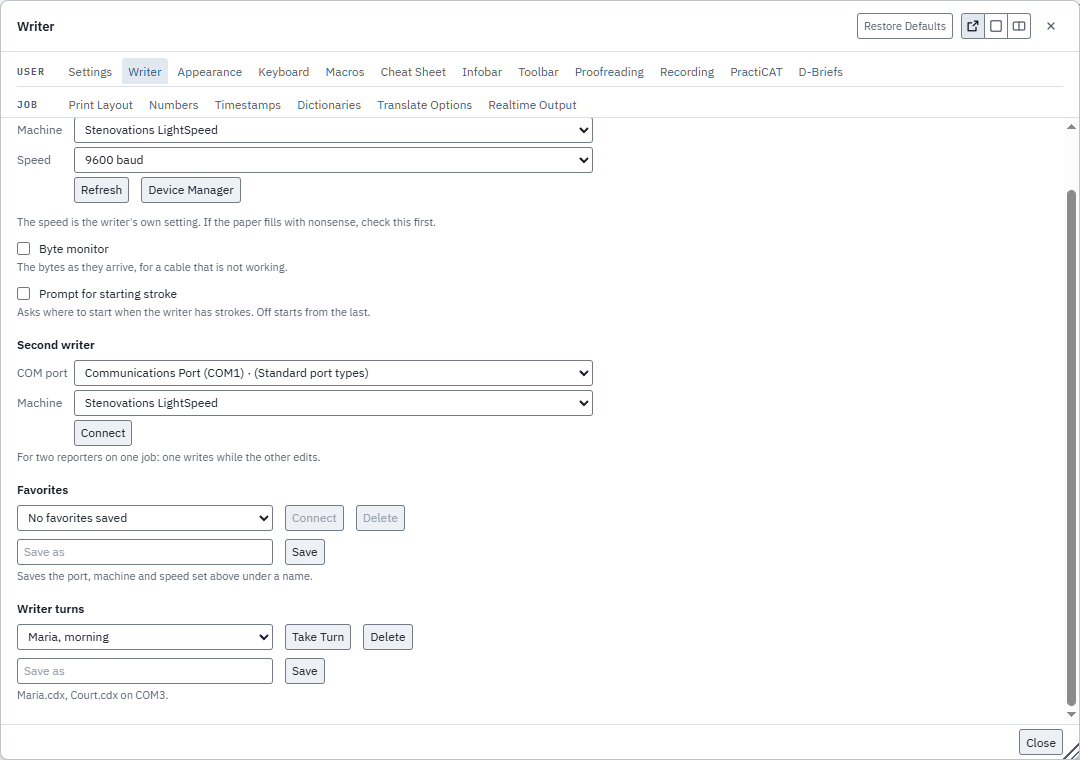
Writer
Opens the Writer menu: port, machine and speed, Device Manager, Favorites, Byte monitor, Prompt for starting stroke and the Writer turns list. With Prompt for starting stroke on, a Stentura writer with strokes in memory asks where to start: First Stroke brings in every stroke on the writer, Last Stroke starts with the next stroke written, or pick a stroke from the list. Off, Translation starts with the next stroke written, and the strokes already on the writer are not brought in.
Second writer is for two reporters on one job: one writes while the other edits. Select the COM port and Machine, then click Connect. The button then reads Disconnect.
Delete on a row in Favorites removes that favorite. For a keyboard in place of a writer, see Keyboard Steno and Key Map.
Writer menu
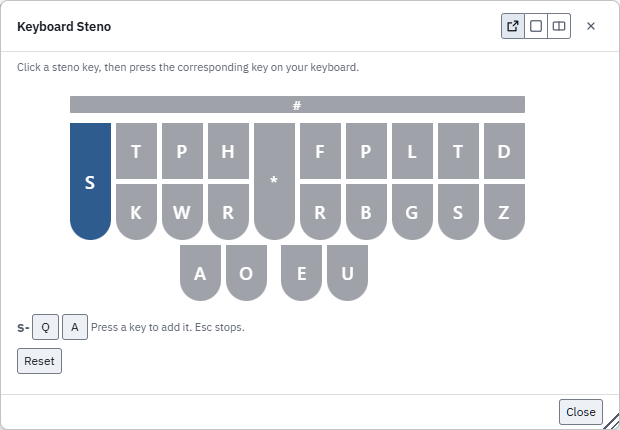
Keyboard Steno
Opens the Keyboard Steno menu, which sets the keyboard key or keys for each steno key when you write on a computer keyboard. The Writer menu has a Keyboard Steno button when COM port is Keyboard.
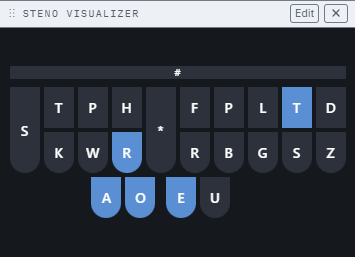
Click a steno key on the board. The key turns blue, and the line under the board lists its keys.
Press a key on the keyboard to add it. A key that already makes another steno key moves to this one.
To remove a key, click it on the line. Press Esc to stop.
Point at a steno key to see its keys. Reset puts back Plover's layout.
Arpeggiate, on the Writer menu when COM port is Keyboard, is for keyboards without N-key rollover, which cannot read many keys pressed at once. Press the keys one at a time, then the Send key, Space by default, to write the stroke. A steno key cannot be the send key.
Keyboard Steno menu, with S picked: Q and A make S
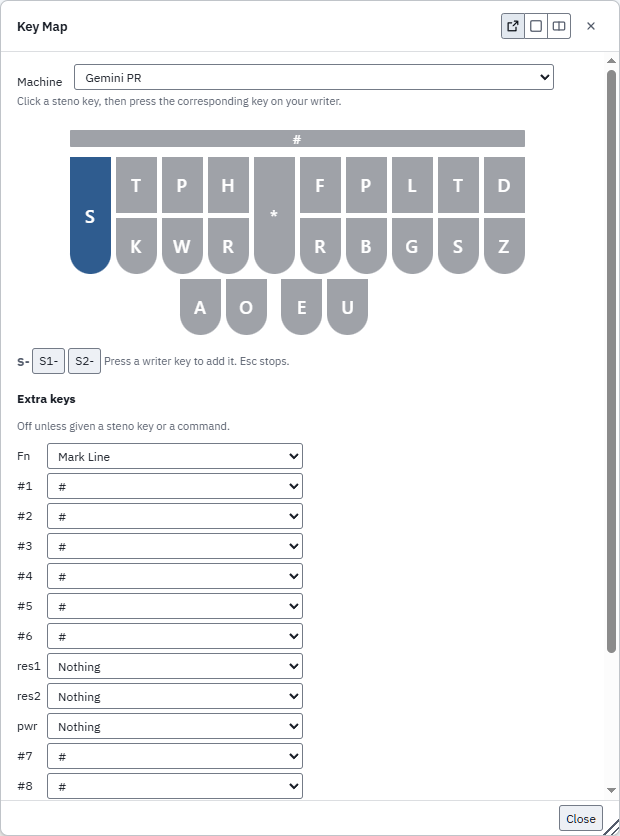
Key Map
Opens the Key Map menu, which sets the writer key or keys for each steno key on a Gemini PR, Plover HID, Tréal or Passport writer. The Writer menu has a Key Map button when one of these is the machine.
In Machine, select the writer's protocol.
Click a steno key on the board. While a key is picked, strokes go to the menu, not the job.
Press a writer key to add it. A writer key makes one steno key, and one steno key can have several writer keys. To remove a key, click it on the line. Press Esc to stop.
Extra keys lists the writer's other keys, such as Fn, res1 and pwr. Each is off unless given a steno key or a command. A key given a command runs that command, like a pedal button, and is never part of a stroke.
Reset puts back Plover's map. Each machine has its own map.
Key Map menu for Gemini PR, with S picked and Fn set to Mark Line
Connect/Disconnect Writer
Connects or disconnects the writer, the same as the Connect or Disconnect button. On a connected cable writer, stops and starts Translation; the port stays open, so running the command again turns Translation back on. On a keyboard writer, gives the keys back to the keyboard.
Connect, before the writer is connectedDisconnect, while the writer is connectedWriter bar, connected and waiting on the writer
Change Writer Turn
Opens the Writer menu at the Writer turns list. A writer turn is the writer and the Dictionaries that are on, saved under a name, for two reporters taking turns in one job. Type a name and click Save to save the current turn. Select a turn and click Take Turn to switch to it, or Delete to remove it.
Writer menu at the Writer turns list
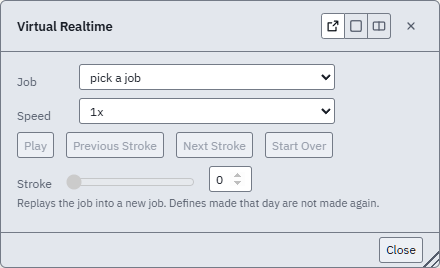
Virtual Realtime
Realtime > Virtual Realtime replays a job's strokes into a new job, as written. Use it to test a Realtime output, such as captions, with no writer connected, or to watch a job come out stroke by stroke. It is a test, not a way to make a transcript. The menu sets the job, the speed (0.5x to 8x) and the starting stroke, with Play, Previous Stroke, Next Stroke and Start Over. Realtime outputs send as they did on the day. Defines made that day are not repeated. Closing the menu stops the replay. A menu opened over the replay pauses the replay until that menu closes.
Virtual Realtime menu
Writer Selection
Shows and hides the writer port and machine fields on the status bar. Off, the status bar shows the port and machine as text, or No writer set up; click the text to open the Writer menu. On by default.
Writer Bar
Shows and hides the writer bar, a bar at the top for the record button, writer selection and connection status. Off, they are on the status bar. Off by default. Right-click the bar to move it.
Writer bar, with no writer connected
Number Bar as Dragged Key
Turns the number bar as a dragged key on and off. On, an undefined stroke with the number bar down is read without the bar, unless every key in it is a digit. For example, an undefined #KAT reads as KAT, cat, because K is not a digit. #TA stays 25, since T and A are digits. On the Input tab of Translate Options. Off by default.
Number Bar Untrans
Turns Number bar untrans on and off. On, a stroke with the number bar down that reads as digits only is an Untranslate, unless your Dictionary defines it. Turning it on or off retranslates the job.
Off: an undefined #SPH writes He lives at 134.
On: He lives at [#SPH].
With Phonetic translation on, the Untranslate is then sounded out, so #SPH can come out as a word. On the Input tab of Translate Options. A job setting: a new job starts with the last job's choice. Off by default.
Number bar untrans off, then on
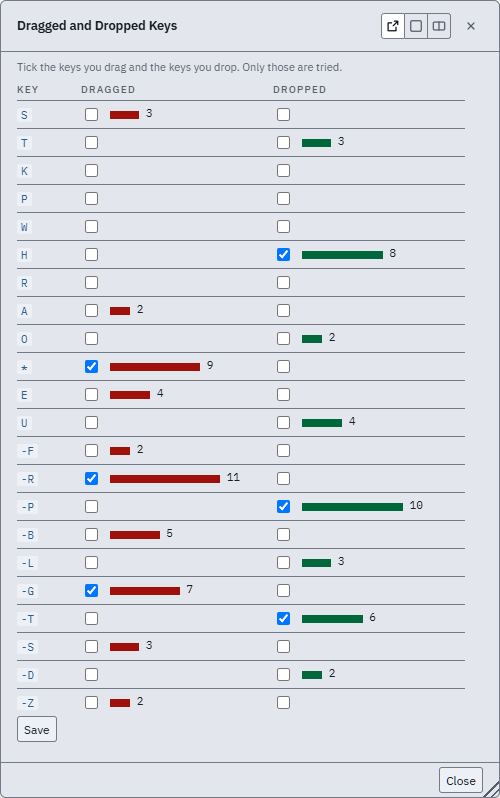
Dragged and Dropped Keys
Opens the Dragged and Dropped Keys menu.
A dragged key is one pressed by accident along with the stroke. A dropped key is one you meant to press that did not register.
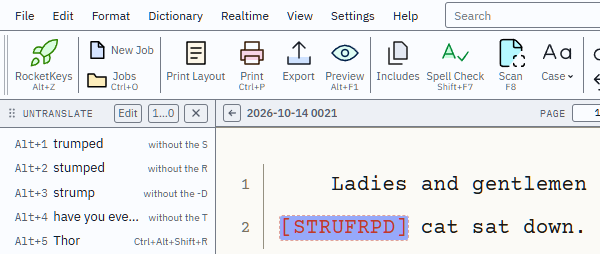
StarCAT counts both from your fixes. Say you meant KAT, cat, but wrote KAOT, and KAOT is not in your Dictionary. The Infobar and the Define box offer cat, "without the O". Pick cat, and O gets one more on the Dragged side. Meant TKOG, dog, and wrote TOG: pick dog, "with a K", and K gets one more on the Dropped side.
Each key shows a bar and its count. A long Dragged bar means the key is too easy to hit: turn its sensitivity down on the writer. A long Dropped bar means turn its sensitivity up.
Check the keys that drag and the keys that drop, and click Save. Use closest guess from dictionary on misstroke then only takes off checked dragged keys and only adds checked dropped keys. With none checked on a side, StarCAT uses the keys next to each other on the keyboard. With all checked, any key on that side can come off or go on, which finds more guesses and more wrong ones; check only the keys that misbehave.
Dragged and Dropped Keys menu
Key Press
Sends one key press, with Ctrl, Alt or Shift if set, to StarCAT's fields, not to other programs. For macro steps and Dictionary entries.
5Appearance
An appearance sets the colors of the frame, the paper, the text and the marks.
Change the appearance:
Open Settings > Appearance.
In the Appearance field, select an appearance. The built-in appearances are listed first, then their Large versions, then the appearances made on this computer under Made here.
To change a color or size, select the Frame, Writing Window or Raw Steno tab and change the setting. The appearance name shows "(changed)".
Click Save to keep the change in this appearance, or Revert to go back to how it was saved. To keep it under a new name, type the name in Save as and click Save As.
Show previews shows a preview of each appearance to click. Delete removes an appearance you made.
Built-in appearances cannot be changed; use Save As. Save also keeps the toolbars, and selecting the appearance puts them back. If you select another appearance with changes not saved, StarCAT asks to save them.
To remove an appearance you made, select it and click Delete. Built-in appearances cannot be deleted.
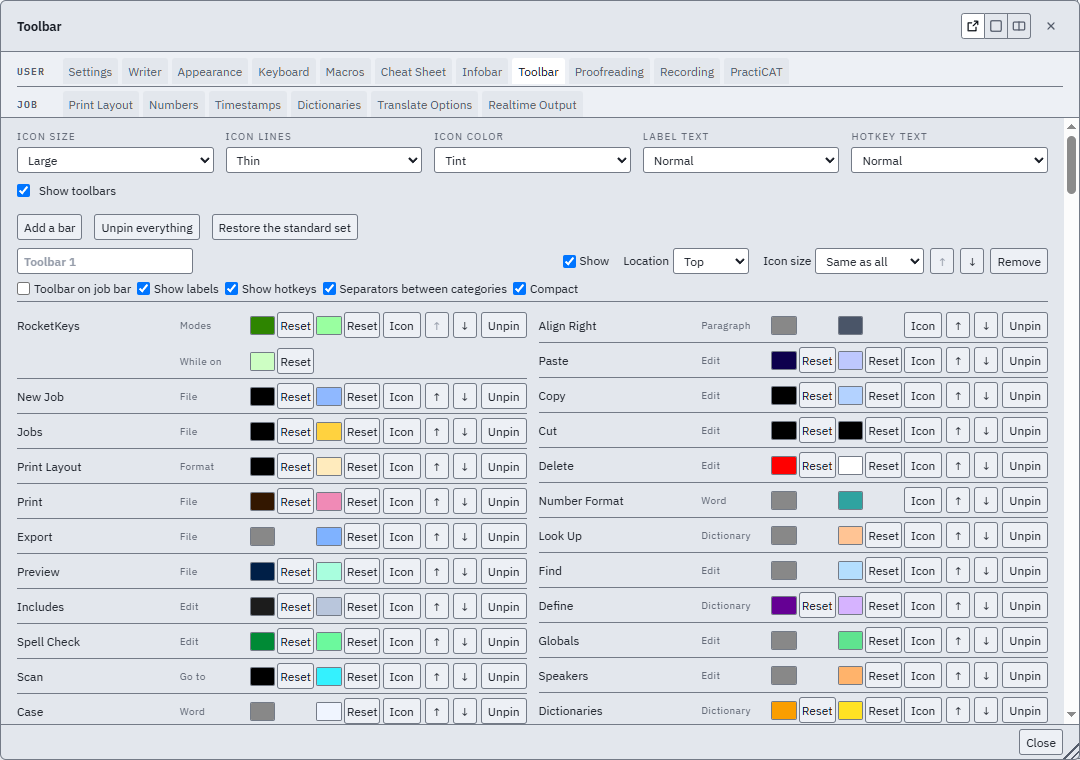
Set up the toolbars:
Open Settings > Edit Toolbars.
Search for a command, select the bar in Pin to, and check the command's box. The command goes on the front of that bar. Clearing the box takes it off every bar.
For each bar, set Location (Top, Left or Right), Show, Icon size (Same as all, or a size of its own) and the options below it: Toolbar on job bar, Show labels, Show hotkeys, Separators between categories and Compact. Toolbar on job bar puts the bar in the job bar, the row across the top with the mode chips, instead of on a row of its own. One bar at a time can go there, and only at Top. Compact puts less space around the buttons. The arrows move the bar up or down the stack.
Type in a bar's name box to rename it. A bar with no name shows as Toolbar 1, Toolbar 2 and so on.
Toolbar 2 is off on a new installation. Turn it on from the View menu. It holds the formatting commands that are not on Toolbar 1: Strikeout, Superscript, Subscript, Plain, Highlight, First Line Indent, Single Space, Start New Paragraph and Codes.
A Left or Right bar stands on its side of the window with the icons in a column. Labels and hotkeys shrink to the width of the icons and never widen the column; a name that still does not fit is on the button's tooltip. Drag the grip at the start of a bar to another edge to move it. Bars with small icons (under 24 pixels) start with labels and hotkeys off.
Each command listed under a bar has a line color, a fill color, an Icon button that opens the icon picker, arrows that move it along the bar, and Unpin. A mode (RocketKeys, number mode and the rest) also has a While on color for its background while the mode is on. Drag a row onto another bar to move the command there.
Font and Font Size work like the font boxes in a word processor: pin them, click one, and pick from the list. They set the writing window's font and size, the same as Transcript Font and Transcript Size in Appearance. The one in use has a check mark. Neither one changes the printed transcript.
Unpin Everything empties the bars.
Restore the Standard Set returns the bars to the shipped commands.
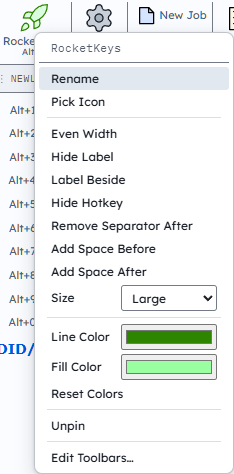
Right-click a button:
The menu changes that one button.
Rename gives the button another name. Use Shipped Name puts the shipped name back.
Pick Icon opens the icon picker at the button.
Change Hotkey waits for a key and sets it. Modes set their key on the Keyboard menu instead.
Full Width: the buttons on a bar share one width. This one takes the width of its own name. Even Width puts it back.
Show Label or Hide Label, Show Hotkey or Hide Hotkey: this button's own choice, over the bar's. Label Beside puts the name beside the icon on a Top bar; Label Under puts it back.
Size: the bar's size, or one of this button's own. At half the bar's size or less it stacks with the next small button: two in one slot, one above the other, with no label. Unstack puts it back in a slot of its own. Two small buttons stack only when no separator stands between them.
Add Separator Before and Add Separator After, or Remove Separator when one is there. Separators between categories are on until you change them.
Add Space Before and Add Space After add a blank slot the size of the button. Right-click the space for Remove Space.
Line Color and Fill Color color this icon alone. Reset Colors returns it to the bar's colors.
Edit Toolbars opens the Toolbar menu.
Icon colors are saved with the appearance, so each appearance has its own. To keep the same icon colors when you select another appearance, turn on Keep Icon Colors on the Toolbar menu.
Right-click menu on the RocketKeys button
Drag a button to move it. Buttons in the list under the arrow at the end of the bar drag onto the bar the same way, and a button dropped on the arrow goes to the end of that list.
Toolbar menu
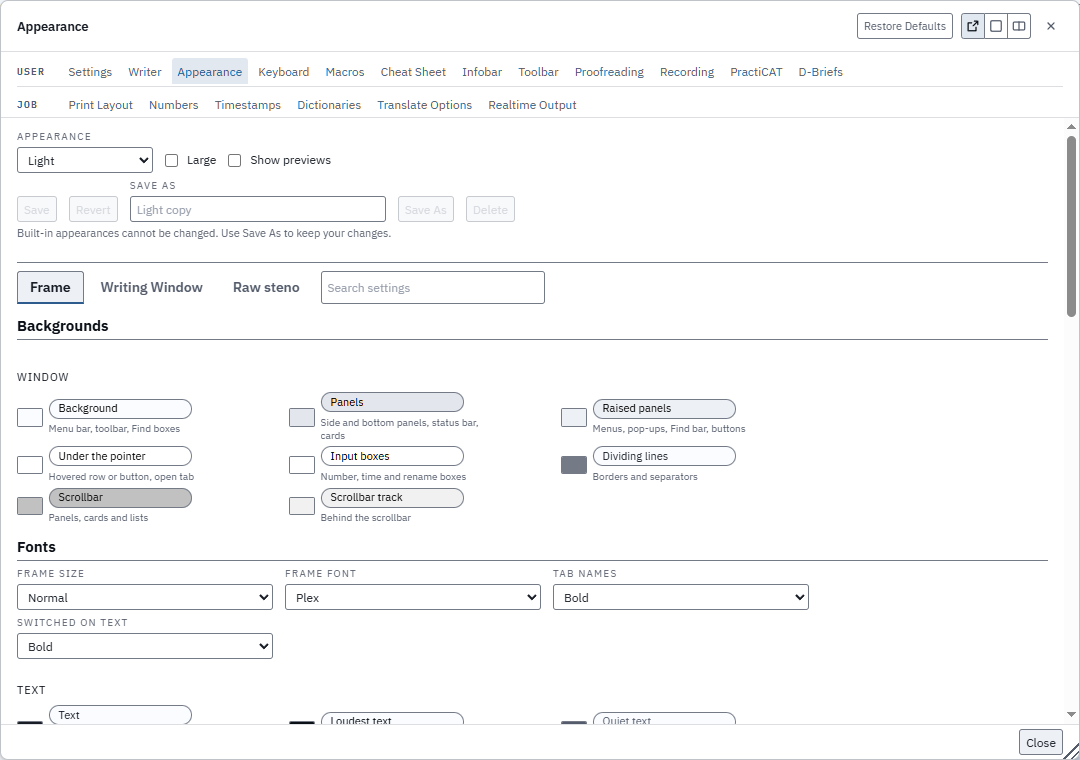
Appearance
Opens the Appearance menu. See Change the appearance. The menu has three tabs, Frame, Writing Window and Raw Steno, and a search box that finds a setting on any of them. Each tab has three sections: Backgrounds, Fonts and Other. The Frame tab also sets the waveform colors: Background, Waveform and Played.
Reset to Defaults returns every size, font and color on every tab to the appearance's own. Ctrl+Z undoes it. Like any change, the reset waits for Save.
On the Writing Window tab, Highlight is the color behind a Find hit, the words a steno row wrote, and the word Scan stops on.
Inverse colors, on by default, draws it as a solid block with the text in the page color, so a marked word stays readable. Turn it off for a light wash that lets a mark's own color show through.
Scan stopped on an untranslate, with Inverse colors on
The appearances are below, like next to like. A new installation starts on Light or Dark, whichever Windows is set to.
Appearance menu, Frame tab
Light
Dark
High contrast
Linen
Peach
Powder
Lavender
Navy
Charcoal
Navy lime
Pine
Slate
Midnight
Neon
Plum
Onyx
Use Appearance
Switches to an appearance by name. An appearance you made keeps the panels that were open and where they sat, so a key or macro step with Use Appearance returns to that layout. Set the name when you assign the command to a key or add it to a macro.
For example, Use Appearance with the name Onyx switches to Onyx. In a Dictionary entry, that is {@RUN(uselook Onyx)}.
A panel opened, closed or moved while an appearance you made is on stays with that appearance. To make one, see Change the appearance.
Toolbar 1
Ctrl+Shift+F2 → off
Shows and hides the toolbars. Listed on View > Bars under the first bar's name. Show toolbars on the Toolbar menu is the same switch.
Toolbar 2
Shows and hides the second toolbar. Listed on View > Bars under the second bar's name. Off by default. Further bars are shown and hidden on the Toolbar menu.
Toolbar icons
Sets the size of the toolbar icons: Tiny, Small, Normal, Large or Largest. The same setting is on the Toolbar menu.
Toolbar labels
Sets the text size of the toolbar labels: Small, Normal, Big or Bigger. Normal by default.
Toolbar hotkeys
Sets the text size of the hotkeys shown on the toolbar: Small, Normal, Big or Bigger. Normal by default.
Toolbar icon lines
Sets the line weight of the toolbar icons: Thin, Medium or Heavy. The default is Thin.
Toolbar icon color
Sets how the toolbar icons are colored.
Line draws the outline only and is the default.
Tint adds a light fill.
Color adds a full fill.
Tab names
Sets the tab names on the writing window and the rails to Bold or Plain. The default is Bold.
Frame Font
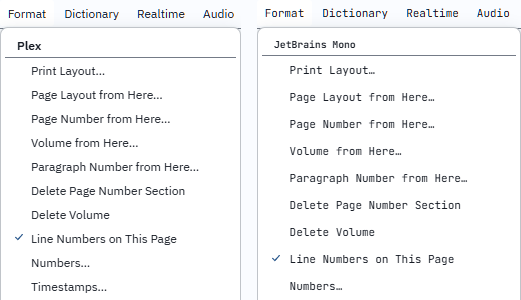
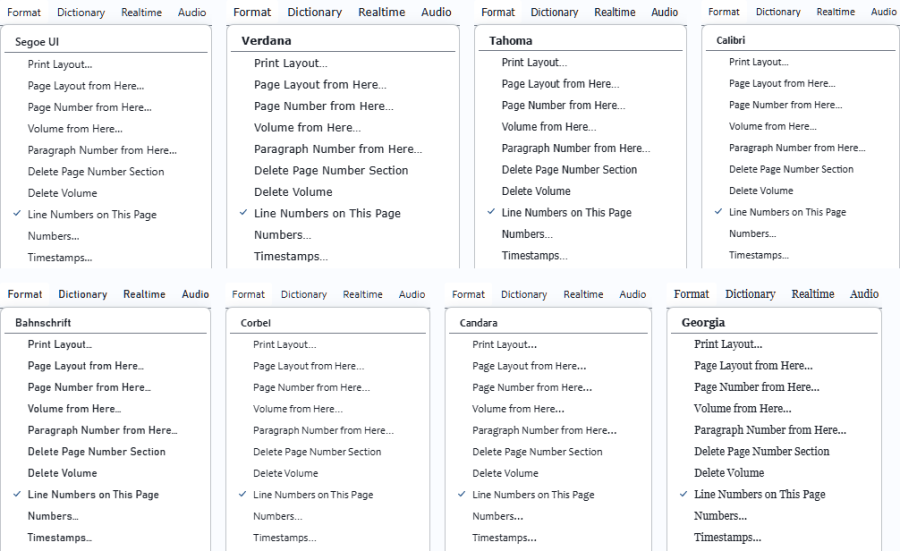
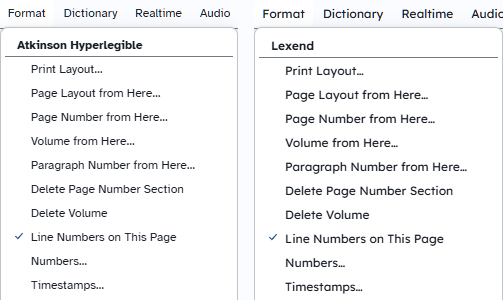
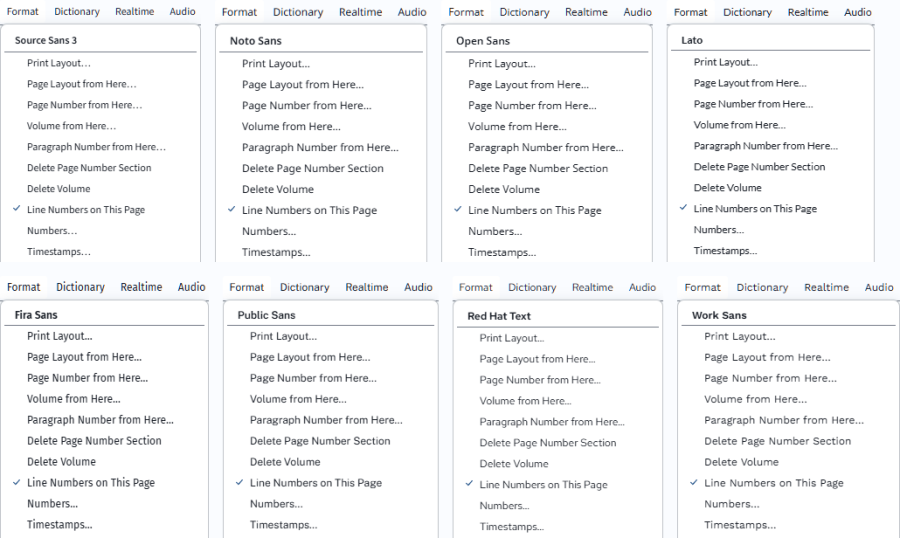
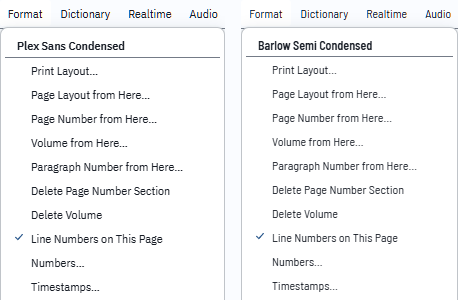
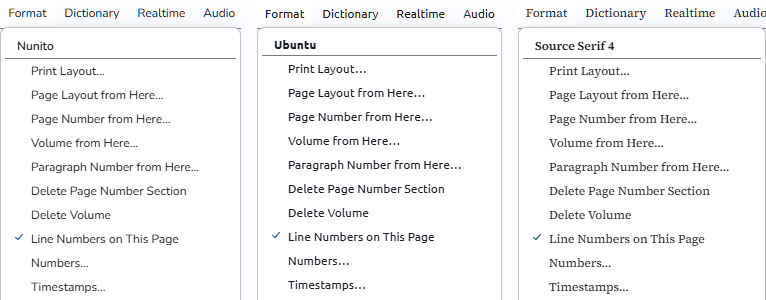
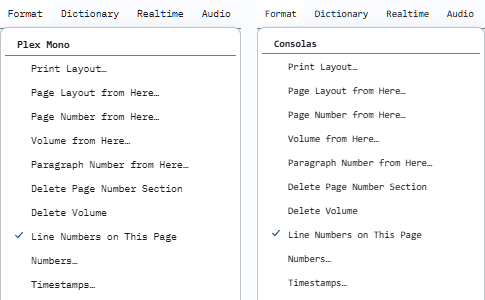
Sets the font of the menus, toolbars and panels. The default is Lexend. The list holds 27 fonts in groups:
Plain sans: Source Sans 3, Noto Sans, Open Sans, Lato, Fira Sans, Public Sans, Red Hat Text, Work Sans.
Narrow: Plex Sans Condensed, Barlow Semi Condensed.
With character: Nunito, Ubuntu, Source Serif 4.
Fixed width: Plex Mono, Consolas.
The Windows fonts and Consolas come with Windows. The rest come with StarCAT.
Plex and JetBrains MonoWindows: Segoe UI, Verdana, Tahoma, Calibri, Bahnschrift, Corbel, Candara, GeorgiaMade for reading: Atkinson Hyperlegible, LexendPlain sans: Source Sans 3, Noto Sans, Open Sans, Lato, Fira Sans, Public Sans, Red Hat Text, Work SansNarrow: Plex Sans Condensed, Barlow Semi CondensedWith character: Nunito, Ubuntu, Source Serif 4Fixed width: Plex Mono, Consolas
Switched on text
Sets the text on a switched-on button, such as Follow or Waveform, to Bold or Plain. The default is Bold.
6Settings
Settings are in two groups.
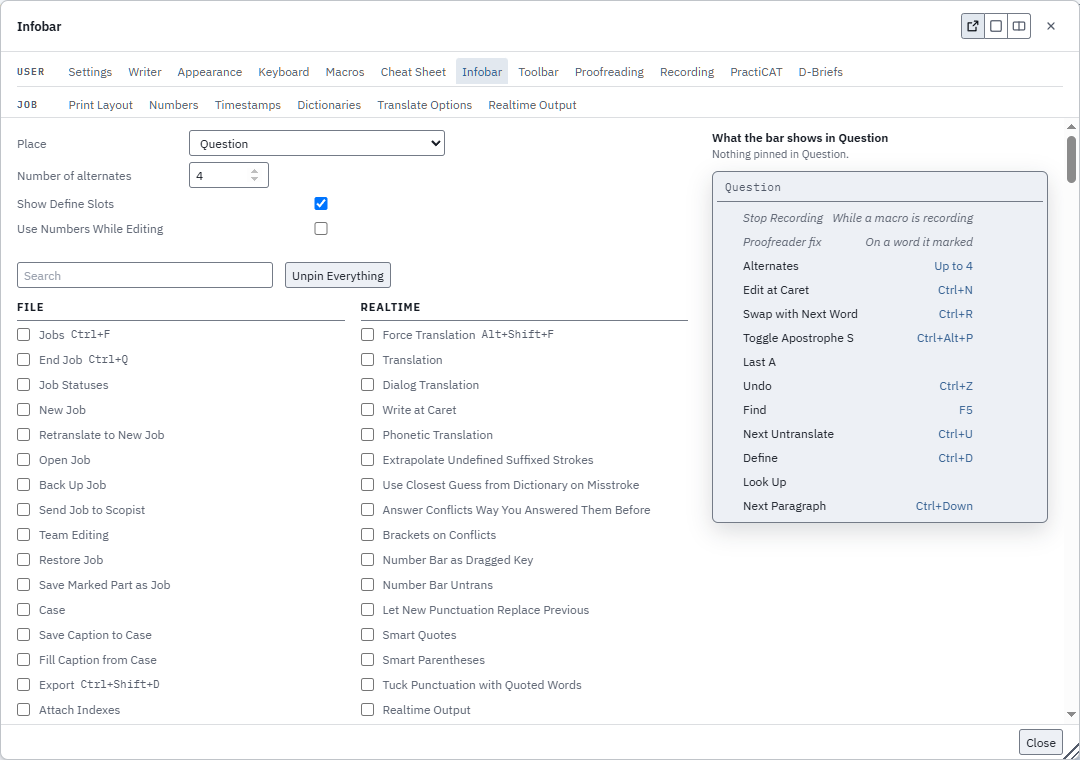
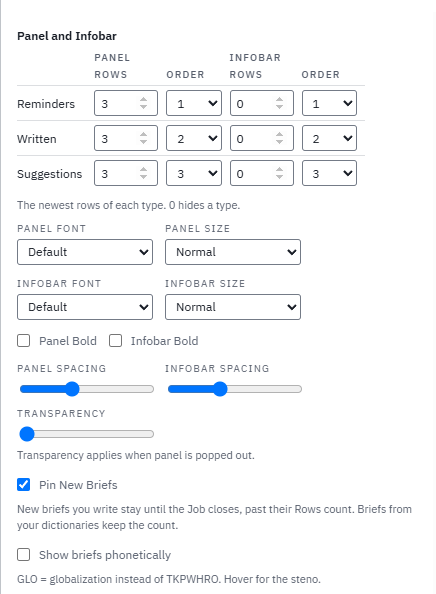
User settings apply to every job: Backups and Users, Writer, Appearance, Keyboard, Macros, Cheat sheet, Infobar, Toolbar, Proofreading, Recording and PractiCAT.
Job settings apply to the open job: Print layout, Numbers, Timestamps, Dictionaries, Translate options and Realtime output.
Find a setting:
Open Settings > Settings. The last settings menu used opens, with a tab for every settings menu across the top. The first time, the Appearance menu opens.
Select a tab to switch to that menu.
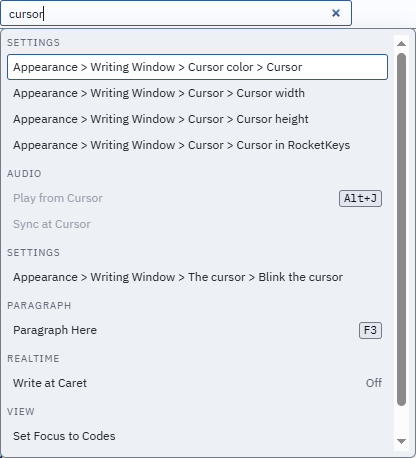
Or type the setting's name in the search box at the top of the window (Ctrl+Shift+P), and select it from the list. The menu opens with the setting outlined.
Back up your settings:
Open Settings > Backups and Users.
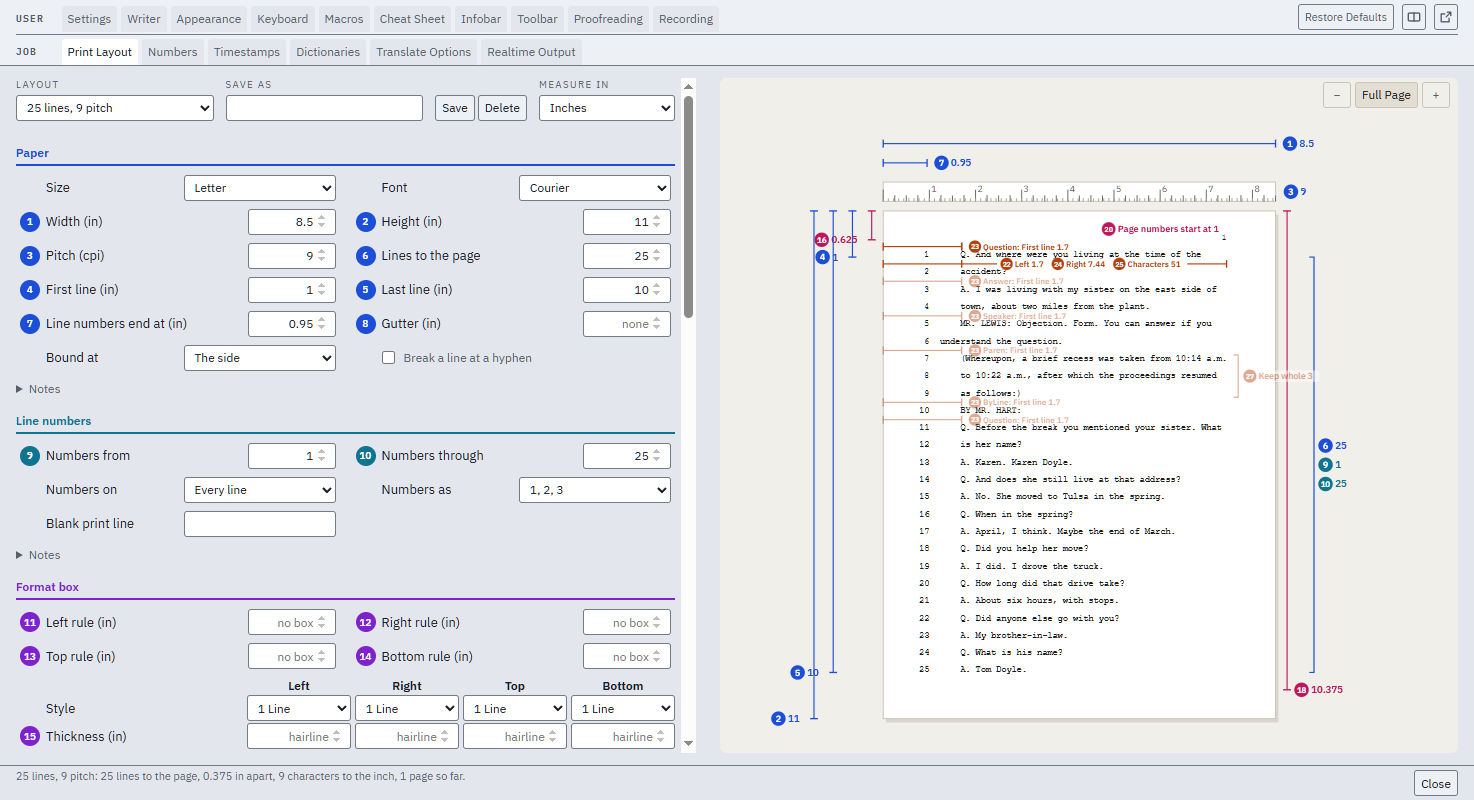
Click Back Up to a File and choose where to save it. The file saves key bindings, macros, realtime settings, color settings, panel layout and print layouts.
To restore a backup, click Restore from a File. StarCAT restarts. The open job is saved and reopened.
Revert Settings returns every setting to how it was when StarCAT started, and restarts StarCAT.
Share settings with a student or another reporter:
Open Settings > Backups and Users.
Under Share settings, check what to share: Keyboards and Hotkeys, Steno Layouts, Macros, Print Layouts, Includes, Other Settings, Appearance and Panels.
Click Export Settings and choose where to save the file. It is a .json file named StarCAT shared settings and the date.
Folders, the writer, realtime outputs and the reporter's name are never shared.
Import shared settings:
Open Settings > Backups and Users and click Import Settings.
Pick the .json file. A backup file works too; it is a .json file named StarCAT settings and the date. The list shows what the file holds and what each item would replace.
Uncheck anything to leave out, and click Import Checked. Items with the same name are replaced; everything else stays. StarCAT restarts.
Keep a second user:
A user is a whole set of settings: keys, macros, the writer, outputs, appearance, panels and print layouts. Keep one for depositions and one for CART.
Open Settings > Backups and Users.
Under Saved users, type a name and click Save User. The current settings are saved under that name, and the name appears in the title bar.
To switch users, click Change User beside the user's name, or use Settings > Change User and pick the user with the arrow keys and Enter. StarCAT restarts on that user's settings.
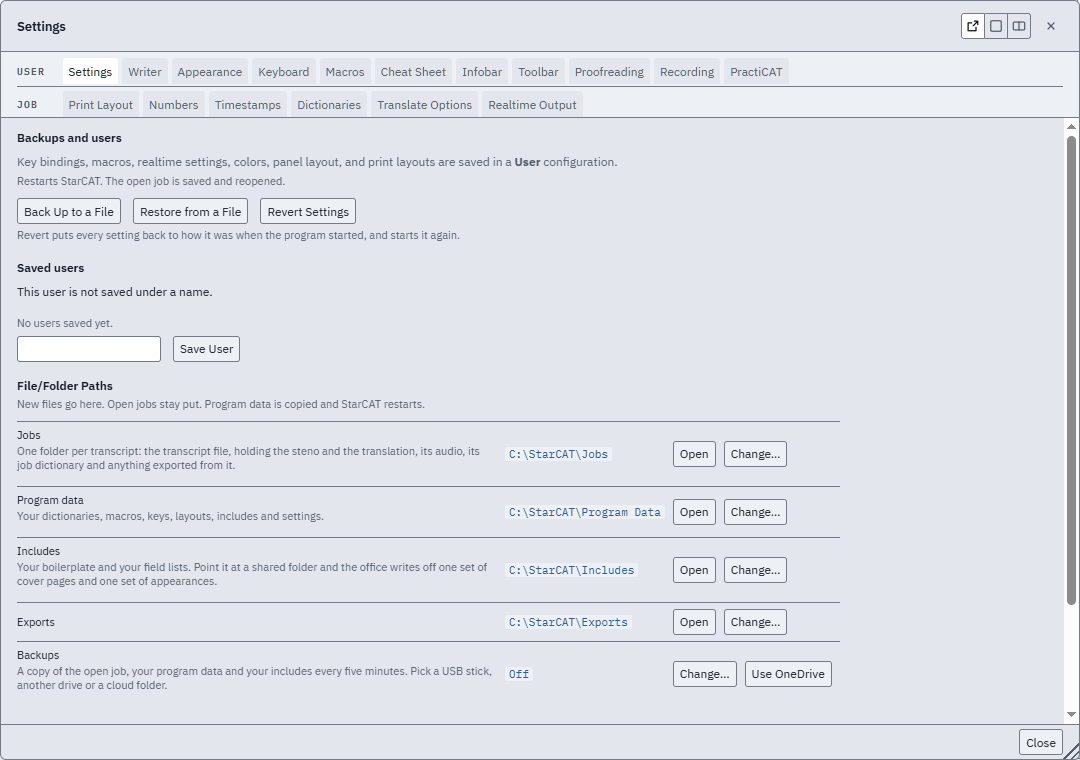
Backups and Users
Opens the Backups and users menu.
Besides backups and saved users, the menu lists the folders StarCAT uses under File/Folder Paths, each with Open and, where it can be moved, Change.
Delete beside a saved user removes that user. Off on the Backups path turns backups off, and Use and a cloud folder's name moves them there.
Reminders sets a message to appear when a job closes or when StarCAT closes: Reminder is the message, Details the text under it. Click Stay on the reminder to keep the job or StarCAT open.
Backups and users menu, titled Settings
Change User
Lists your other saved users. Pick one with the arrow keys and press Enter, or click Restart as User. StarCAT saves the open job and restarts with that user's settings. With no other user saved, it opens Backups and Users instead.
Settings
Alt+U
Opens the settings menus as one set of tabs, on the menu last used. The first time, it opens on Appearance. The User row of tabs is above the Job row.
A Job tab opens its menu in its own window, and Settings on that window goes back.
Restore Defaults on a menu resets its fields. It takes two clicks: the button reads Confirm Restore after the first. Tables on the menu are not reset.
All settings: the User tabs above the Job tabs
Search
Ctrl+Shift+P
Searches every command, menu item and setting by name. The list drops down under the search box at the top of the window. Selecting a command runs it. Selecting a setting opens its menu and outlines it.
List for cursor, under the search box
7Dictionaries
Dictionaries are read from the top down. The first Dictionary that has the Steno supplies the Translation. To add an entry or global a word, see Defining.
Set the dictionary order:
Open Dictionary > Dictionaries.
Clear a Dictionary's checkbox to stop reading it.
Use the arrows on each row to reorder the prioritization of Dictionaries and their entries. The change takes effect on the next stroke.
Select Main on the Dictionary for Main Defines, and Job on the one for Job Defines. The job dictionary moves to the top. In the Define box, Ctrl+M sends the Define to the Main Dictionary and Ctrl+J to the job Dictionary.
See how a word is written:
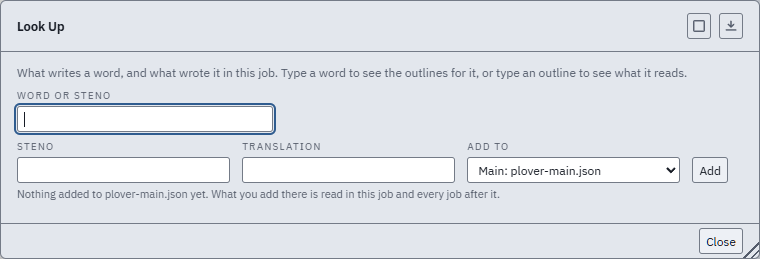
Open Dictionary > Look Up.
Type the word, or the Steno. The menu lists every entry that writes it and the Dictionary each is in.
With no entry, click Add, type the Steno and pick the Dictionary in Add to.
Find briefs for the strokes you write most:
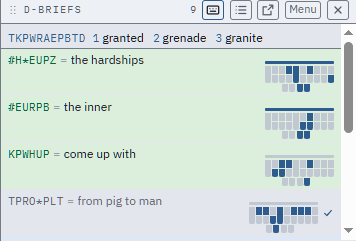
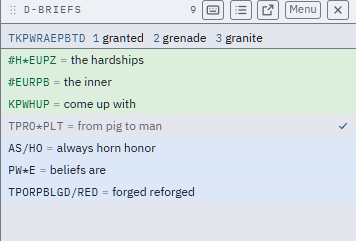
Open Dictionary > Brief My Dictionary and click Find. The most used entries of two or more strokes are listed, each with a one-stroke brief.
Edit a brief you do not like, or click New Suggestion for another.
Check the rows to keep and click Add # to Main Dictionary. The button shows the number of checked rows.
Eclipse commands in entries:
Entries from an Eclipse Dictionary keep working. Among the commands StarCAT reads:
{PGH:Colloquy}: a paragraph in the style of that name.
{N}: a new paragraph in the style the open one continues in: Question and Answer go on in Continuation, Speaker in Colloquy.
{>.} and {>?}: the paragraph ends on a period, or a question mark, when you write no mark. A mark set on the paragraph still wins.
{>-}: lowercases the word before.
{TM:%#I:%M %p}: the time the stroke was written, in the codes of the Insert Time/Date box. Text after it goes with it: at {TM:%H%M} hours writes at 1559 hours.
{d1}, {d0}, {dt}: Downcap on, off, and switch. Everything goes in lower case, the start of a sentence too. DOWNCAP shows in the status bar.
{l1}, {l0}, {lT}: literal case on, off, and switch. The letters keep the case they are typed in: M{l1}ac{l0}Donald writes MacDonald.
{superon}, {superoff}, {subon}, {suboff}: superscript and subscript. H{subon}2{suboff}O writes H₂O. One turns the other off, and {n} turns both off.
{GLUEON}, {GLUEOFF}, {SLOWDOWN} (switch): glue mode, words joined with nothing between them. GLUE shows in the status bar.
{DELETE}: the delete stroke. {/}: a slash joined on both sides.
{-}: a hyphen joined on both sides.
{" } and { "}: a closing quote on the word before, and an opening quote on the word after. {, "} is a comma, then an opening quote on the next word.
{&-A}{&-B}{&-C} writes A-B-C: the hyphen goes between the letters.
{"Q}, {"A}, {"S:MR. BROWN}: the quoted Question, Answer and Colloquy paragraphs. {U3}: the paragraph style named User 3.
{>>} and {>>>}: a new paragraph that opens with the chevrons.
Font, color, sound and caption commands, such as {FN:14}, {RED} and {W:ding.wav}, write nothing.
{<name}: puts in the include of that name. A .ecl on the end is dropped.
Case CATalyst commands in entries:
Entries from a Case CATalyst Dictionary (.sgdct) are read the same way as its RTF/CRE export. Among the commands StarCAT reads, as the export writes them:
\cxds: Delete Space. {\cxds ing} joins ing to the word before. \cxdstroke is the delete stroke.
\~: Sticky Space. Your\~Honor never breaks at a line end.
{\cxconf [{\cxc there}|{\cxc their}]}: a conflict. Both readings are kept.
\par\s1 and \par\s2: a new Question and Answer. Each style number is read off the file's stylesheet, so Colloquy and the other styles come through by name.
\b, \i, \ul, \strike and \caps: bold, italic, underline, strikethrough and all caps.
\cxfc and \cxfl: Cap Next and Lowercase Next.
\cxsgcapprev1 to \cxsgcapprev9: capitalize the 1 to 9 words before. Written after supreme court, \cxsgcapprev2 makes it Supreme Court.
\page and \tab: a page break and a tab.
\cxsingle and \cxdouble: Single Space on and off. \cxlienum and \cxlienum0: Line Numbers on and off.
\cxsgbench1 and \cxsgbench0: Bench on and off. \cxsgdef: Define. \cxsgstitch: Stitch.
\super, \sub and \nosupersub: superscript, subscript, and both off. H{\sub 2}O writes H₂O.
{\cxsgfield [!NAME]}: a field. Its text comes through.
A command with no match writes nothing, and the import lists it under Commands left out. Oops, \cxsgoops, is one today. An entry with a command StarCAT cannot read is left out and counted.
digitalCAT commands in entries:
StarCAT writes commands the way digitalCAT does, so most entries from a digitalCAT Dictionary (.dct) need no change. Among the commands StarCAT reads:
The Prefix, Suffix and Capitalize Next flags.
{P Colloquy}: a paragraph in the style of that name. {<}: a new paragraph.
Your^Honor: the caret in the middle is a hard space. Mr.^: the caret at the end capitalizes the next word.
{@DELETE(LASTSTROKE)}: the delete stroke.
{@CAPWORD(LASTWORD)}, {@CAPALL(ON)}, {@STITCHWORD(ON)}: cap the word before, all caps, and stitching.
{@DUMP(ALL)}: send what is held.
{@RESOLVELASTCONFLICT(ENTRY3)}: picks the third reading of the last Conflict. ENTRY1 to ENTRY5.
{b}words{b}: bold.
{T}: the time, where the command sits in the entry.
{K} and {K Check Audio}: an Oops mark, with its note.
{I Cover}: puts in the include of that name.
The > tab is read as text, a > character.
Dictionaries
Opens the Dictionaries menu. Each row has a checkbox to use it, the Main and Job radio buttons, the arrows that move it, and the entry count. Main picks the Dictionary a Main Define goes into, and Job the one a Job Define goes into. See Set the dictionary order. StarCAT reads .dct, .dix (and .db0 to .db9), .sgdct, RTF/CRE .rtf, .json, .py and StarCAT .cdx.
Add a Dictionary…: adds a Dictionary file to the list.
New dictionary and Create: makes an empty Dictionary with that name.
On each row, the double arrow moves the Dictionary to the top, and × takes it off the list. A row with changes waiting shows Write in, which puts them in the Dictionary file.
Dictionaries menu with three Dictionaries: the job dictionary, Main.json and Medical Terminology.json
The Update Area is a holding Dictionary for entries meant for the Main Dictionary, so you can check them before they are kept. It is off on a new installation. The controls under the list:
Main defines go to the Update Area: a Define to the Main Dictionary goes to the Update Area instead.
Translate with the Update Area: entries in the Update Area translate as if they were already in the Main Dictionary.
Review the Update Area (#): opens the entries in the Dictionary editor. Move an entry to the Main Dictionary to keep it. This button shows only while Main defines go to the Update Area is checked or the Update Area holds entries.
Dictionaries in Use
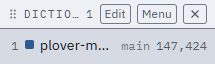
Turns the Dictionaries panel on and off. The panel lists the Dictionaries in use, in reading order.
Right-click a Dictionary in the panel:
Edit this dictionary: opens it in Edit Dictionaries.
Turn off or Turn on: stops or starts using it.
Move up, Move down, Move to the top: change the order.
Make this the main dictionary: Main Defines go into it.
Make this the job dictionary: Job Defines go into it, and it moves to the top.
Remove from the list: takes it off the list.
Dictionaries panel with one Dictionary
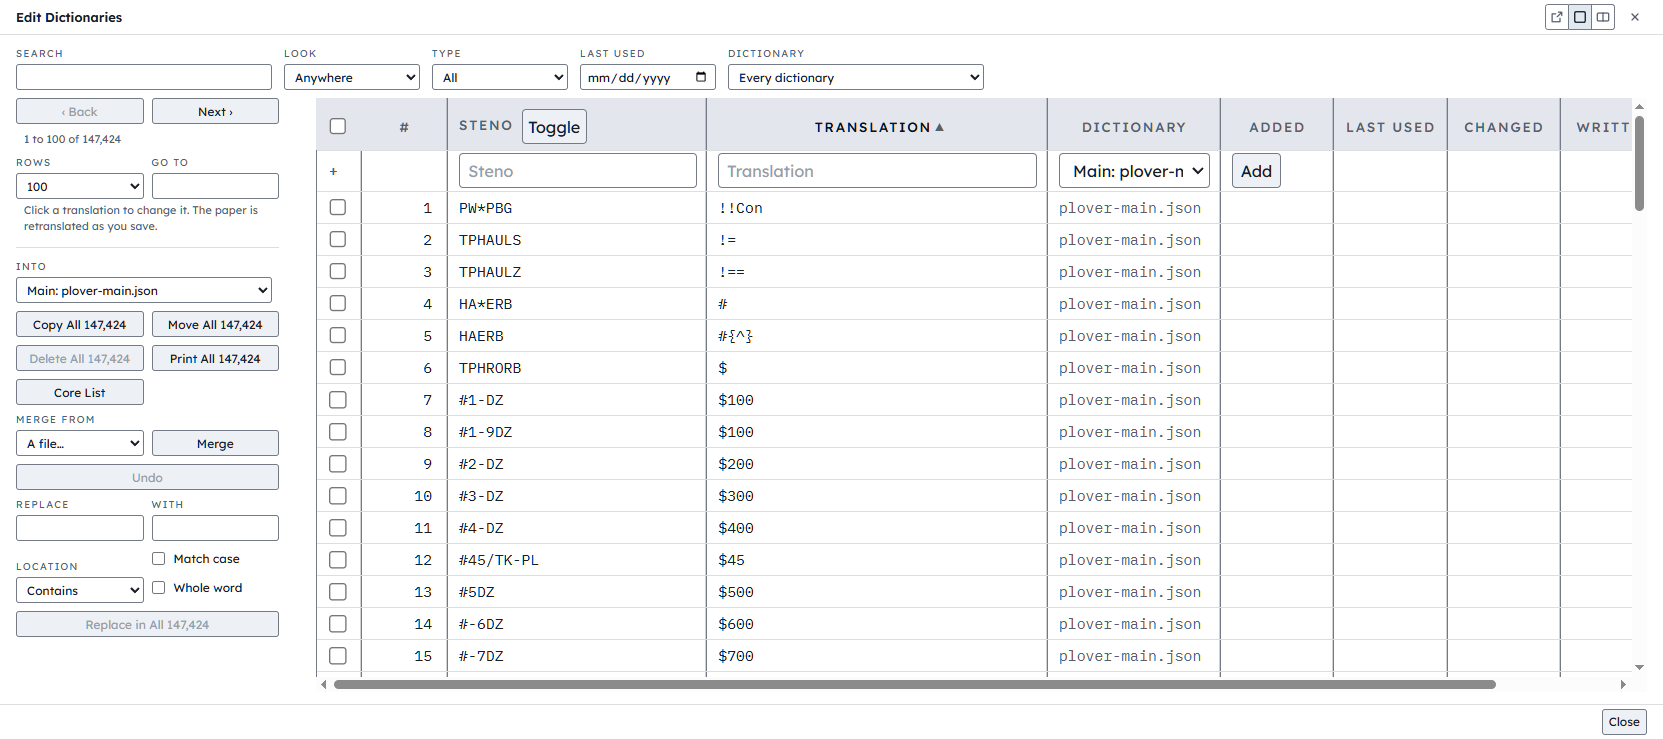
Edit Dictionaries
F9
Opens the Edit Dictionaries menu. A changed or added entry rewrites the job at once. To have it wait for Retranslate Changed Paragraphs like other Dictionary edits, turn off Retranslate on Edit Dictionaries saves in Translate options.
Edit Dictionaries menu
Filters, across the top:
Search: finds text in the entries. Look sets where: Anywhere, Steno or Translation.
Type: shows one kind of entry, such as Conflicts, Numbers, Macros, Two strokes, Never written or Deleted.
Last used: shows entries last written before this date.
Dictionary: Every dictionary or one Dictionary.
Paging, at the top left:
Back and Next: move a page.
Rows: the number of rows on a page.
Go to: jumps to the first row holding this text, without filtering the list.
The list:
Click a translation to change it. Double-click a row to open the entry in the define box.
Up and Down move between entries. Enter or Alt+L opens the entry in Edit Entry. On an entry that plays a macro, Alt+L opens that macro in Macros instead.
Edit, Delete and Revert show under Rows for the selected row. Revert takes off a change and puts back what the Dictionary says. On a deleted entry, Restore puts it back.
Type in the top row and click Add to add an entry to the Dictionary chosen in that row.
Click a column head to sort. Drag a head to move the column, and drag its edge to size it. Right-click a head to show or hide columns and table lines.
Toggle, in the Steno head: shows steno as notation or as tape columns.
Right-click a row for Edit, Delete and Add Entry.
The buttons on the left act on the checked rows. With no rows checked they act on every entry the filters match, and they say so: Copy All 147,424, or Copy 3 with three rows checked.
Into: the Dictionary that Copy, Move and Merge write to.
Copy: copies the entries into the Into Dictionary.
Move: copies the entries into the Into Dictionary and takes them out of the Dictionary they were in. An entry StarCAT can't take out of its Dictionary file stays there too, and the line under the buttons gives the count.
Delete: deletes the entries. They go to the Deleted type, where Restore puts them back. With no rows checked, this button requires a Last used date.
Print: prints the entries in list order, with steno as Toggle shows it.
Core List: saves a .txt file of the words and phrases, once each, in alphabetical order, without the steno. Each translation of a conflict is listed. Entries with no letter or digit are left out. This is the list to give a scopist.
Trim Spaces: shows when Type is Broken. Takes the spaces off both ends of each translation.
Merge from and Merge: brings entries into the Into Dictionary from Personal, from any Dictionary on the list, or from A file…, which takes the Dictionary file types StarCAT reads. Search and Type narrow a merge from a Dictionary on the list.
Undo: takes back the last change to the Into Dictionary. The button names it.
If an outline in Copy, Move or Merge is already defined differently in the Into Dictionary, a table asks what to do with it. Clicking a column head sets every row.
Keep old: the translation in the Into Dictionary stays. On Move, the entry also stays where it was.
Keep new: the incoming translation replaces it.
Conflict: the outline keeps both translations as a conflict.
Neither: the outline comes out of the Into Dictionary.
Replace, for Translations only:
Replace and With: the text to find and the text to put in.
Location: Contains, Begins with, Ends with or Exact match.
Match case and Whole word: narrow the search.
Replace in: runs it on the checked rows, or on every entry the filters match. Undo on the line under it takes it back.
Dictionary Table Size
Sets the text size of the Edit dictionaries table. Ctrl and +, - or 0, or Ctrl and the mouse wheel over the table, also change it. Larger by default.
Go to Entry
Goes to an entry in Edit dictionaries without filtering the list. Opens the menu if it is closed and moves the cursor to its Go to box. Type the steno or word and press Enter. The menu says Not in the list: when there is no match.
Dictionary Builder
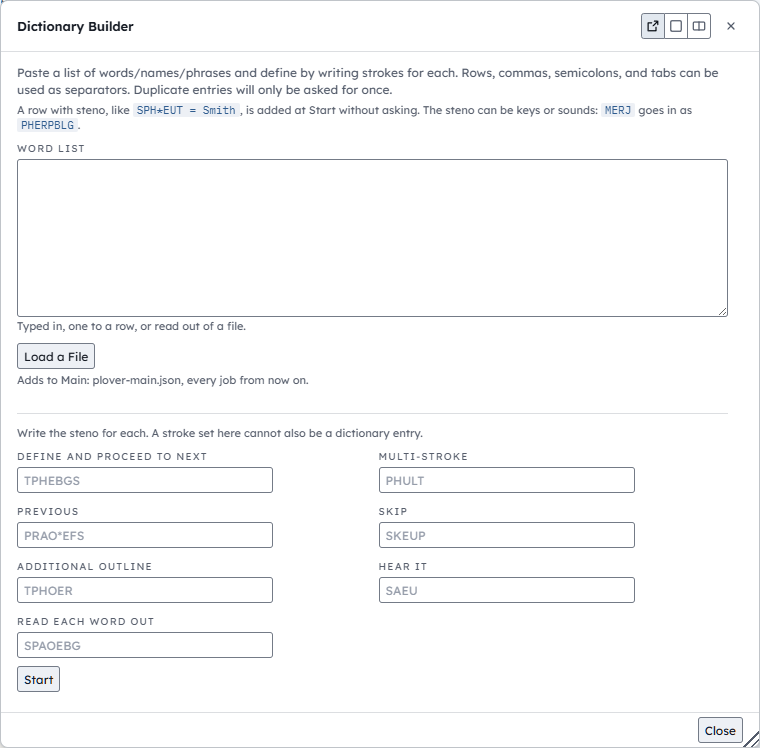
Opens the Dictionary Builder, for defining a list of words by writing the Steno for each one.
Dictionary Builder
To build a list:
In Word List, type or paste the words, or click Load a File.
Choose the Dictionary the entries go into, if the menu asks.
To run the list from the writer, assign a stroke to each command in the boxes under the list.
Click Start. The first word comes up.
Write the Steno for the word. One stroke defines it and the next word comes up. For more than one stroke, check More than one stroke, write the strokes, and click Define.
Repeat for each word. Use Skip to pass a word and Back to return to one.
Click Done, or finish the last word. The list of what was defined comes up. Click Take Back on any entry to remove it.
The list:
Word List: type or paste the words, names and phrases. Rows, commas, semicolons and tabs separate them. A duplicate is asked for once.
Load a File: adds a .txt or .csv file to the list.
A row with Steno, like SPH*EUT = Smith, is added at Start without asking. The Steno can be keys or sounds: MERJ goes in as PHERPBLG.
With more than one place to go, radio buttons choose the Dictionary the entries go into. With one, the line under Load a File names it.
The boxes under the list assign a stroke to each command, so you can run the list from the writer. Each is one stroke, and that stroke can't also be a Dictionary entry during the build.
Define and proceed to next: defines the word and moves on.
Multi-Stroke: turns More than one stroke on or off.
Previous: goes back a word.
Skip: moves on without defining.
Additional outline: defines the word and stays on it.
Hear it: says the word.
Read each word out: turns that checkbox on or off.
While a word is up, your writer goes to this list. Nothing written here reaches the transcript.
Steno: write the stroke. One stroke defines at once. With More than one stroke checked, strokes wait for Define. The asterisk takes one back.
Define: defines the word with what is in Steno.
Additional Steno: defines it and keeps the word up for another outline. If you already write the word, a line says so, and this adds an outline without taking that one away.
Board: opens a steno keyboard for building the stroke with the mouse.
Read each word out: says each word as it comes up. Hear It says it once.
Suggest Steno: offers outlines from the theory in force, fewest strokes first. Clicking one defines the word.
Back, Skip and Done: go back a word, move on, or end the list.
A stroke can bring other entries with it. They show as a checked list: uncheck any you don't want and click Add Them and Go On.
If a pasted Steno is already defined in the Dictionary it goes into, StarCAT doesn't overwrite it. It shows both, with Replace on each row and Replace All for more than one.
Done lists what was defined. Take Back removes an entry, and a replaced entry goes back to what it was. Build Another List starts again.
Look Up
Looks up a word or Steno. Type in Word or steno. A word lists the entries that write it, and Steno lists what it translates to. Delete on a row deletes that entry.
With Word or steno empty, the menu lists the entries added to the job dictionary and the Main Dictionary. Delete or Restore on a row deletes the entry or puts it back.
To add an entry, fill in Steno and Translation, select the Dictionary in Add to, and click Add.
Look up menu
Commands
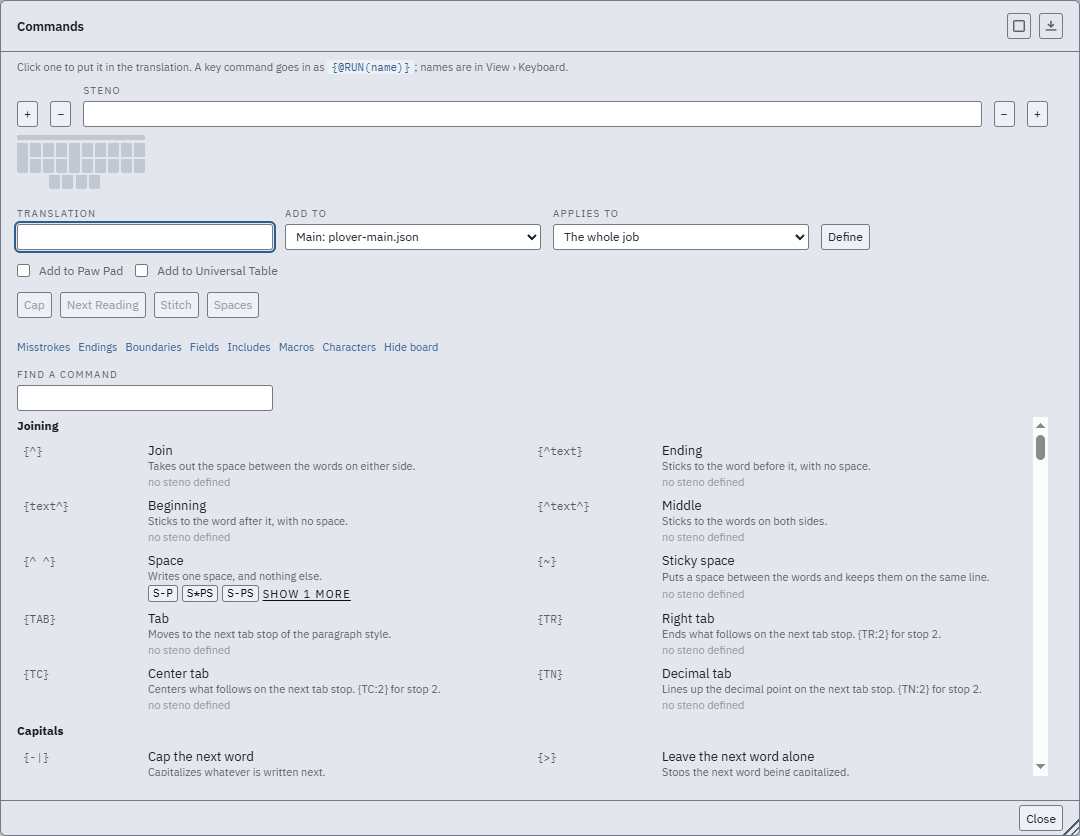
Opens the Define menu with the commands list open. The list shows the formatting commands an entry can use. Find a command narrows the list. Click a row to put it in the Translation box. See Define box keys and Define box buttons.
Commands menu
Misstroke Guesses
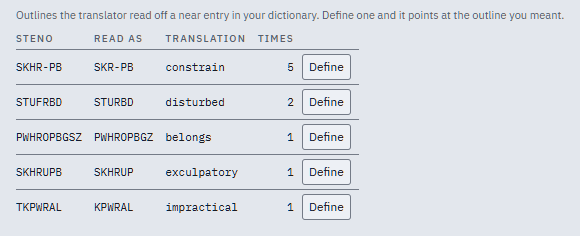
Lists the Misstrokes the translator matched to the nearest entry in a Dictionary. Defining one points its Steno at the intended entry. Nothing is defined until you click a row's Define.
Misstroke guesses, each row with its Define button
Normalization Table
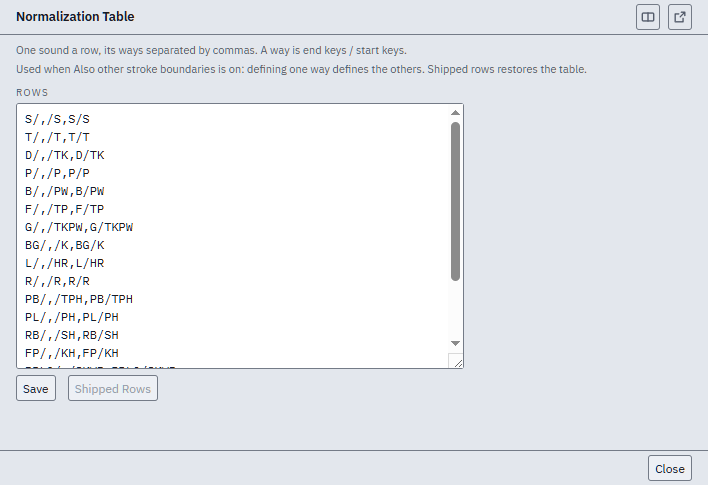
Opens the Normalization table. Each row is one sound and the ways it splits between two strokes, written as end keys/start keys, separated by commas. The Define menu's Boundaries pane uses it, so one Define also covers the other splits: with Boundaries open and the T row, T/,/T,T/T, a Define of PET/TEUGS as petition also defines PET/EUGS and PE/TEUGS. Save keeps your changes. Shipped Rows restores the shipped table.
Normalization table
Endings Table
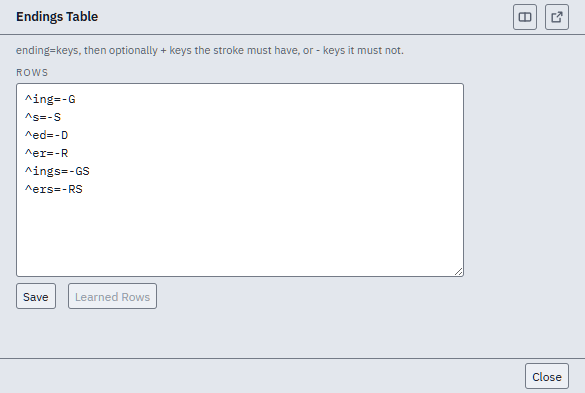
Opens the Endings table. The Define menu's Endings pane uses it. Each row is the ending, =, then the keys that write it. Rows from Eclipse's Integral prefix and suffix table copy in as they are. Save keeps your changes. Learned Rows restores the rows read from the Dictionary. Ending extrapolation does not read this table: it has four fixed keys of its own, listed under Extrapolate undefined suffixed strokes.
^ed=-D: -D on the last stroke writes ed.
dis^=STK: a caret after the letters makes a prefix. STK goes on the first stroke.
A comma and a check can follow the keys. The check looks at the stroke the ending goes on.
Keys with no + are keys the stroke must not have. ^ing=-G,-TSDZ: RUPB gets RUPBG for running, and RUPBS gets no -G, because it has -S.
Keys after a + are keys the stroke must have, one of them at least. ^s=-Z,+-D: HRAPBD gets HRAPBDZ for lands, and RUPB gets no -Z, because it has no -D.
The hyphen in -D marks a final-side key, as it does in any Steno. It does not mean "must not".
Endings table
Compare Dictionaries
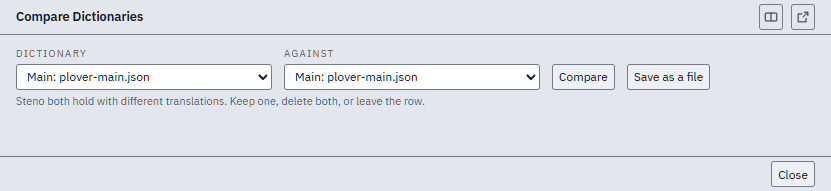
Compares two Dictionaries. Select Dictionary and Against and click Compare. The menu lists Steno in both with different Translations, 50 rows a page.
Keep writes that Translation into the other Dictionary.
Delete from both removes the Steno from both.
Undo reverses a settled row.
Back and More move between pages.
Save as a File writes the comparison to a text file (.txt).
Compare dictionaries menu
Export Dictionary to RTF/CRE
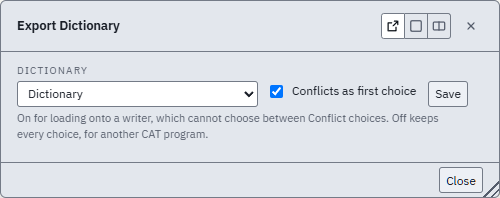
Exports one Dictionary to RTF/CRE. Select it in Dictionary and click Save. Check Conflicts as first choice for a Dictionary you load onto a writer, which cannot choose between Conflict choices: each Conflict is written as its first choice. Clear it for another CAT program, which keeps every choice. Nothing else changes. Entries that write no text, such as paragraph commands, macros, fields and speakers, are left out and counted.
Export dictionary menu
Brief My Dictionary
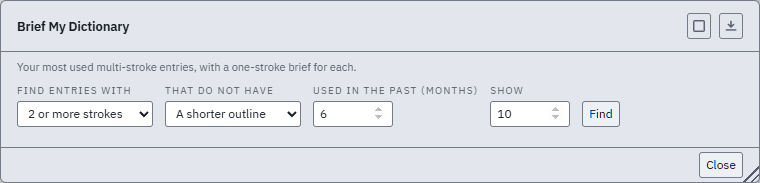
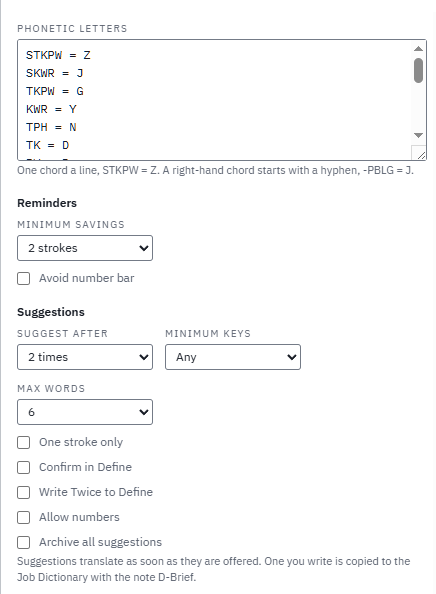
Lists the multi-stroke entries you write most, with a one-stroke brief for each: Dictionary > Brief My Dictionary. The count comes from the strokes you have written, not from the Dictionary. Set the fields and click Find.
Find entries with: 2 or more strokes or 3 or more strokes.
That do not have: Shorter Steno leaves out an entry whose words another entry already writes in fewer strokes. One-stroke Steno leaves out only words that already have a one-stroke entry.
Used in the past (months): only entries written in that many months. 6 by default; 0 counts every stroke ever written.
Show: how many rows to list, most used first. 10 by default.
Each row shows Used (times written), the Translation, the Steno and the suggested Brief: one stroke that no Dictionary has. None free means no brief was found, and the row cannot be checked. Edit a brief, or use New Suggestion or Stop Suggesting on a row. Stop Suggesting means that entry is not suggested for a brief again, here or while you write. Add # to Main Dictionary adds the checked rows.
Brief My Dictionary menu
Case Prep
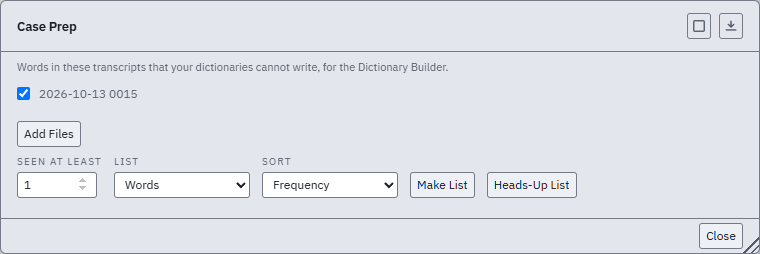
Lists the words in a set of transcripts that the Dictionaries cannot write. Check the jobs to read. Jobs in the current case and the open job start checked. Add Files adds other files.
Seen at least: leaves out anything that comes up fewer times than this.
List: Words, Phrases or Both.
Sort: Frequency or A-Z.
Create List: makes the list.
On each row, Cap cycles the capitalization and Remove takes it off the list. Undo All puts the list back as it was made. Save List saves it to a file.
Heads-Up List prints a sheet to read before the job. The words are grouped by how often they occur. Words a Dictionary writes come first, with their Steno; the words no Dictionary writes follow.
Start Dictionary Builder puts the list in the Dictionary Builder.
Case Prep menu, with the open job checked
8Jobs
A job is the steno, transcript, audio, job dictionary and speakers of one sitting. A case groups the jobs of one matter, with their shared case caption (the court, parties and case number that head the transcript).
Open File > Jobs. The Jobs tab lists every job in the Jobs folder.
Double-click the row, or click it and click Open.
File > Open Recent lists the last 10 jobs opened.
File > Open Job opens a job folder from anywhere else, such as a thumb drive.
Put a job in a case:
Open File > Jobs, the This Job tab.
Type the case name in Case and click Save. The list under the box offers the cases you have. A new name makes a new case.
The next job in the case starts with the case caption. See Case.
Jobs
Ctrl+F
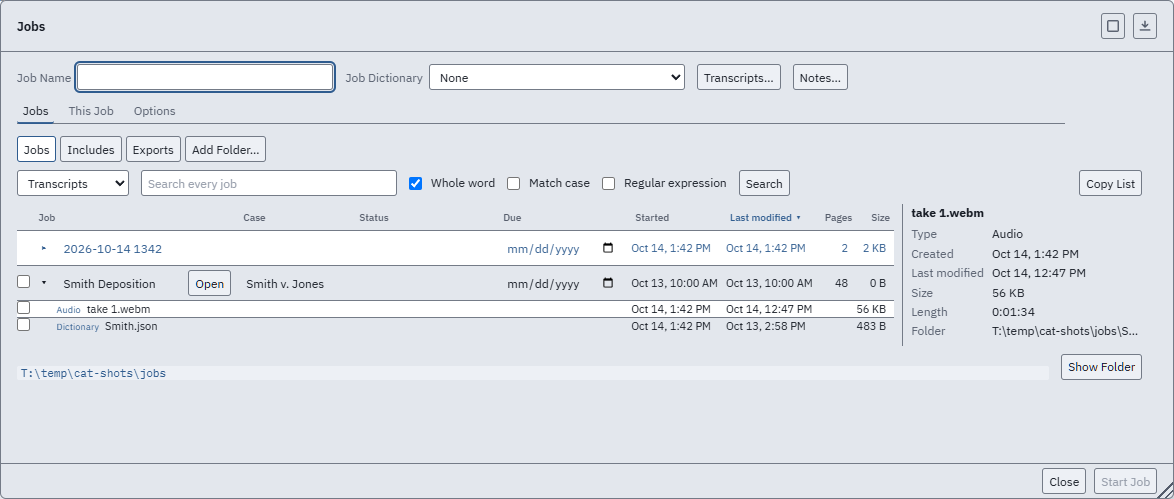
Opens the Jobs menu: start a new job, open a job from the list, set the case and job dictionary, and append another job. It has three tabs: Jobs, This Job and Options. The menu opens on the last tab used.
Jobs list
Jobs, Includes and Exports are folders shown as tabs. Add Folder adds any folder as a tab. Ctrl+Left and Ctrl+Right move between them.
The × on a folder tab takes the tab off. The folder stays. Up goes up one folder.
Click a column heading to sort by it. Drag a heading to move the column. Drag the right edge of a heading to make the column wider or narrower. Double-click the edge for the default width.
Right-click a heading to show or hide columns: Read-only, Started, Last modified, Pages, Strokes, Words, Untranslates and Size. Check Read-only on a row and the job writes no file of any kind when it opens or closes.
Type in the Job box to rename a job, or in the Case box to move it to another case. Press Enter to keep the change or Esc to undo it.
Pick a Status on the row. Edit Statuses at the bottom of the list opens Job Statuses.
Pick a Due date on the row. Click the Due heading to see what is due first. A job past its date shows in orange, unless its status is Finished. Clear the box to take the date off.
Click Open, or double-click the row, to open the job.
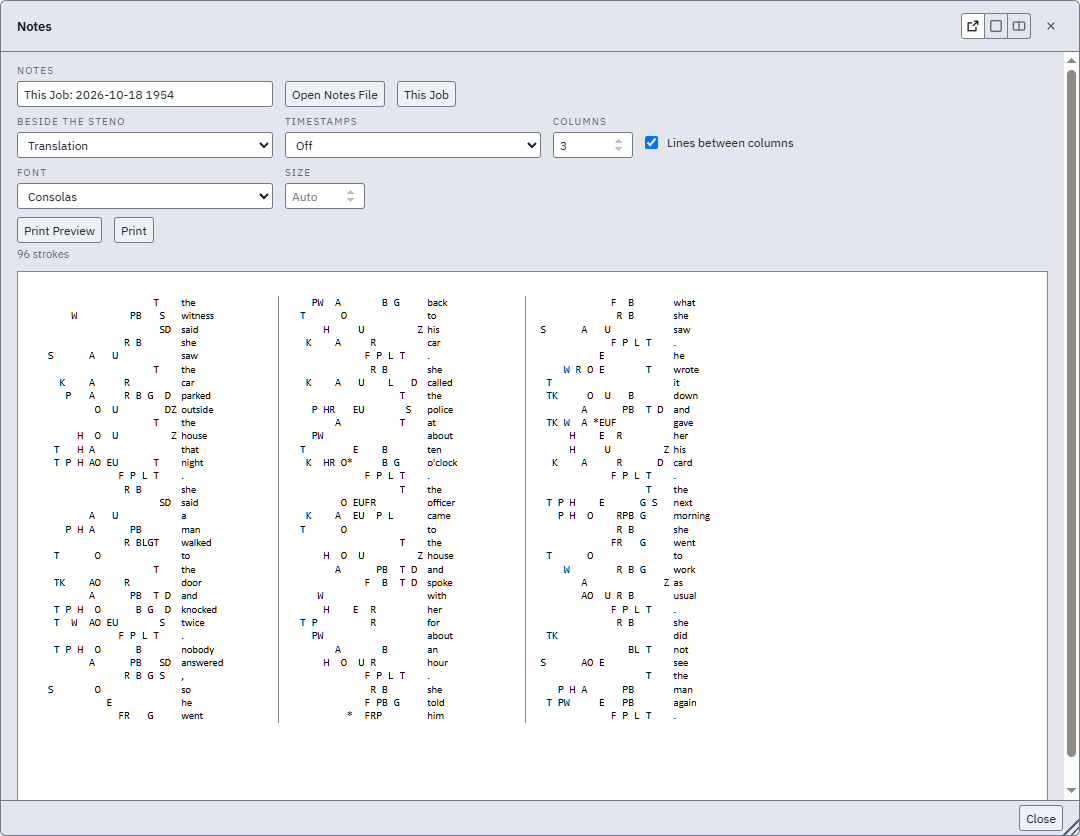
Click the arrow by the name to list the job's files: Job, Stroke log, Notes, Audio, Dictionary, Exhibit and Export. Job is the .starcat file. Double-click it in File Explorer to open the job in StarCAT. Stroke log (job.log) lists every stroke and edit in the job. Notes is a .stn notes file of the job's strokes, written when the job closes, for anyone who asks for your notes. Double-click a file to open it in its own program.
Check the boxes and press Delete to send jobs or files to the Recycle Bin. The open job cannot be deleted.
Search every job finds words in every transcript, or in every job Dictionary. Pick Job info to search what the pane beside the list shows: "Michael" finds every job Michael created or edited, and "Created by: Michael" only the jobs he created. Copy List copies the list to paste into a spreadsheet.
The picker beside Search every job picks what to search: Job Name, Transcripts, Dictionaries or Job info.
In Search every job, ? is one unknown letter and * is any number of them. Click Search.
Whole word and Match case narrow the search. Whole word does not show for Job Name or with Regular expression.
Regular expression reads the box as an expression. Expressions puts a ready-made one in the box. Neither shows for Dictionaries.
This case only searches the open job's case. It shows when the open job is in a case.
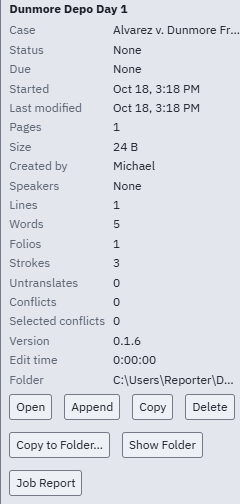
The pane beside the list shows the selected job: Case, Status, Due, dates, pages, size and folder. Once a job has been opened, it also shows who created it, who last edited it, its speakers, and its lines, words, folios, strokes, untranslates, conflicts and selected conflicts, and the fields you filled in, such as WITNESS. A selected conflict is a Conflict whose Translation StarCAT picked and nobody has confirmed yet. A folio is 72 words. Edit time is the time spent working in the job. A break of more than five minutes counts as five.
Info pane beside the Jobs list
Click a file in a job's list of files to show it in the pane: its type, dates, size and folder. A dictionary also shows how many entries it has, and an audio file shows its length.
A job's audio file in the info pane
Append creates a new job: the open job, then the selected job after it. The new job is named "<open Job> with <selected Job>" and opens. The two jobs it came from do not change. Use Append to put the volumes of a long day together.
Copy creates a copy named "<name> copy" on the list.
Copy to Folder copies the job out of StarCAT, such as to a thumb drive.
Show Folder opens the job's folder in File Explorer.
Job Report prints what the pane shows, on one sheet: the job's dates, pages and folder, its statistics, and its fields.
Open, Append, Copy and Delete show only for a job that is not open.
Jobs menu, with a job picked that is not open
At the top of the menu:
Job Dictionary: the Dictionary for the new job. New one for this job… shows Name, to name it. Choose a file… picks one from anywhere.
Transcripts…: makes jobs from .rtf, .txt, .asc or .ecl transcripts. Select one file or several.
On the This Job tab:
Job Dictionary: the same picks, for the open job. Click Save.
Translate settings: a saved set of the writer's port and protocol, the outputs and the Print Layout. Pick a set and click Use. This sets the writer but does not connect it. To save the current settings, type a name in Save as and click Save. Delete deletes the set picked.
Writer…, Print Layout…, Dictionaries… and Translate Options… open those menus.
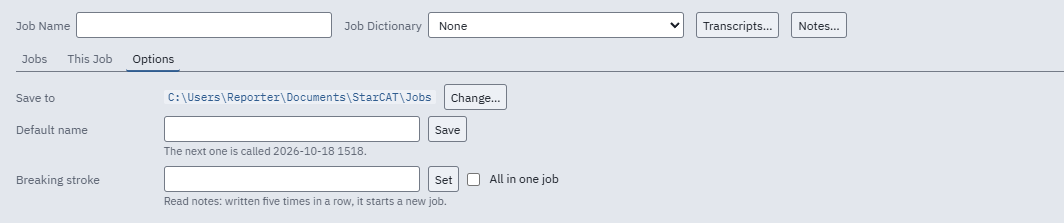
On the Options tab:Save to is the folder new jobs go in. Change… picks another.
Read notes from your writer:
Your writer saves every stroke to its memory as a notes file, even when not connected. Notes…, at the top of the Jobs menu, makes a job from that file. StarCAT reads .stn, .not and .ecl files, and StarCAT job.log files.
Copy the notes file off the writer onto the computer.
Open the Jobs menu and click Notes….
Select one file, or several. Each file becomes its own job, translated with your Dictionaries.
All in one job, on the Options tab, puts several files into one job instead.
Notes… at the top of the Jobs menu, and Breaking stroke and All in one job on the Options tab
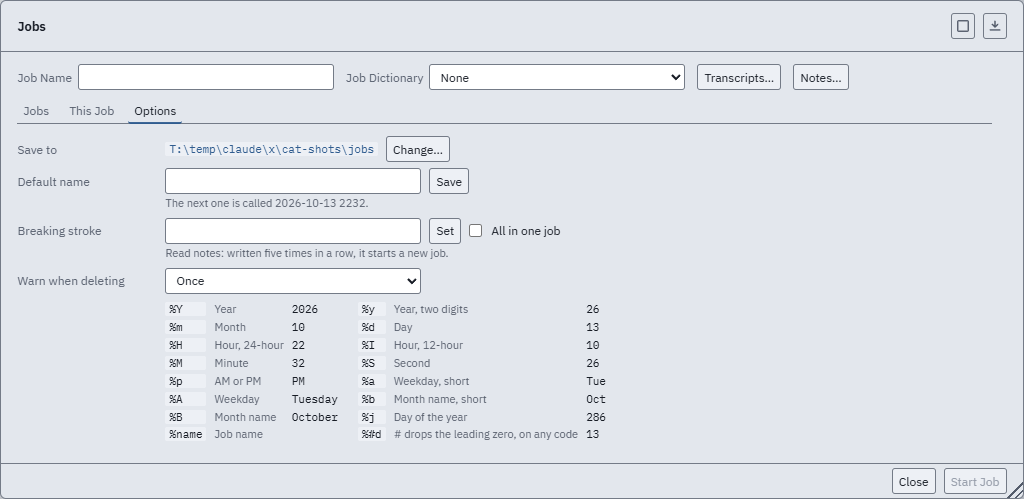
Default name codes
Default name, on the Options tab, names each new job. Click Save beside it to keep it. Type plain text, codes, or both. %name is the name you type in the Job Name box. Each other code is replaced by the date or time the job starts. Examples are for Tuesday, October 13, 2026 at 2:05:09 PM.
%name: the name you typed
%Y: year, 2026
%y: year, two digits, 26
%m: month as a number, 10
%B: month, October
%b: month, short, Oct
%d: day of the month, 13
%o: st, nd, rd or th for the day, so %#d%o is 13th
%A: weekday, Tuesday
%a: weekday, short, Tue
%w: weekday as a number, Sunday is 0, 2
%H: hour, 24-hour clock, 14
%I: hour, 12-hour clock, 02
%p: a.m. or p.m., p.m.
%P: AM or PM, PM
%M: minutes, 05
%S: seconds, 09
%j: day of the year, 286
%U: week of the year, 41
%x: date, 10/13/26
%X: time, 14:05:09
%c: date and time, 10/13/26 14:05:09
%z or %Z: this computer's time zone, Eastern Daylight Time
%%: a percent sign
Put # after the percent sign to drop a leading zero: %#I is 2, not 02. A code not on this list stays as you typed it.
Example: %name %m%d%y-%H%M names a job "Smith 101326-1405".
Jobs menu, Options tab
Breaking stroke
Use a breaking stroke when you write two proceedings in one notes file, such as two depositions in one day without turning the writer off.
Pick one stroke you never write in a transcript, such as STPH-FPLT.
Write it five times in a row between the two proceedings.
When you read the notes, StarCAT starts a new job at each run of five. The jobs are named after the file with 1, 2, 3 on the end. The breaking strokes are left out.
Written fewer than five times, the stroke is ordinary writing and stays in.
To set it, open the Options tab, click Set beside Breaking stroke, and write the stroke on your writer. You can also type the Steno in the box. Leave the box empty to create one job per file.
On the Options tab, Warn when deleting asks before each job, once for all of them (the default), or never.
New Job
Ends the open job and opens a new one, translating, with no menu. A job with nothing written is discarded. The new job takes the Default name from the Jobs menu.
Open Job
Opens a job folder from any location, such as a thumb drive or archive drive. Dragging the folder onto the window does the same.
Open a recent job
File > Open Recent lists the jobs you last opened, newest first, up to 10. The open job is not listed, nor is a job you have since deleted or moved. Click one to open it. Jobs 1 to 9 are numbered: type the number and press Enter.
End Job
Ctrl+Q
Ends the open job. A job with nothing written is discarded; otherwise the End Job menu opens. Every stroke and edit is already saved. Click one of your job statuses or End Without One. The status shows on the Jobs list. Edit Statuses opens Job Statuses. An empty job opens in its place, so the next stroke is not lost. The job's defines are then written into the dictionary files, and the Jobs menu opens.
End job menu
Job Statuses
The statuses you pick from on the Jobs list and when you end a job. StarCAT comes with Editing, Sent to Scopist, Proofread, Read, Final Edit, Draft Print, Final Print, Invoiced and Done. The last three are Finished.
Click Add Status and type its name.
Check Finished on a status that means the job is done. A job with a Finished status never shows as past due.
Change a name and every job with it takes the new name.
Click Delete to take a status off the list. Jobs that have it keep it.
Exit StarCAT
Alt+X
Closes StarCAT, the same as the X at the top right. Every stroke and edit is already saved. A reminder set for Closing StarCAT shows first.
Retranslate to New Job
File > Retranslate to New Job retranslates the job's strokes with the current Dictionaries into a new job named "<title> retranslated". Edits and paragraph labels are not copied. The original job keeps its edits.
Use it when the Dictionary was wrong for the whole job and you typed over words it now gets right: the new job starts clean, without those edits. To keep your edits, use Retranslate Changed Paragraphs instead.
Retranslate Changed Paragraphs
Edit > Retranslate Changed Paragraphs lists the paragraphs that read differently with the Dictionaries as they are now. Click a row to go to its paragraph. Retranslate Changed Paragraphs updates them in the open job.
Use it after you fix Dictionary entries while editing. Your edits stay; one typed over words that now translate differently is marked Stale. To start over without your edits, use Retranslate to New Job.
Back Up Job
Saves the open job to one .scjob file: the job folder (Steno, job Dictionary, audio and exhibits), without exports. The save dialog opens at the Exports folder.
Send Job to Scopist
Saves the open job, its audio, and the Dictionaries that are on, with their changes, to one .scjob file for a scopist. Python Dictionaries are not included. On the scopist's computer the Dictionaries apply to that job only.
Restore Job
Opens a .scjob file as a new job folder. An existing job is never overwritten. A file that is not a job is refused and nothing is written.
Save Marked Part as Job
B W (RocketKeys)
Saves the marked part of the job, with its audio, as a new job named "<title> part". The open job is not changed. Mark the part first, one of two ways:
On the Raw Steno panel (View > Panels > Raw Steno), press the first stroke's row and drag to the last, or click the first row and Shift+click the last.
In the transcript, select the words. The strokes that wrote them are the part.
A Raw Steno mark of two or more strokes comes first.
Case
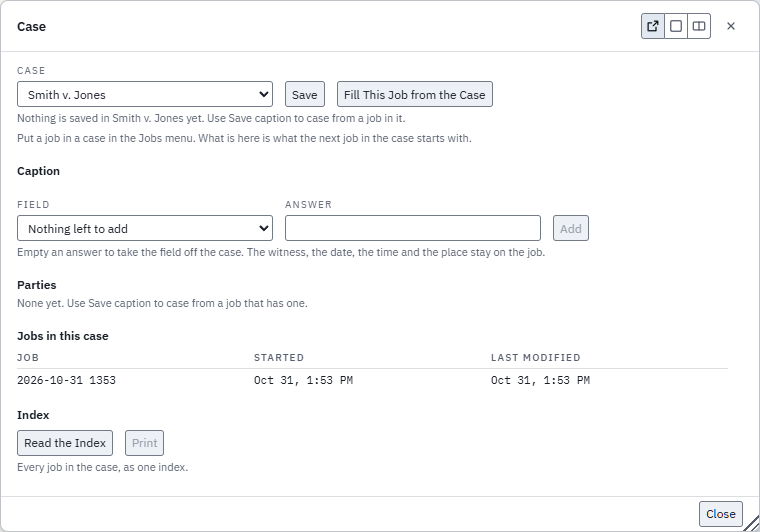
Opens the Case menu. Select a case to show its case caption (the court, parties and case number that head the transcript), jobs and index. The next job in the case starts with the case caption on the menu. Put a job in a case on the This Job tab of the Jobs menu.
Case: selects the case. Save saves what is on the menu to it.
Fill This Job from the Case: see Fill Caption from Case. Gray unless the open job is in that case.
Caption: Field, Answer and Add add a field. Empty an answer to remove the field from the case; the witness, date, time and place stay on the job.
Parties: come from Save Caption to Case. Edit a name in place. Empty a name to remove it.
Jobs in this case: Job, Started and Last modified, oldest first.
Index: Read the Index lists the entries across the case, with Category, Item and Where, as volume, page and line. The volume is where the job falls in the case, oldest first. Print is gray until the index is read.
Case menu, before any case is namedJobs menu, This Job tab
Save Caption to Case
Writes the open job's case caption to its case, replacing the one already there.
Fill Caption from Case
Fills the open job's unanswered blanks (fields) from its case. Answered blanks are not changed.
Translation turns strokes into words using the Dictionaries.
The Input tab switches are job settings: a reopened job translates as it was written. Number bar as a dragged key is a User setting.
Turn a switch off:
Open Realtime > Translate Options. The Input tab opens.
Clear the switch, such as Smart quotes.
Close the menu. The job keeps the choice, and the next new job starts with it.
Translate Options
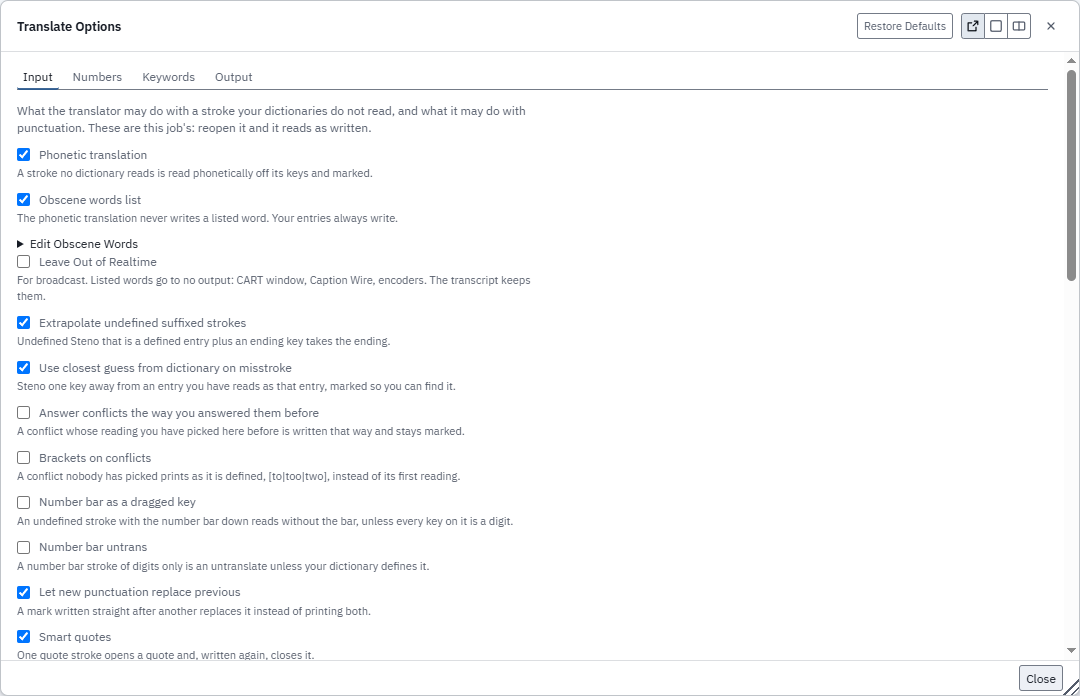
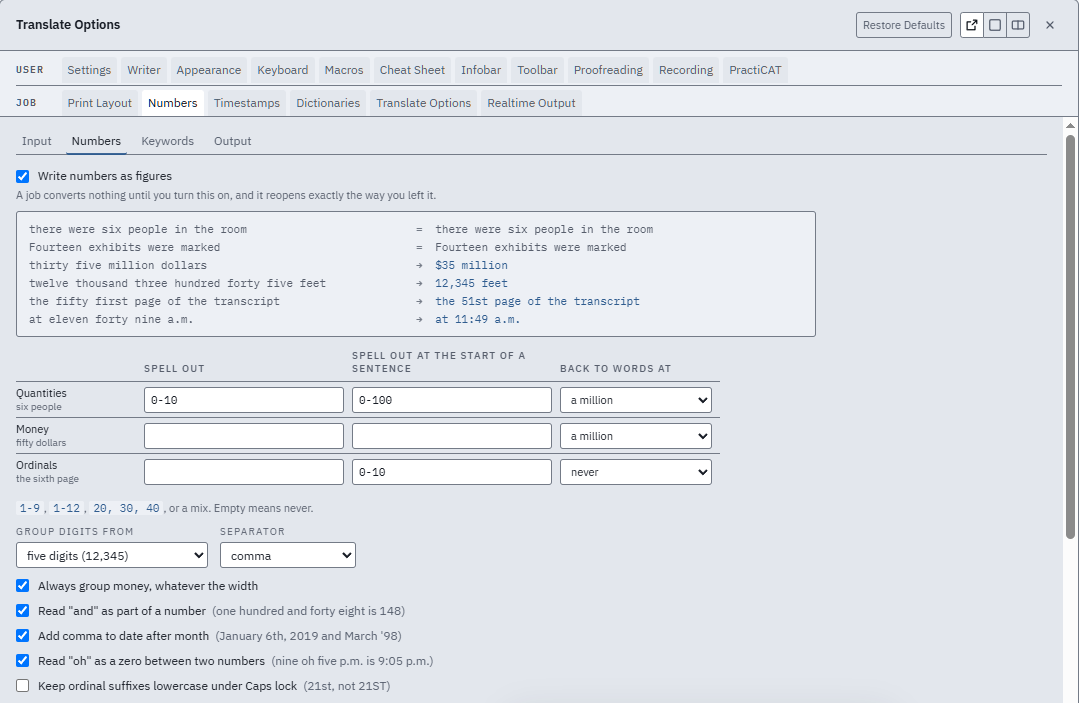
Opens the Translate Options menu, with four tabs: Input, Numbers, Keywords and Output.
Translate Options, Input tab
The switches at the top of the Input tab each have an entry below. The rest of the tab:
Obscene words list: Phonetic translation never writes a word on the list. Your Dictionary entries always write. On by default. Edit Obscene Words opens the list, one word to a line. Empty puts back the list StarCAT ships. A User setting.
Leave Out of Realtime: for broadcast. Words on the list go to no output: the CART window, Caption Wire, encoders. The transcript keeps them. Off by default. A User setting.
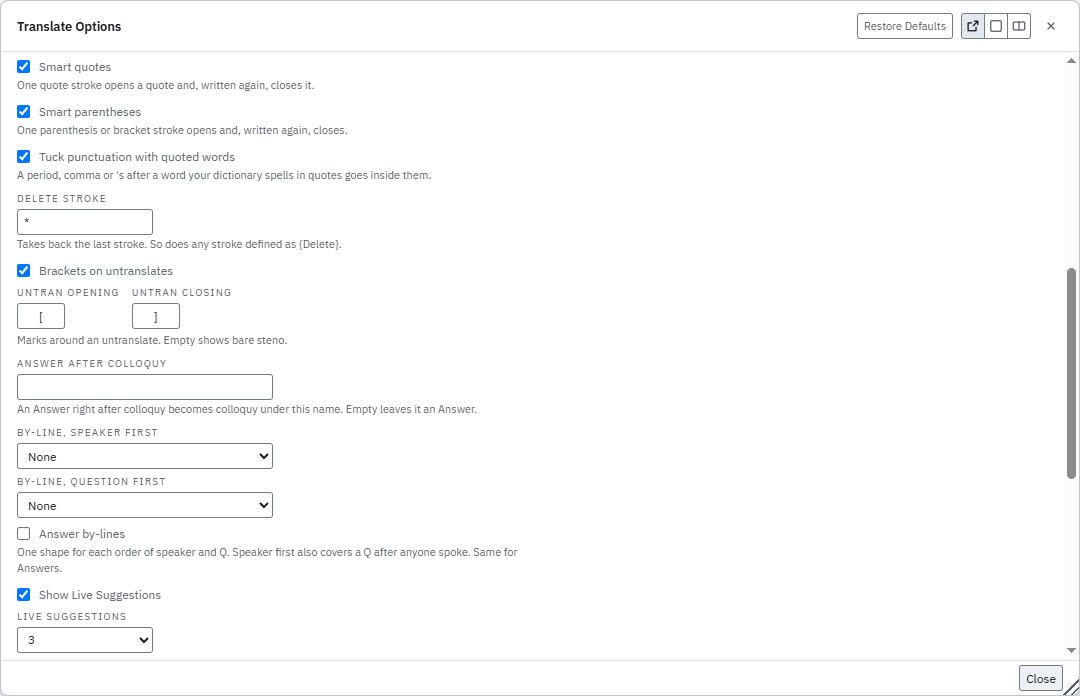
Delete stroke: the stroke that takes back the last stroke, * by default. A stroke defined as {Delete} does the same.
Brackets on untranslates: an Untranslate shows between Untran opening and Untran closing, [ and ] by default: [TKPWHR]. Clear the switch, or empty both boxes, and it shows bare Steno: TKPWHR.
Answer after colloquy: an Answer written right after colloquy or a parenthetical becomes colloquy under this name. Empty, the default, leaves it an Answer. Example, with THE WITNESS: in the box: THE COURT: Objection, then the Answer stroke and cat, becomes THE WITNESS: Cat., not A. Cat.
By-line, speaker first: the by-line written when you write a speaker, then the Question stroke. None by default. BY MR. SMITH: and BY Mr. Smith: go on a line of their own. Q. (BY MR. SMITH), Q. (By Mr. Smith), Q. (BY MR. SMITH): and Q. (By Mr. Smith): go in front of the question. After anyone else speaks, the next Question gets the by-line again, with the last name used.
By-line, question first: the by-line written when you write the Question stroke, then a speaker. Only the forms in front of the question. While this is set, a by-line goes in only where you write the speaker.
Answer by-lines: an Answer written next to a speaker gets a by-line too, such as BY THE WITNESS:. Off by default.
Example, with By-line, speaker first set to BY MR. SMITH:
Written
Becomes
MR. SMITH's speaker stroke, the Question stroke, did
BY MR. SMITH: on its own line, then Q. Did?
THE COURT's speaker stroke, objection
THE COURT: Objection
The Answer stroke, yes
A. Yes.
The Question stroke, did
BY MR. SMITH: on its own line, then Q. Did
With By-line, question first set to Q. (BY MR. SMITH), write the Question stroke, then MR. SMITH's speaker stroke and did: Q. (BY MR. SMITH) Did.
The by-lines, the Answer name and the brackets are job settings.
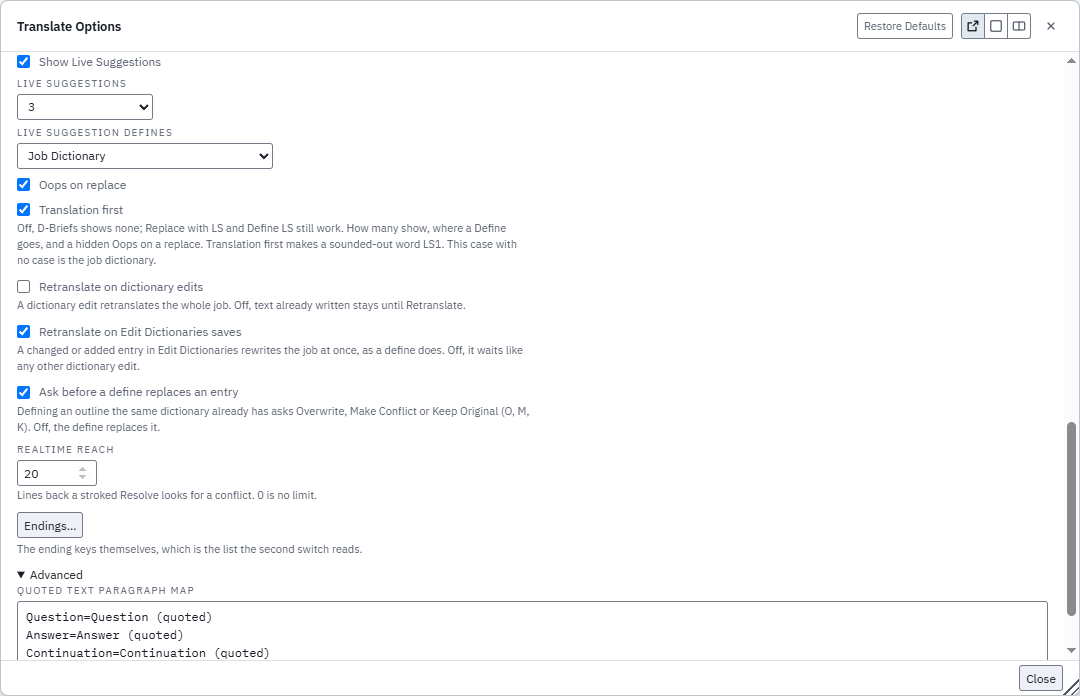
Translate Options, Input tab, bottom: Live Suggestions, Retranslate, Realtime reach and Advanced
Show Live Suggestions, Live Suggestions, Live Suggestion defines, Oops on replace and Translation first: see Show Live Suggestions.
Retranslate on dictionary edits: a Dictionary edit retranslates the whole job. Off by default: text already written stays as it is until you Retranslate. A User setting.
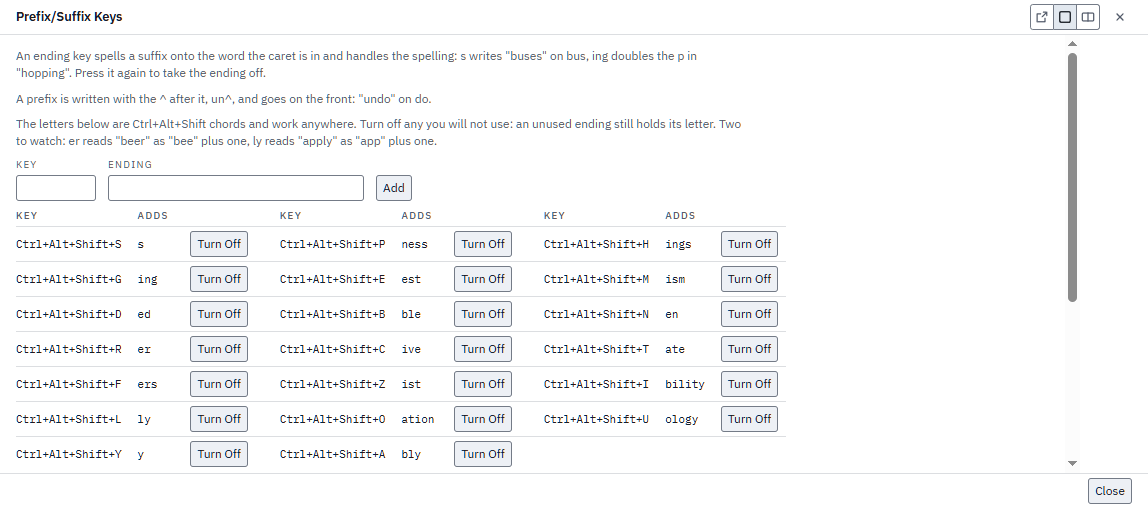
Prefix/Suffix Keys... opens Prefix/Suffix Keys: the Ctrl+Alt+Shift keys that put an ending on the word at the cursor. Extrapolate undefined suffixed strokes does not use them.
Turns Translation on and off. Off, strokes from the writer are not translated and are not recovered later. Turned back on, the status bar shows how many strokes were not translated.
Write at Caret
Writes strokes at the cursor instead of at the end of the job. Off by default, and off again each time StarCAT starts. On, the status bar shows AT CARET.
Warning: use Write at Caret only when editing. Turn it off before you write live. On, every stroke from the writer goes in at the cursor, not at the end of the job.
Each stroke goes in at the cursor, and the cursor moves on after it.
Highlighted words are replaced by the next stroke.
The asterisk takes back the last stroke written at the cursor.
When the highlight is part of one stroke, or the words on both sides of the cursor were edited, the stroke goes on the end of the job and the status bar says so.
Dialog Translation
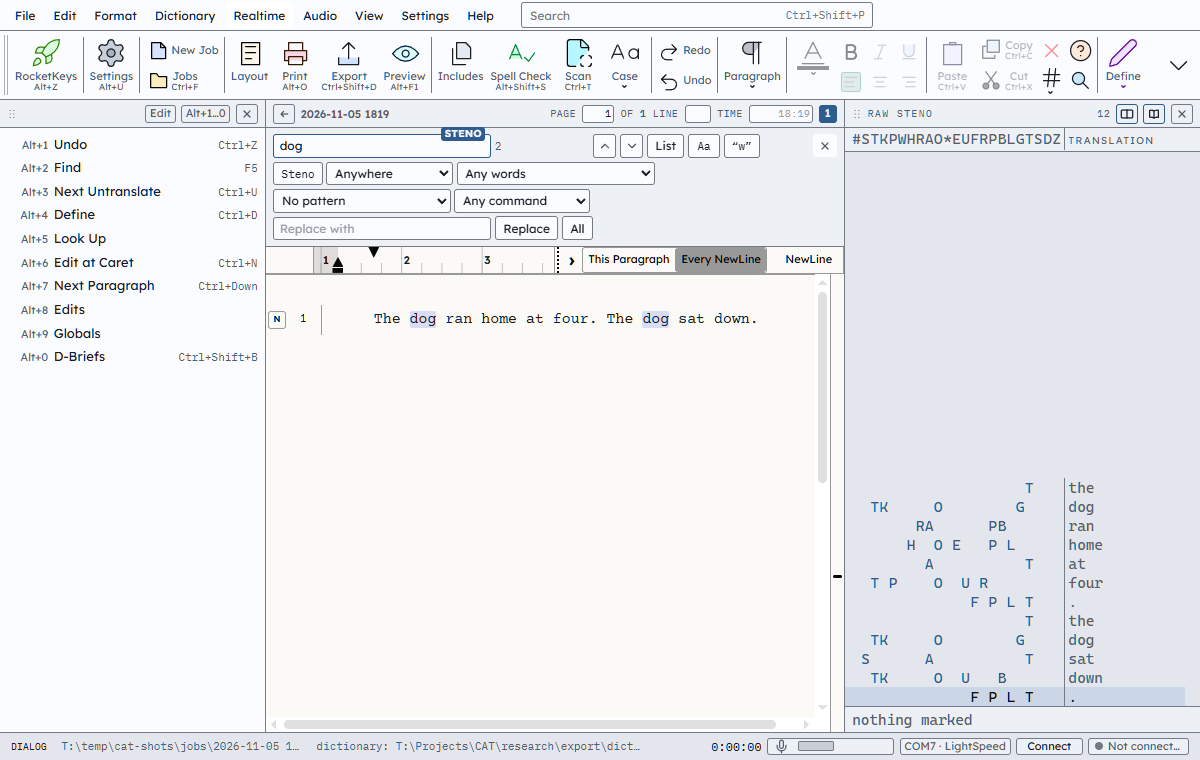
Turns Dialog Translation on and off: Realtime > Dialog Translation. On, when the cursor is in a text box on a menu, such as Find, strokes from the writer go into the box, translated through the job's Dictionaries. Off by default. Once turned on, it stays on the next time StarCAT starts.
While it is on, the status bar shows DIALOG, and the box taking the strokes shows STENO on its top edge.
Example: open Edit > Find, click in the box and write TKOG. The box reads dog, and nothing is added to the job.
Dialog Translation on: dog written into the Find box, STENO on the box, DIALOG in the status bar
Warning: a stroke written into a box is not in the Job. With Dialog Translation on, words written while the cursor is in a box do not go on the record.
Highlighted text in the box is replaced by the next stroke.
The asterisk takes back the last stroke. With no stroke written yet, it deletes the word before the cursor.
A stroke defined as Enter or Esc works as the menu's OK or Cancel. A stroke defined as Tab moves to the next box or button.
A stroke defined as a command runs the command.
In Find's Steno search, each stroke is added as Steno, not as Translation.
The Define box always takes strokes, with Dialog Translation on or off.
Phonetic Translation
Turns Phonetic translation on and off. On, a stroke with no Dictionary entry is read phonetically from its keys and marked Phonetic. On by default.
TPHRAPB translated phonetically as flan
Theory
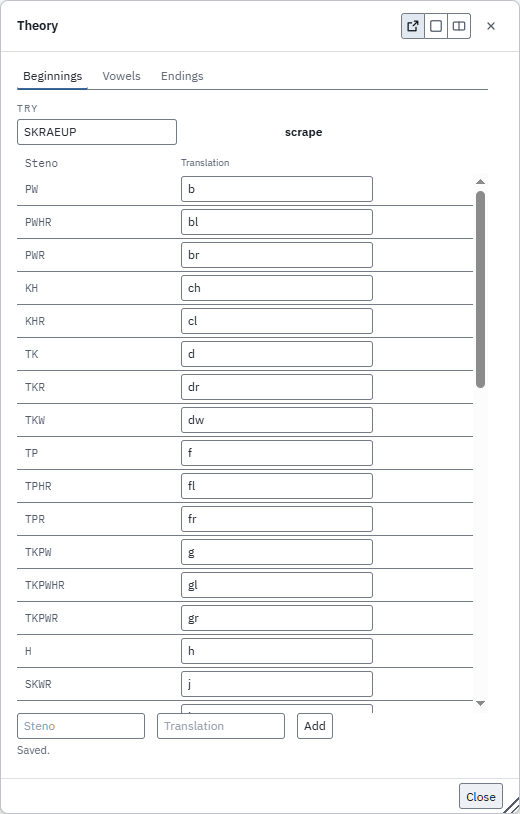
Opens the Theory menu: the rows Phonetic translation sounds out with, as Beginnings, Vowels and Endings, each a Steno and its Translation. Your rows replace the shipped ones. The rows are kept in theory.txt, a plain text file in the Program data folder.
Teach Phonetic translation a sound:
Open the Theory menu. Try, at the top, shows how a stroke reads with the rows as they are now. Type SKRAEUP: it reads skrape, because no row says SKR is scr.
Click the tab for the keys: Beginnings for SKR.
Type the Steno and the Translation, SKR and scr, and click Add.
Try now reads scrape, and so does every undefined stroke that starts with SKR.
To go back, click Reset on your row. A changed row returns to the shipped Translation; a row you added is removed.
Theory menu, Beginnings tab: SKRAEUP in Try reads scrape once SKR is added as scr
Extrapolate Undefined Suffixed Strokes
Turns ending extrapolation, Extrapolate undefined suffixed strokes on the Input tab, on and off. On, an undefined stroke that is a defined stroke plus one of these keys takes the ending, marked Ending folded on. On by default.
-Z or -S: s
-G: ing
-D: ed
These four keys are fixed. Two other things in StarCAT are named Endings:
Turns Use closest guess from dictionary on misstroke on and off. On, a stroke one key away from a Dictionary entry reads as that entry, marked Misstroke, nearest entry. On by default.
KAULGD, one key from called
Answer Conflicts Way You Answered Them Before
Turns Answer conflicts the way you answered them before on and off. On, a Conflict picked before is written the same way and marked Conflict answered for you. On by default. A new job starts with the last choice.
Brackets on Conflicts
Turns Brackets on conflicts on and off. On, an unpicked Conflict prints as defined, such as [to|too|two], instead of its first Translation. On by default. A new job starts with the last choice.
Off, then on
Let New Punctuation Replace Previous
Turns Let new punctuation replace previous on and off. On, a punctuation mark written straight after another replaces it. Off, both stay. A mark you type, or one written next to it, always stays. On by default.
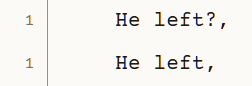
A question mark, then a comma: off, then on
Smart Quotes
Turns Smart quotes on and off. On, the quote stroke opens a quote and, written again, closes it. One left open closes where the paragraph ends; Backspace on it takes it off. On by default.
Smart Parentheses
Turns Smart parentheses on and off. On, the parenthesis or bracket stroke opens and, written again, closes. One left open closes where the paragraph ends; Backspace on it takes it off. On by default.
Tuck Punctuation with Quoted Words
Turns Tuck punctuation with quoted words on and off. On, a period, comma or 's after a word the Dictionary spells in quotes goes inside the quotes. On by default.
Punctuation
Opens the Punctuation menu.
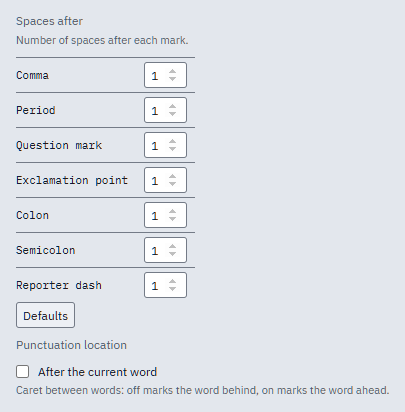
Spaces after sets the spaces written after each punctuation mark.
Defaults resets them.
After the current word sets where a mark goes when the cursor is between words: off, on the word behind; on, on the word ahead.
Abbreviations: a comma after one of these keeps its period. One a line, without the period. A word with a period inside, like e.g., always keeps it. The list saves when you leave the box. Defaults under it puts the shipped list back.
Punctuation menu
Oops
Puts an Oops mark on the words written before the stroke, or on the cursor's words when used from a key. The mark does not print, and a second stroke does not remove it. Its word is "Oops" unless the entry gives another. In a Dictionary entry: {@RUN(oops)}. To go from one Oops mark to the next, define a stroke as {@RUN(nextmark Oops)}.
To remove an Oops mark, put the cursor on its word and use Mark Line.
10Defining
A Define adds the Steno under the cursor and its Translation to a Dictionary, and the job retranslates.
Each entry is a command. Assign any of them to a key or a stroke, or add it to a toolbar: see Keys and Macros.
Define a word:
Put the cursor on the word, or use Edit > Go to > Next Untranslate.
Open Dictionary > Define (Ctrl+D). The Define box opens with the Steno in Steno.
Type the Translation in Translation.
In Add to, select the Dictionary: the job dictionary, the case, or a Dictionary on the list.
Click Define.
If Steno shows one stroke too few or too many, use One Stroke More on Left or One Stroke Fewer on Left before step 5.
Global a word:
A Define is a Global. Applies to sets how far it reaches:
The whole job: every place the Steno is written, before and after.
Here forward: from the cursor to the end.
This section: the section the cursor is in. A section runs from a paragraph set to Page Number from Here to the next one. A job with none is one section.
Local in Add to (Ctrl+L) changes the job and puts nothing in a Dictionary. Its Applies to has two choices instead:
This spot, the default: only the Steno at the cursor.
Rest of job: every place the Steno is written, from the cursor to the end.
Every Global is listed in Edit > Transcript > Globals and on the Globals List panel. Right-click a row to edit or remove it. The Type column says where each one went: Main Define, Job Define, Case Define, E-Define, another Dictionary by its name, or Local. To change a word everywhere without its Steno, use E-Define (Ctrl+E on the StarCAT key map).
Globals: one for this job only, two Main Defines
Realtime define:
Define while you write, without stopping. Example: the witness says "Kowalczyk" and it comes out as an Untranslate.
Press Ctrl+D. The Define box opens on the last stroke written. On the Eclipse map, G does the same in RocketKeys, the mode Alt+Z turns on, where plain keys run commands.
Type Kowalczyk in Translation and press Enter. The Untranslate becomes Kowalczyk, and every later stroke of it writes Kowalczyk.
Keep writing.
Pick from Potentials:
Under Translation, the Define box lists words the Steno could be, numbered 1 to 9 and 0. The list is open when the Steno is an Untranslate; click Potentials to open it otherwise. While the list shows and Translation is empty, typing a row's number defines it at once.
F9 turns the list into slop strokes: rows that come from a Dictionary entry show its Steno as {=STENO}, with the words it writes beside it. Picking one puts {=STENO} in the Translation, so the entry follows that entry when it changes. Use it for a misstroke: define the stroke your hand writes by mistake as {=STENO} of the right one. When you later change the right entry, or resolve its conflict, the misstroke writes the new words too, with nothing to fix twice. Press F9 again for the words. With the list folded or no such rows, F9 opens Characters.
Ask Google in Potentials, in the Spell Check menu (Edit > Spelling > Spell Check), adds a last row marked from Google: the Steno sounded out, as Google spells it. It is for names written by ear. It is off until you turn it on, and then only the sounded-out Steno is sent, only while the list is open.
Define box keys:
Enter: Define.
Ctrl+M, Ctrl+J, Ctrl+H: define at once to the Main Dictionary, the job dictionary or the case.
Ctrl+1 to Ctrl+8: define at once to the other Dictionaries in Add to, in list order.
Ctrl+L: define at once as Local, This spot. Ctrl+T: Local, Rest of job.
Ctrl+W: select E-Define.
Ctrl+[ makes the box small; Ctrl+] shows the whole box.
F9: slop strokes, or Characters.
Add to shows each key beside its Dictionary.
Define box buttons:
These change the Translation:
Cap (Alt+C): cycles capitalized, all caps, lowercase.
Next Reading (Alt+N): reads a conflict the other way.
Stitch (Alt+S): puts hyphens in or takes them out.
Spaces (Alt+P): cycles sticky spaces, no spaces, plain spaces.
These open a pane in the box. Clicking the button again hides it.
Misstrokes: keys that could drag or drop. Each misstroke is defined with the entry unless the Dictionary has it.
Endings: ending forms, defined with the entry unless the Dictionary has them. A word that takes an ending opens this pane on its own. See Endings table.
Boundaries: the same sounds split differently between two strokes, defined with the entry unless the Dictionary has them. See Normalization table.
Fields: inserts a field, a blank the job fills in later.
Includes: makes the stroke write an include from the library.
Macros: makes the stroke run a macro.
Characters: inserts a special character. F9 opens it too.
Board: a steno keyboard for building the Steno with the mouse.
Commands: inserts a formatting command. Find a command narrows the list.
Checkboxes:
Add to Paw Pad: puts the define on the Paw Pad too.
Add to Universal Table: keeps it in a table you can apply to any job.
When the Translation ends in a period, a line says what a comma after it does. Keep the Period adds the word to the abbreviation list, so a comma after it keeps the period.
If you select the job dictionary in Add to and the job has none, Define waits until you set one. Select it in Job Dictionary, or type a Name for a new one, and click Use.
Define slots:
Define Slots define from the writer, with no box. Fingerspell a word that is not in your Dictionary, write the Define stroke for a slot, and from then on that slot's Steno writes the word. There are nine slots.
Open Dictionary > Define Slots.
Steno: the stroke the word will be written with. A blank Steno turns the slot off.
Define stroke: the stroke you write to define to this slot. Use one you never write for anything else, such as 1*Z for slot 1. The Define stroke already in the Main Dictionary for this slot shows here. Save puts the new one in the Main Dictionary and takes the old one out.
Words: how many words behind the cursor the slot takes. 1 for Kowalczyk, 2 for Anna Kowalczyk.
Case: as written, Initial cap, ALL CAPS or lower case.
Dictionary: where the entry goes. Job saves it for this job only.
Press Save. A new Define stroke goes into your Main Dictionary and the menu says so: #S*Z defines to Slot 1.
Four slots set up, each with its Define stroke
Number keys show as number bar Steno: 1-Z reads #S-Z, 2-Z reads #T-Z.
A slot set to job writes to the job dictionary. A job that has none gets one on the first slot define, named after the job. To use one you already have, choose it first: File > Jobs, the This Job tab, Job Dictionary.
During the job, the witness spells Kowalczyk:
Fingerspell the name.
Kowalczyk fingerspelled
Write 1*Z. Kowalczyk is defined to 1-Z.
From then on, write 1-Z.
1-Z writes Kowalczyk
To define words you already wrote, select them and write the define stroke. A selection is taken whole, whatever Words says.
Rules:
Never put the define stroke on the slot's own Steno. Writing 1-Z would then define and write the word at once: Kowalczyk Kowalczyk.
A slot replaces what its Steno meant before. Pick Steno you never use.
Using a slot again in the same job redefines it, and the earlier uses change with it: Jones on 1-Z, then Smith on 1-Z, and every Jones reads Smith. Use the next slot for the next name.
Words counts back from the cursor. A word at the start of a sentence is saved with its capital unless Case says otherwise.
Ctrl+Z right after a slot define takes it back: the entry leaves the Dictionary, and every stroke of it reads what it read before.
Once you write a stroke after a define, Ctrl+Z skips it and takes back the change before it. Remove the entry in the Dictionary editor.
Create a brief during Realtime:
Brief Words Behind makes a brief from the writer, with no box. You pick the Steno as you write. A Define Slot has its Steno set ahead of time and fires on one stroke; Brief Words Behind takes three strokes and any Steno you want.
Write the words, then the stroke for Brief Words Behind. It takes the words behind the cursor: one, or as many as its count says.
Write the brief, one stroke or more.
Write the stroke for Brief Words Behind again. The brief is defined to the words in the job dictionary, and the brief strokes come off the paper.
A job that has no job dictionary gets one on the first press, named after the job.
The count is in the dictionary entry: {@RUN(brief)} takes one word, {@RUN(brief 2)} two, {@RUN(brief 3)} three, up to 9. In the Define box, the Commands list has it as Brief Words Behind: pick the count. Put one on a stroke for each count you use: a 2 and a 3 cover most names and titles. Or select the words first and write the stroke; a selection is taken whole.
Example, the witness says bank of the south: write the four words, write the stroke for Brief Words Behind, Capped with a count of 4, write PWO*FT, and write the capped stroke again. The words read Bank of the South, and PWO*FT writes Bank of the South from then on.
Opens the Define box on the Steno at the cursor, with the last Dictionary used selected. With a count, takes that many strokes. With no count, takes the selection, the Steno under the cursor, or the last stroke written. See Define a word. See Define box keys and Define box buttons.
Main Define
Ctrl+Alt+D
Opens the Define box with the Main Dictionary selected. With a count, takes that many strokes. See Define box keys and Define box buttons.
Case Define
Ctrl+Alt+K
Opens the Define box with the case selected. A job in no case uses the job Dictionary, or Main if it has none, and the box says which. With a count, takes that many strokes. See Define box keys and Define box buttons.
Job Define
Ctrl+Alt+J
Opens the Define box with the job dictionary selected. With a count, takes that many strokes. With no job dictionary, the box offers Job Dictionary, Name and Use. See Define box keys and Define box buttons.
Define It
Saves the entry in the Define box to the selected Dictionary and closes the box.
When that Dictionary already has the Steno with another Translation, Already Defined asks first: SREBG is already in Main Dictionary as van. Press O, M or K:
Already Defined: SREBG is already in Main Dictionary as van, with Overwrite, Make Conflict and Keep Original
Overwrite: the new Translation replaces the old one.
Make Conflict: the entry becomes a Conflict of the two.
Keep Original: nothing changes.
Esc goes back to the Define box. To save without asking, clear Ask before a define replaces an entry in Realtime > Translate Options, Input tab. A Local define and an E-Define never ask.
Cap Translation
Steps the Translation in the Define box through initial cap, all caps and lowercase.
Clear Field
Empties the Define box field the cursor is in, Steno or Translation.
One Stroke More on Left
Adds one stroke to the left of the Steno in the Define box. A count adds more.
One stroke more on the left: SREBG becomes -T/SREBG
One Stroke Fewer on Left
Removes one stroke from the left of the Steno in the Define box. A count removes more.
One Stroke More on Right
Adds one stroke to the right of the Steno in the Define box. A count adds more.
One Stroke Fewer on Right
Removes one stroke from the right of the Steno in the Define box. A count removes more.
E-Define
Opens the Define box set to E-Define, with the selected word, or the word at the cursor, in Words. An E-Define replaces words with words in the job and adds nothing to a Dictionary. Matches whole words only; Case sensitive matches capitals exactly.
Define box set to E-Define, with vehicle in Words
Define to Slot
Defines the words behind the cursor, or the selection, to a slot's Steno with no box. Takes the slot number; with none, uses slot 1. The slot sets the Steno, the number of words, and the Dictionary. Dictionary > Define Slots makes the stroke for it; in the Define box, the Commands list has it as Define to Slot.
Define Slots
Opens the Define Slots menu. Each slot has a Steno and a Define stroke. A slot with no Steno is off. Save adds a new Define stroke to the Main Dictionary. See Define slots.
The slots also show at the bottom of the Infobar: each slot's number, Steno and Translation, or not defined. The slot you defined last is highlighted. Clear Show on Infobar to hide them. Show Define Slots in Edit Infobar is the same setting.
Brief Words Behind
Makes a brief from the writer. The first use takes the words behind the cursor: one word, or the count given. Write the brief, then use it again. The brief is defined to the words in the job dictionary and the brief strokes are removed from the text. Dictionary entry: {@RUN(brief)}; {@RUN(brief 3)} takes three words. In the Define box, the Commands list has it as Brief Words Behind.
Brief Words Behind, Capped
Does what Brief Words Behind does, with the words initial-capped: bank of the south becomes Bank of the South.
bank of the south, then the brief PWO*FT writing Bank of the South
Add Speaker
Adds a speaker from the writer. Write the name, then write the stroke for Add Speaker. The words behind the cursor, two by default, become a named speaker on the roster, and their Steno is defined in the job dictionary to start that speaker's colloquy. No box opens. A job that has no job dictionary gets one, named after the job.
Doctor Chang, then Add Speaker and the next words
Add to Phrase List
Adds the selected words to the Phrase list of the word index. Select two or more words.
11Writing Window
Display settings do not affect the printed transcript. Print settings are in Format > Print Layout.
The display settings are on Settings > Appearance, on the Writing Window and Raw steno tabs.
Change the size of the transcript:
Open Settings > Appearance and click the Writing Window tab.
Pick a Transcript Size, 8 pt to 32 pt, and click Save.
From the keyboard, Ctrl+= and Ctrl+- move the transcript one step up or down the Transcript Size list, and Ctrl+0 on the number pad returns it to 16 pt. When the Codes panel has the keyboard, the same keys size the Codes panel instead.
Display the transcript as it prints:
Open Settings > Appearance and click the Writing Window tab.
Click Match Print Formatting. Print View turns on: the transcript shows in the size nearest the job's print size, with 2.0 line spacing, Full page boundaries and the print font, black on white, without the Paragraph Bar or format marks. PRINT VIEW shows in the mode strip.
To turn it off, click Match Print Formatting again or click PRINT VIEW.
Print View does not change the appearance. Your size, font and colors come back when it is turned off.
Arrange the panels:
The window has four places for panels: the left column, the right column, the second right column and the bottom rail.
Drag a panel by its header into a column or the bottom rail. The bottom rail appears when a panel is placed in it and disappears when it is empty.
Open View > Columns > Second Right Column to add a column outside the right column.
Right-click a panel header and choose Tab the ... column. The panels in that column share one height, and a strip of tabs selects the panel shown. Choose Stack the ... column to give every panel its own height again.
On a tabbed column with two or more panels open, right-click a panel header and choose Pin Panel. The pinned panel stays open above the tabs.
Choose View > Columns, then Collapse Right Column or the one for another column or the rail, to fold it away. Expand Right Column brings it back. The fold buttons are also on the transcript header, at the edge nearest each column.
Right column tabbed: Raw steno, Unresolved and Codes
Open menus as tabs:
A menu opens either floating over the transcript or as a tab in the writing window. Dictionaries, Print Layout, Includes and the dictionary tables open as tabs; most others float. A menu reopens where you last put it.
At the top right of a menu, click one of the three buttons. The lit one is where the menu is now. - Pop Out floats the menu over the transcript. - Tab gives the menu the whole writing window, with a strip of tabs at the top and the job's name first. - Beside the transcript puts the menu in the writing window next to the transcript.
To share the window again, click Beside the transcript on a tab.
Click a tab to show that menu. Click the job's tab to go back to the transcript; the other tabs stay open.
Drag a tab along the strip to change the order.
Drag a tab down onto the left or right half of the writing window to put it on that side of the transcript. With a menu filling the window, the dragged menu shares the window with it, one on each side. For example, Includes on the left and Print Layout on the right.
Right-click a tab to set its color and text color. The job's tab and the tabs on panel columns can be colored the same way.
Dictionaries and Print Layout as tabs, Print Layout filling the writing window
Dialog Settings:
Drag a floating menu by its title to move it, and drag its bottom right corner to size it. It opens there next time. Double-click the title to put it back.
Right-click a menu's title for its Dialog Settings:
Remember Position: the menu opens where you left it. This is the default.
Always Center: the menu opens in the middle every time, even after you drag it.
Size: makes the text and boxes in that menu bigger or smaller, 80% to 150%. The title stays the same size.
Each menu keeps its own settings. The Settings menus with the User and job tabs (Appearance, Keyboard, Numbers and the rest) share one set.
Dialog Settings on a menu's title
Hide or show a panel's scrollbar by right-clicking and choosing Hide Scrollbar or Show Scrollbar. The panel still scrolls with the mouse wheel and the keys.
Transcript Size
Sets the size of the transcript text, 8 pt to 32 pt. The default is 16 pt.
Zoom In
Ctrl+Shift+F7Ctrl+=Ctrl+Shift+=Ctrl+Numpad +
Moves the transcript one step up the Transcript Size list.
Zoom Out
Ctrl+Shift+F8Ctrl+-Ctrl+Numpad -
Moves the transcript one step down the Transcript Size list.
Reset Zoom
Ctrl+Numpad 0
Returns the transcript to 16 pt.
Screen Font
Sets the transcript's font on the screen, by its name in Appearance, for example Courier New. Set the name when you assign the command to a key or add it to a macro.
Screen Font Size
Sets the transcript's size on the screen, for example 14 pt. Set the size when you assign the command to a key or add it to a macro.
Own Size While Raw Steno Shows
Gives the transcript a separate size while Raw steno is displayed. Opening or closing Raw steno swaps the two sizes; Zoom In and Zoom Out change the size in use. Off by default. Also on Settings > Appearance, on the Writing Window tab, as Own size while Raw steno shows.
Line spacing
Sets the space between lines, 1.0 Single to 3.0 Triple. The default is 2.0 Double.
Transcript Font
Sets the on-screen font of the transcript. Fixed width and proportional fonts are listed separately. A proportional font changes how columns line up on screen. The default is Courier Prime.
Zen Mode
F11
Hides what is checked in Zen Settings: by default, everything but the transcript. Run it again, or press Esc, to turn it off. Zen Mode is off each time StarCAT starts.
Zen Mode: the transcript and the quiet line
Zen Settings
Sets what Zen Mode hides: Menus, Toolbar, Side panels, Raw Steno, Line numbers, Page bar, Status bar, Playback Bar, Ruler, Timestamps, Scrollbar, Format box, Page numbers and Untranslate marks. All but Raw Steno, Format box, Page numbers and Untranslate marks hide by default.
Under Shows instead:
Quiet line shows the page, line, time and stroke count at the bottom.
Dim what stays fades what is still shown.
Center the page centers the transcript.
All three are on by default.
Zen Settings with the defaults
Page boundaries
Sets how page breaks display.
Full shows the margins between pages and is the default.
Compact draws a line between pages.
None runs the last line of a page straight into the first line of the next.
Sets the width of the cursor: 1, 2, 3, 5, 8, 12 or 16 px. The default is 2 px. At 8 px and wider, the cursor is see-through, so the letter under it shows.
1 px, 2 px, 3 px and 5 px, top to bottom
Cursor in RocketKeys
Sets the width of the cursor while a mode, such as RocketKeys, is on, 1 px to 16 px. The default is 8 px, so you can see at a glance that the mode is on. It is set apart from Cursor width.
Cursor height
Sets the height of the cursor: Full, Half or Hidden. Hidden is for CART, where the cursor is not wanted on screen.
Full, Half and Hidden, top to bottom
Frame Size
Sets the size of the rails, panels, toolbars and the writing below the transcript, Smaller to Twice normal. The menus are not affected. The default is Normal.
Raw Steno Size
Sets the size of the Raw steno text, 7 pt to 16 pt. The default is 11 pt.
Raw Steno Font
Sets the font of Raw steno. Only fixed width fonts are listed, because the steno keys are laid out on a grid. The default is Cascadia Mono.
Writing Line Slider
The Writing Line Slider is the thin handle on the right edge of the transcript. It sets where the newest line of writing sits during Realtime: at the bottom of the writing window, or higher. Drag it up or down. The transcript moves as you drag, so you can place the line by eye. The slider goes as high as 90 percent of the window, so at least one line of writing always shows. Its place is kept the next time StarCAT opens.
Newest writing held halfway up the window, the Writing Line Slider circled at the right edge
This command turns the slider on and off. Off, the slider is hidden and the newest writing stays where the slider set it. Right-click the slider and click Hide Slider to hide it. On by default.
Match Print Formatting
Ctrl+Shift+F12
Turns Print View on and off. Print View shows the transcript in the job's print layout: the size nearest the printed size, 2.0 line spacing, Full page boundaries and the print font, black on white, without the Paragraph Bar or format marks. The appearance is not changed.
Formatting Marks
Shows and hides formatting marks: a dot on each space, an arrow on each tab and a ¶ at the end of each paragraph. Off by default.
Show Headers and Footers
Shows and hides the headers and footers on each page of the transcript. On by default.
Reporter's Area
Shades the Reporter's Area: the lines written by the last 128 strokes, the part a command from the writer can still reach. A scopist editing alongside the reporter in Team Editing edits up to the shading and not inside it. Screen only. Off by default.
Reporter's Area shaded at the end of the job
Ruler
Shows and hides the ruler above the transcript. The ruler shows the margins, the first line indent and the tab stops of the paragraph at the cursor. On by default.
Two buttons on the ruler say what a change applies to:
This Paragraph: only the paragraph at the cursor.
Every and the style's name, such as Every Question: every paragraph in that style, in this job only.
The ruler starts on This Paragraph when the paragraph already has its own margins or stops, and on the style otherwise.
Drag a margin, the indent or a tab stop to move it. While you drag, the spot in inches and columns shows under the marker.
Click an empty spot on the ruler to add a tab stop.
Drag a tab stop down off the ruler to remove it.
Reset puts this paragraph back on its style, or puts the style back on the stock layout.
Divides the writing window into two panes. The lower pane shows the end of the job as it is written. The upper pane scrolls and edits without losing sight of the writing. Drag the bar between the panes to set the lower pane's height.
Split screen: the upper pane above, the lower pane at the end of the job
Caret Follows Writing
Moves the cursor to the last word written each time a stroke arrives. On by default. Turn it off when someone else is editing the transcript during Realtime. While the mouse button is held down or the split screen is open, the cursor does not move.
Words Per Minute Here
Measures how fast a passage was written. Highlight the words and run it, or put the cursor in a paragraph for the whole paragraph. The status bar gives the words per minute, the word count and the seconds, measured from the first stroke of the passage to the last. Realtime Statistics measures what is being written now; this measures any passage after the fact. Typed text has no stroke times and gives no rate.
Word Count
Counts the words in the job. The count appears as a status message.
Next Mode
Turns on the next mode in the keyboard map. After the last mode, the modes turn off. On a map with one mode, such as RocketKeys, turns that mode on and off.
Collapse Left Column
Alt+[
Collapses or expands the left column. A left column with no panels is not affected.
Collapse Right Column
Alt+]
Collapses or expands the right column.
Second Right Column
Adds and removes the second right column, outside the right column. Removing it moves its panels to the bottom of the right column.
Collapse Second Right Column
Collapses or expands the second right column. Does nothing while the second right column is off.
Collapse Bottom Rail
Alt+\
Collapses or expands the bottom rail. Does nothing when the bottom rail is empty.
Collapse All Rails
Alt+Shift+\
Collapses every column and the bottom rail at once. If all are already collapsed, expands them all. Empty columns are not affected.
Every column collapsed: Raw steno is a tab at the right edge
Swap Right Columns
Swaps the right column and the second right column. Each column's panels, width and collapsed state move together. Does nothing while the second right column is off.
Tab Left Column
Switches the left column between tabs and stacked panels.
Tab Right Column
Switches the right column between tabs and stacked panels.
Tab Second Right Column
Switches the second right column between tabs and stacked panels.
Tab Bottom Rail
Switches the bottom rail between tabs and stacked panels.
Pin Panel in Left Column
Pins the panel shown in the left column above its tabs, or releases the pinned panel. The column must be on tabs with at least two panels open.
Pin Panel in Right Column
Pins the panel shown in the right column above its tabs, or releases the pinned panel. The column must be on tabs with at least two panels open.
Pin Panel in Second Right Column
Pins the panel shown in the second right column above its tabs, or releases the pinned panel. The column must be on tabs with at least two panels open.
Pin Panel in Bottom Rail
Pins the panel shown in the bottom rail above its tabs, or releases the pinned panel. The rail must be on tabs with at least two panels open.
12Panels
Each panel has a switch that shows or hides it. The panels are listed on View > Panels. Any switch or command in this chapter can also be assigned to a key or a stroke; see Keys and Macros.
The Paw Pad holds notes to keep in sight while you write: attorney names, the order of witnesses, terms, briefs to remember.
Open View > Panels > Paw Pad and click a tab. Job is this job only, Case every job in this case, All Jobs every job. A sent word lands in the tab that is open.
Select the word or name on the paper.
Choose Realtime > Send Steno & Text to Paw Pad. The word and its Steno are added under Steno. Notes typed in Add a note go under Notes.
Pin a row to the top:
Click the pin button on the row, or right-click the row and click Pin. The row moves to the top of its section, Steno or Notes.
To unpin, click the pin button again, or right-click and click Unpin.
Read a script into the job:
Choose View > Panels > Open Script and pick the .txt file. The Script panel opens with the file, one line a row.
Click Send each time the speaker reaches the next line. The line goes to the end of the transcript and to every output. Click a line to make it the next one without sending it.
Infobar
Turns the Infobar on and off. The Infobar is a column on the left that lists the commands for the cursor's position, each with its key or number, and messages.
Infobar with the cursor in receipt
Edit Infobar
Opens the Infobar menu. Sets the number of alternates shown and the commands pinned to the top for each place. Unpin Everything removes the pins.
Place: where the settings apply: Everywhere, a paragraph style, or a spot under the cursor.
Number of alternates: 0 to 9.
Show Define Slots: shows Define Slots on the Infobar. It is the same setting as Show on Infobar on the Define Slots menu.
Order and Position: where Commands, D-Briefs and Define Slots sit: 1, 2 or 3, Top or Bottom. Giving one part another's Order swaps them.
Search: finds a command in the list.
The list: check a command to pin it to the place.
Pinned to the top: the Infobar for the place. A pinned row has Move up, Move down and Unpin. Other rows have Pin and Remove. The Alternates row has Move up and Move down, and Remove sets its count to none. Show brings it back.
Put back N removed rows: restores every row removed from the place. It shows when a row has been removed.
Infobar menu
Use Numbers While Editing
Turns plain numbers on and off for the Infobar. On, a plain digit runs that Infobar row while the cursor is in the text, without RocketKeys. To type a number while it is on, use Edit at Caret. Off by default.
Runs an Infobar row by its number, given on the key or macro step: 1 to 9, and 0 for the tenth row.
Status Messages
Turns status messages on and off: the message after a command and the note after a setting changes. Off hides any message showing. The Action Log still records. A failure always shows, and so does the answer of a command like Word Count. Off by default.
Raw Steno
Ctrl+Shift+F5
Turns the Raw steno panel on and off. The panel shows each stroke as it arrives.
Raw steno panel
Steno Visualizer Panel
Turns the Steno Visualizer panel on and off. The panel draws a steno keyboard and lights the keys of each stroke as it arrives.
Steno Visualizer lighting RAOET, receipt
Edit on the panel opens its settings: colors, transparency, key letters and font.
Steno Visualizer settings
Team Editing Panel
Turns the Team Editing panel on and off. The panel has the same host, join and chat controls as the Team Editing menu, so the chat stays in view while you write. See Team Editing.
Team Editing panel: Host this job, or Join with an address or code
Steno Visualizer
Ctrl+Alt+V
Shows or hides the Steno Visualizer in its own window, outside the writing window. Right-click it for its settings.
Phonetics
Shows the phonetic reading of each stroke in the Raw steno panel in place of the Translation. Clicking the column head does the same. Off by default.
Globals List
Turns the Globals panel on and off. The panel lists the job's Globals. Right-click a row to edit or remove the Global.
Globals panel with three Globals
Speakers List
Turns the Speakers panel on and off. The panel lists the job's speakers, each with its color and the shortest Steno that writes it. A speaker with no Steno shown has no Dictionary entry yet, so it cannot be written. Right-click a row to name it, give it Steno or a color, or seat it.
Speakers panel with three speakers
Marked Lines
Ctrl+M
Turns the Marked lines panel on and off. The panel lists each marked line with its page and line number. Click a row to go to the line, or click the mark's words to change them. Print makes a page of the marks to print or send. The dropdown shows every mark or only the marks with one word. It shows when marks have two or more words. The number box sets how many lines show above and below each mark, 0 to 5.
Marked lines panel with four marks
Includes Matching
Turns the Includes matching panel on and off. When you write the first words of an include that has Offer it while I write on, the panel lists the includes that match, best match first. Write Matching Include writes the rest of one.
Script
Turns the Script panel on and off. A script is prepared text sent into the job a line at a time. Open opens a script. Close puts it away.
Script panel, four lines sent, the next one highlighted
Open Script
Opens the Script panel with a chosen .txt file.
Send Line
F12
Sends the next line of the script, or the given number of lines up to 9, to the end of the transcript and to every output. Opens the panel if closed. Send on the panel does the same, and is gray with nothing left to send. Clicking a line sets the next line without sending it.
Codes
Turns the Codes panel on and off. The panel shows the transcript, a row for each paragraph, with its codes drawn as tags around the words, such as <Bold>Smith</Bold>. The paragraph style is a tag at the start of each paragraph. Words found with Find are lit, with no tag.
Click in the words to type there. The typing goes into the transcript.
Type <Bold> in front of words and </Bold> after them. The tags come off and the words turn bold, in one undo. Italic, Underline, Superscript, Subscript, Strikeout, Redacted, Release and Literal work the same way, in any case.
Click a tag and press Enter to change it to another code.
Click a tag and press Shift+Left or Shift+Right to move its end a character.
Highlight words in the panel and right-click to put a format on them.
Right-click the style tag to pick another paragraph style.
Press Ctrl+Z to undo. The keyboard stays in the panel.
Up and Down move a line and keep the column.
The tags for marks: Untranslate, Stop, Conflict, Resolved, Phonetic, Folded, Misstroke, Edited, Stale, Check, Blank, Filled and Spelling. For formats: Bold, Italic, Underline, Superscript, Subscript, Strikeout, Redacted, Release, Literal and Bench.
Codes panel
Codes Size
Sets the text size of the Codes panel. Ctrl+plus, Ctrl+minus and Ctrl+zero on the number pad also change it while the panel has the keyboard.
Codes Font
Sets the font of the Codes panel. Plex Sans by default.
Set Focus to Codes
Moves the keyboard into the Codes panel, opening it if closed. Delete or Backspace on a tag removes the code. Esc returns to the text.
Paw Pad
Turns the Paw Pad on and off. The Paw Pad keeps notes and Steno for this job, this case, or all jobs, with a Find box. Side by side shows All Jobs next to the other tab. Pinned rows come first. To put a note in the job at the caret, click the cursor button on its row, or right-click it and click Insert. Double-click a row to edit it.
Paw Pad with a name sent with its steno, and three notes
Send to Paw Pad
Sends the highlighted words to the Paw Pad.
Send Steno & Text to Paw Pad
Sends the highlighted words and their Steno to the Paw Pad.
Mark Misspellings
Turns spelling marks on and off. Misspelled words are underlined.
Mark Proofreading
Turns proofreading marks on and off. Marks doubled words, unmatched quotes and parentheses, blanks and grammar faults.
Proofreading
Opens the Proofreading menu. Sets the rules Mark Proofreading applies. Mark proofreading at the top turns it on and off. It is off by default, and the rules can't be changed while it is off. Every check is on by default; uncheck one to stop marking it. Press Esc on a mark to remove it for the job.
The paragraph opens on a space, a comma or a period
A question or an answer ending on a comma, a semicolon or a colon: none of the three ends a sentence.
A quotation mark with nothing closing it: within the paragraph.
A parenthesis with nothing closing it: an opening parenthesis nothing closes, or a closing one that opens nothing.
Repeated word
Incorrect A/An: the article does not match the word after it, as in "a apple" or "an car".
Two questions in a row and Two answers in a row: Q after Q, or A after A, with nothing between.
The same speaker twice in a row: a colloquy paragraph naming the speaker who was already speaking.
Question without by-line: a question after anything but an answer, with no by-line between them.
A blank paragraph in the middle of testimony: a blank paragraph with testimony above it and below it.
A subject and a verb that disagree: "they was", "he don't". "If I were" is not marked.
The wrong form of a verb after have, be or a modal: "have went", "could took", or "they taken" with no helping verb.
Custom Rules: the lines in Custom Rules, below.
Proofread Includes also checks the paragraphs that came in from an include, such as a title page. Off by default.
A flag on a subject and verb that disagree, or a verb in the wrong form, offers the corrected words on the Infobar: "They was" offers "They were", and "have went" offers "have gone".
Custom Rules adds rules, one a line: what the Infobar says, an equals sign, then the words to flag. For example, Mismatched verb=he do flags every "he do" and shows "Mismatched verb". Add {a} and a suggestion after the words, as in Mismatched verb=he do{a}he does{a}I do, and each suggestion is a row on the Infobar that writes it in place of the flagged words. A line with no equals sign is flagged as a watch word. Clear Custom Rules to stop flagging them all.
Proofreading menu, Mark proofreading on
Action Log
Turns the Action Log on and off. The Action Log lists each command run, newest first. Each row shows the time, what ran the command and what it did. What ran it is one of these:
The hotkey, such as Ctrl+B.
The Steno, such as KPA\*.
Menu.
A macro and its step, such as My Macro, step 2 of 3.
The control on the screen.
Undo on a row takes that change back. A row for a setting can also have a button that opens its menu. Edit opens Edit Action Log. Clear empties the list.
Action Log
Edit Action Log
Opens the Edit Action Log menu. Sets the commands the Action Log records. Check a command to keep it out of the log. Search finds a command. Reset to Default clears every check.
Edit Action Log menu, titled Action Log
Byte Monitor
Turns the Byte monitor on and off. The Byte monitor shows the bytes arriving from the writer's port in hex and as printable characters.
Byte monitor, titled Off the port, with TX Bolt bytes from a LightSpeed
Close Menu
Closes the open menu from a key or a stroke, the same as the X at the menu's top right, its Close button, or Esc.
X at the top right and the Close button
13Navigation
Each entry is a command. Assign any of them to a key or a stroke, or add it to a toolbar: see Keys and Macros.
Scan the marks:
Open Edit > Go to > Scan Stops and check the kinds of mark to stop on.
Open Edit > Go to > Scan. The cursor moves to the next mark of a checked kind and highlights it.
Correct or Define the word.
Open Edit > Go to > Scan again.
Scan stops on an untranslate
Scan with CAT Scan:
Open Edit > Go to > CAT Scan. The count of marks left appears and the cursor moves to the first one.
Define the word or pick a Conflict choice. After the job retranslates, the cursor moves to the next mark.
Open Edit > Go to > CAT Scan again to turn it off.
CAT Scan on: 1 Untranslate left, the cursor on STRUFRPD
Go to a page and line:
Open Edit > Go to > Page or Line. The cursor moves to the Page box above the transcript.
Type the page number.
To go to a line, press Tab and type the line number.
Press Enter.
Page 2, line 10 typed
Check a word and come back:
Assign Bookmark Swap to a key or stroke. Press it where you are writing. The bookmark is set.
Scroll or search back to the word and fix it.
Press Bookmark Swap again. The cursor returns to the bookmark, and a new bookmark is set where the fix was. To go straight to the end of the writing without a bookmark, press End of Transcript: Ctrl+End on the StarCAT map, Ctrl+Page Down on the Eclipse map.
Find the words written at 10:42:
Open Edit > Go to > Time. The cursor moves to the time box at the top right, above the transcript.
Type 10:42 and press Enter. The cursor moves to the words written then. For the last place you edited, press Last Edit Point (Alt+Shift+L).
Back to Writing
Alt+End
Ends a macro back at the writing. The cursor returns to the end of the writing only if it was there when the macro began, so a macro run during read-back leaves you where you were reading. The Realtime macros end with this command. Pressed on its own while you read back, it does nothing. To jump to the end, use End of Transcript.
Panic Stroke
Ctrl+Alt+Esc
Closes any open menu or popup, turns off any writing mode, pauses audio playback, and returns to the writing. Docked panels stay open.
Scan
Ctrl+TT (RocketKeys)V T (RocketKeys)
Goes to the next mark of a kind checked in Scan Stops. The search wraps from the end of the transcript to the start.
Scan Backward
Ctrl+Shift+TR T (RocketKeys)
Goes to the previous mark of a kind checked in Scan Stops. The search wraps.
CAT Scan
Ctrl+Shift+M
Turns CAT Scan on and off. On, a Define or a Conflict choice moves the cursor to the next mark after the job retranslates; typing over a word does not. Turning it on reports the marks left of each kind and goes to the first. CAT Scan uses the scan command run last, so it can step through Conflicts only or Untranslates only.
Scan Stops
Opens the Scan Stops menu: which marks Scan and Scan Backward stop on. The menu counts the checked kinds in the open job, leaving out a kind with none. On by default: Untranslate, Scan stop, Conflict, Conflict answered for you, Phonetic, Blank to fill and Oops. Off by default: Misstroke, nearest entry, Folded ending, Misspelling, Typed in, Out of date and Proofreading. Single-kind commands, such as Next Untranslate, are not affected.
Scan Stops menu, with the defaults
Read Through
Moves the cursor down the transcript one line at a time, for proofreading. Use it again, or press any other key, to stop. Read Through Backward reverses the direction. Set the rate in Lines a minute on the Proofreading menu, 1 to 600, 30 by default. It stops at the end of the job.
Read Through Backward
Moves the cursor up the transcript one line at a time at the Proofreading rate. Use it again, or press any other key, to stop.
Read Aloud
Reads the transcript aloud from the cursor. Use it again, or press any other key, to stop. A stroke from the writer also stops it.
Next Untranslate
Ctrl+UU (RocketKeys)V U (RocketKeys)
Goes to the next Untranslate. The search wraps.
Previous Untranslate
Ctrl+Shift+UR U (RocketKeys)
Goes to the previous Untranslate. The search wraps.
Next Unresolved Conflict
Ctrl+\Shift+C (RocketKeys)V R (RocketKeys)
Goes to the next unresolved Conflict. The search wraps.
Previous Unresolved Conflict
Ctrl+Shift+\R R (RocketKeys)
Goes to the previous unresolved Conflict. The search wraps.
Next Conflict
Ctrl+OC (RocketKeys)V C (RocketKeys)
Goes to the next Conflict, unresolved or answered for you. An answered Conflict keeps its mark until you clear it; a Conflict you resolved has none and is not found. The search wraps.
Previous Conflict
Ctrl+Shift+OR C (RocketKeys)
Goes to the previous Conflict, unresolved or answered for you. The search wraps.
Next Phonetic
Goes to the next Phonetic translation. The search wraps.
Previous Phonetic
Goes to the previous Phonetic translation. The search wraps.
Next Misspelling
Goes to the next misspelled word. The search stops at the end of the transcript.
Previous Misspelling
Goes to the previous misspelled word.
Next Proofreading Mark
Ctrl+Alt+F10
Goes to the next Proofreading mark, the blue line. The search stops at the end of the transcript.
Previous Proofreading Mark
Ctrl+Alt+Shift+F10
Goes to the previous Proofreading mark.
Next Marked Line
F10
Goes to the next marked line. A word given on the key or macro step, such as {@RUN(nextmark Oops)}, limits it to marks with that word. The status bar shows the reason for the mark.
Next mark on line 2, with its reason, check name, on the status bar
Previous Marked Line
Shift+V (RocketKeys)Shift+F10
Goes to the previous marked line. A word given on the key or macro step limits it to marks with that word.
Last Q
Alt+Shift+GR Q (RocketKeys)
Goes to the start of the last Question.
Last A
R A (RocketKeys)
Goes to the start of the last Answer.
Next Question
V Q (RocketKeys)
Goes to the start of the next Question. With none after the cursor, the cursor stays where it is.
Next Answer
V A (RocketKeys)
Goes to the start of the next Answer.
Next Speaker
V S (RocketKeys)
Goes to the start of the next Speaker paragraph.
Previous Speaker
R S (RocketKeys)
Goes to the start of the previous Speaker paragraph. Inside one, the first press goes to its start.
Last Edit Point
Alt+Shift+LShift+Z (RocketKeys)
Goes to the last edit. Use it again to go back one more edit, up to five; the sixth press returns to the most recent.
Bookmark Swap
Sets a bookmark at the cursor. Use it again to go to the bookmark and set a new one where the cursor was. The bookmark is not shown and is not saved in the job.
Go to Page or Line
Shift+G (RocketKeys)Alt+G
Puts the cursor in the Page box above the transcript. Type a page number and press Enter. Tab moves to the Line box and the time box. With the Line box empty, the view moves to the page and the cursor does not.
Go to Time
Puts the cursor in the time box above the transcript. Type a time and press Enter. The cursor moves to the words written at that time.
Next Word
Right ArrowL (RocketKeys)O (RocketKeys)
Goes to the next word.
Previous Word
Left ArrowJ (RocketKeys)Shift+O (RocketKeys)
Goes to the previous word.
Next Sentence
Alt+FShift+K (RocketKeys)
Goes to the start of the next sentence.
Previous Sentence
Alt+BShift+I (RocketKeys)
Goes to the start of the current sentence, then the sentence before.
Next Punctuation Mark
Ctrl+Alt+.
Goes to the next punctuation mark.
Previous Punctuation Mark
Ctrl+Alt+,
Goes to the previous punctuation mark.
Word After Next Punctuation
Ctrl+.Shift+. (RocketKeys)
Goes to the start of the word after the next punctuation mark.
Word After Previous Punctuation
Ctrl+,Shift+, (RocketKeys)
Goes to the start of the word after the previous punctuation mark.
Next Character
Ctrl+Right ArrowShift+L (RocketKeys)
Goes to the next character.
Previous Character
Ctrl+Left ArrowShift+J (RocketKeys)
Goes to the previous character.
Next Line
Down ArrowK (RocketKeys)
Goes to the next line, in the same column.
Previous Line
Up ArrowI (RocketKeys)
Goes to the previous line, in the same column.
Start of Line
Home[ (RocketKeys)
Goes to the start of the line.
End of Line
End] (RocketKeys)
Goes to the end of the line.
Next Paragraph
Ctrl+Down ArrowH (RocketKeys)
Goes to the start of the next paragraph.
Previous Paragraph
Ctrl+Up ArrowY (RocketKeys)
Goes to the start of the previous paragraph.
Start of Paragraph
Goes to the start of the current paragraph.
End of Paragraph
Goes to the end of the current paragraph.
Screen Up
Shift+Y (RocketKeys)PageUp
Moves up one screen.
Screen Down
Shift+H (RocketKeys)PageDown
Moves down one screen.
Start of Page
Alt+Home
Goes to the first line of the current printed page.
End of Page
Goes to the last line of the current printed page.
Top of Screen
Ctrl+Home
Goes to the start of the first line wholly on the screen.
Bottom of Screen
Ctrl+End
Goes to the end of the last line wholly on the screen.
Start of Transcript
Ctrl+PageUp
Goes to the start of the transcript.
End of Transcript
Ctrl+PageDown
Goes to the end of the transcript. The view scrolls with the writing again.
14Editing
Typing over a word changes the text, not the Steno under it. A later Global updates words translated from that Steno, but not words you typed over.
Each entry is a command. Assign any of them to a key or a stroke, or add it to a toolbar: see Keys and Macros.
A command that acts on the word at the cursor acts on the selection when there is one.
Shift with any movement key extends the selection. Use the Select commands below for one-press selections, and in macros and Steno, which have no Shift key.
Commands that take a count, such as Select Next Word, extend by one unless the key or macro step gives a number.
Correct a word:
Select the word.
Type the correction.
In RocketKeys, plain keys run commands. Run Edit at Caret to open the edit box on the word, type the correction and press Enter.
To correct the stroke instead of the word, open Edit > Correct Steno. The Steno is corrected and the word retranslates.
Change the name in a by-line:
Click in the name, such as JONES in BY MS. JONES:.
Type, or press Backspace. The name changes in this by-line and in the automatic by-lines after it.
Backspace in front of the name, or on its last letter, deletes the whole by-line.
Insert a table:
Put the cursor where the table goes. In the middle of a paragraph, the paragraph breaks there, the same as pressing Enter.
Open Edit > Insert > Table. Type the number of Columns and Rows and click Insert.
Type in the first cell. Press Tab to go to the next cell.
Each row is a paragraph in a new table style: Table, Table 2 and so on. Drag the tab stops on the ruler to change the column widths of that table only. A word too long for a cell wraps inside its column. Grid lines show the table on screen and do not print. Align Left, Center and Align Right in a table line up the cell the cursor is in, or every cell in the selection.
Paste an earlier copy:
Open Edit > Clipboard. The panel lists the last ten copies and cuts, newest first.
Click Paste on its row. From the writer, a stroke defined as {@RUN(clippaste 3)} pastes the third row.
Click Lock on a row you paste often. A locked row stays through newer copies and restarts.
Check spelling:
Put the cursor where the check should start.
Open Edit > Spelling > Check Spelling from Here. The check stops on each misspelled word with suggestions. Pick one, or type the word, and go on.
Find and replace:
Open Edit > Replace. The Find bar opens with the cursor in the Replace with box.
Type the text to find in the Find box.
Type the replacement in the Replace with box.
Click Replace to replace the highlighted hit and go to the next, or All to replace every hit.
Replace changes words, not Steno. Two kinds of hit are left as they are: a hit whose strokes are shared with the words around it, and a hit inside an include. The bar reports how many of each were left.
dog replaced with hound by All, before and after
Track changes:
Open View > Panels > Track Changes Pane.
Type an Editor ID. A blank ID uses the Windows user name.
Turn on Track Changes. Edits from now on are recorded under that ID.
Open View > Panels > Display Changes to color each editor's changes on the page.
Editor 1 to Editor 5 each have a color; a sixth editor takes Editor 1's color. Globals, layout and fields are not tracked.
The pane lists each change with its page and editor. Click a column to sort. Double-click a row to go to the change. The deletions box sets how deleted text shows on the page. Struck shows the deleted words struck through where they were. Mark shows a small ‸ there instead; point at it to read the words. Pane only shows nothing on the page, only in the pane. A word typed over shows only its new word on the page; the old word is in the pane.
Accept keeps a change: its color goes and the words stay.
Reject undoes it, so the Steno translates as it did before.
Accept All and Reject All do every change.
Undo (Ctrl+Z) undoes an Accept or a Reject, and Redo makes it again.
Accept and Reject work on the row picked in the pane, or on the change at the cursor. All four are on the Edit menu. Accept Change and Reject Change are also on the right-click menu over a change.
cat typed over with lion, tracked under Scopist
Use Mistran Watch:
Mistran Watch is a list of words that often come out wrong, checked before proofreading. Running it finds every place they appear, so you check each one.
Put the cursor on a word, or select a phrase.
Open Edit > Spelling > Mistran Watch and choose Send to Mistran Watch, Send to Case Mistran Watch or Send to Job Mistran Watch.
Before proofreading, open Edit > Spelling > Mistran Watch > Run Mistran Watch. Every hit is listed in the Search results panel by page and line.
Mistran Watch run with doctor on the list
All three lists are searched together. Pick the list by how far the word reaches:
Mistran Watch: misstrokes, which can come out wrong in any job, such as generally for gently.
Case Mistran Watch: a word for this case, such as a party's name, in every job of the case. In a job with no case, the word goes on the Job list.
Job Mistran Watch: a word for this job only.
An entry that begins and ends with a letter matches whole words only. An entry cannot contain { } | or ^.
Seat the speakers:
The seating chart is a picture of the room: a card in each chair with the speaker's name and the Steno for their speaker stroke. Glance at it to find the stroke for the person who starts talking.
Open Edit > Transcript > Speakers. The seating chart is at the top of the menu.
Click Seat on a speaker's row, or drag the row onto the chart to pick the chair.
To see the chart over the transcript, click Show the Cards on the Speakers menu. Show All Speakers is the same thing as a command, to assign to a key or stroke. Held on a key, the cards stay up until you let go.
Remove a Question and its Answer from the writer:
At the end of the Answer, write the stroke for Select Back to Last Q. The selection runs back to the Q symbol, which is not included.
Write the stroke for Delete. The Question's paragraph stays, empty, ready for the next Question.
Select three words:
Put the cursor in the first word and open Edit > Select > Word.
Open Edit > Select > Next Word twice. From the writer, one stroke defined as {@RUN(selnextword 2)} does the same.
Select Word
Selects the word at the cursor.
Block Mark
M (RocketKeys)F7
Turns on Block Mark: the movement keys select from the cursor, as if Shift were held. Use it again, press Esc, or click in the transcript to turn it off.
Select Sentence
Selects the sentence at the cursor, through its ending punctuation.
Second sentence selected
Select Paragraph
Selects the paragraph at the cursor.
Select Paragraph with the cursor on home: the whole Answer selected
Select Page
Selects the printed page at the cursor. To remove a range of pages, open Edit > Delete > Delete Pages.
Select Next Word
Extends the selection forward by one word, or by the number given.
Select Word on doctor, then Select Next Word with 2
Select Previous Word
Extends the selection back by one word, or by the number given. Inside a word, the start of that word counts as the first.
Mark More
Adds one more word to the end of the selection, or the number given. When words are selected, it is row 9 on the Infobar.
Mark Previous
Adds one more word to the front of the selection, or the number given. When words are selected, it is row 0 on the Infobar.
Select Next Sentence
Extends the selection forward by one sentence, or by the number given.
Select Previous Sentence
Extends the selection back by one sentence, or by the number given. Inside a sentence, the start of that sentence counts as the first.
Select One Character Right
Extends the selection one character right.
Select One Character Left
Extends the selection one character left.
Select Back to Last Q
Extends the selection back to the start of the last Question. The Q symbol is not included, so deleting the selection leaves the paragraph.
Select Back to Last Q, used at the end of the Answer
Select Back to Last A
Extends the selection back to the start of the last Answer. The A symbol is not included.
Select Transcript
Selects the whole transcript.
Drop Selection
Esc
Clears the selection. The cursor does not move.
Edit at Caret
Ctrl+NN (RocketKeys)
Opens the edit box on the word at the cursor. Characters and Fields work as they do on Special Character.
doctor typed over with physician
Correct Steno
Corrects the Steno at the cursor instead of the text. The edit box opens on the strokes. The corrected stroke retranslates.
Steno TKOG corrected to KAT: dog becomes cat
Type in Some Text
Types the given text at the cursor, from a key or macro. The text is entered as typed characters, so {Q} appears as three characters.
Force Translation
Alt+Shift+F
Translates the given text as a Dictionary entry. {Q} starts a Question. No Steno is added. Any paragraph, capitalization or Conflict syntax that works in a Dictionary entry works here. A line of commands only, like {Omit Text Box}, may change nothing you can see, so the status line says Forced and the line.
Overtype
InsertInsert (RocketKeys)
Turns Overtype on and off. On, a typed character replaces the character at the cursor.
Undo
Ctrl+ZAlt+BackspaceZ (RocketKeys)
Undoes the last change. A define is skipped once you write a stroke after it; remove it in the Dictionary editor.
Redo
Ctrl+Shift+Z
Redoes the last change undone.
History
Lists every change to the transcript, newest first. Undo and Redo step through the list in order. Back to Here on a row undoes every change down to and including that row. Redo brings them back one at a time.
Three changes, newest first
Edits
Lists the words typed over the Translation, with what each replaced, when, and its status. Undo on a row restores the Translation of the strokes.
doctor typed over with physician
Globals
Opens the Globals menu, Edit > Transcript > Globals, which lists every Global made in the job (see Global a word in Defining).
Edit opens the Define box filled in from the row.
Unglobal takes the Global back: the text reads as it did before, and the entry comes out of the Dictionary it was defined into.
Under the list, a second table lists the Universal Table and every other job that has Globals, to add their Globals to this job. Use it on the next volume of a case, which spells the same names.
Show lists that job's Globals. Each row has Add, which makes that one Global in this job, and Edit, which opens it in the Define box first.
Add Globals makes all of them in this job.
No Dictionary changes, and the other job stays as it was.
On the Universal Table's rows, Remove takes the entry out of the table.
Globals menu with three Globals
Speakers
Opens the Speakers menu: the job's speaker roster and the seating chart. A speaker is a slot: write {S 3} and slot 3 is speaking. Name the slot and every paragraph it wrote takes the name, the ones written before too.
Speakers menu with three speakers
Name a speaker:
Type the slot number in Slot, such as 3.
Type the name in Name, such as MR. SMITH, and click Name or press Enter.
To set the Steno that writes the slot, write it on your writer and click The Last Stroke, or type it in Steno. Click Set. The entry goes in your Dictionary as {S 3}. A Steno that already writes another slot is refused.
The table lists every slot the job has written, named or not:
Slot, Name, and Steno, the shortest Steno that writes it.
Said: how many paragraphs the slot has.
Shortcut: what you type to pick a named speaker from the speaker list, such as SM for MR. SMITH. Empty means the speaker's number. Shortcuts are saved in the job and the case. A Shortcut another speaker already has is refused, and the old one comes back.
Color: the color the name shows in on the screen. No Color takes it off.
Rename puts the slot in Slot, to type a new name. Seat puts the speaker on the seating chart; Unseat takes them off it. Take Off takes the name off the slot.
Under these, a second table lists the entries in your Dictionary that write a speaker as plain text, such as P1:. Naming a slot changes nothing they wrote. Use Slot 1 defines the Steno as {S 1} in your Dictionary, so it writes slot 1 from then on.
Clear all speakers:
Click Clear All Speakers….
Check This Job, All future jobs in this case, or both. This job is checked to start with. All future jobs in this case is gray when the job isn't in a case.
Click Clear, or Cancel to leave them.
This job takes every name off its slot, and the paragraphs print SPEAKER 3 again. All future jobs in this case clears the case's speakers, so a new job in the case starts with none. The jobs already made keep theirs. The status reads, for example, "3 speakers cleared from this job."
Clear All Speakers, with This job checked
Seating chart:
The seating chart shows a card for each seated speaker, in the place they sit in the room. Drag a card to move it. Drag a card's corner to make every card bigger or smaller. Right-click a card for Unseat and the speaker's name, and Unseat Everybody when more than one speaker is seated. Point to the small chart on the menu to show the cards over the transcript.
Show the Cards puts the cards over the transcript, as Show All Speakers does. It then reads Hide the Cards.
Hide them again after *n* Seconds: hides the cards shown over the transcript after that many seconds, 1 to 60. On, 3 seconds, by default. The Auto Hide Speakers command turns this box on and off.
On top: Name or Steno on the top line of each card.
Slot number: Small, Large, or Leave it off.
Transparency: how much of the transcript shows through the cards, 0 to 80 percent. 25 by default.
Keep the room for: This Job keeps the chairs in the job only. This case and Every job save the room, so a speaker seated before sits in the same chair when named in another job of the case, or in any job. A job in no case uses the Every job room. The chairs are saved each time one moves. This Job by default.
Line the cards up: while you drag, a card snaps into line with the other cards or the middle of the room, and a thin line shows where. On by default.
Seating Chart
Turns the seating chart on the Speakers menu on and off. Turning it on opens the Speakers menu.
Five speakers seated, the witness at the head
Show All Speakers
Shows the seating chart over the transcript. With Hide them again after *n* Seconds on, on the Speakers menu, they hide after that many seconds (default 3). On a key, the seating chart stays up while the key is held. To move or unseat a speaker, see Seating chart.
Seating chart over the transcript, each speaker with a color and steno
Hide All Speakers
Hides the seating chart shown over the transcript.
Auto Hide Speakers
Turns Hide them again after *n* Seconds, on the Speakers menu, on and off. Off, Show All Speakers leaves the seating chart up until you use Hide All Speakers. On by default.
Spell Check
Alt+Shift+S\ (RocketKeys)
Opens the Spell Check menu, which lists every word in the transcript that is on no word list. See Check spelling.
Accept on a flagged word accepts it in every job. Reject flags the word from now on. Each decision is listed under Your decisions, and Take Back on its row undoes it.
docter flagged: no list has it
Add Word List, under Word Lists on the same menu, adds a word list from a file, such as a medical word list: a text file, one word per line. Every word in it is considered to be correctly spelled. Remove on a list's row takes the list off.
Search: type a few letters to show only the words with them, in the flagged words and in Your decisions.
Count the words in your dictionary: every Translation in your dictionaries counts as a correctly spelled word. The line under it says how many. On by default.
Stop on capitalized words, Stop on all-caps words, Stop on mixed-case words and Stop on words with a digit: the check passes over words such as Kowalski, EXHIBIT, McKenna and 14-B. Check one to have the check stop on those words when no list has them. Off by default.
Ask Google for a spelling no list has: the word the check stops on is sent to Google, and Google's spelling is offered with the suggestions, marked from Google. Nothing else is sent. Off by default; while it is off, nothing is sent.
Checks spelling from the cursor forward, stopping on each misspelled word with suggestions. With Proofreading on, the check also stops on A/An, agreement, verb form, a repeated word and your proofreading rules. Ignore All on one of those hides it for the rest of the job.
Typeover List
Opens the Typeover list. After a word is typed over, the edit box offers that replacement the next time the word appears. Rows read that=the,what,he, newest first, three replacements deep. An exclamation point at the end of a row locks it: a later typeover does not replace what the row holds. Edit the rows in the Rows box, one a line, and click Save.
After doctor was typed over with physician
Autoreplacements
Opens the Autoreplacements list. Rows read adn=and or otr=on the record, one a line. Type a listed word and press the space bar, and it is replaced, in the transcript and in the edit box. Spell check replaces listed words without stopping. Ctrl+Z right after a replacement gives back what you typed.
The case follows what you typed: Adn becomes And. A whole-word row with a capital in it matches only that case. A replacement with its own capitals, such as nyc=New York City, keeps them. A replacement can hold a paragraph code such as {P}.
A star at one end changes part of a word. wiht*=with turns wihtout into without, and *toin=tion fixes the end of any word. A whole-word row wins over a partial one.
Save keeps the rows. Each list has its own Save.
Add Common Typos adds a starter list of common slips to the box. Save keeps them.
This job only holds rows for the open job. A row there wins over your row for the same word.
In the edit box, type the replacement over a word and press Alt+7. The pair goes on your rows.
In the Define box, type fmc=Ford Motor Company as the Translation and press Alt+7. The row goes on your rows and nothing is defined.
Autoreplacements list with three rows
Add Autoreplacement
Alt+Shift+A
Opens the Autoreplacements list with the word at the cursor as a new row, such as adn=, with the cursor after the equals sign. Type what it becomes and click Save. A word already on the list opens its row, with the replacement selected.
Special Character
Ctrl+W
Opens the edit box at the cursor with the character map, for accented letters and symbols such as the degree and section signs. Characters shows or hides the map. Fields inserts a field.
Character map
Insert Table
Puts a table at the cursor, with the number of columns and rows you choose. Each row is a paragraph in a new table style. Tab goes from cell to cell. Grid lines show on screen and do not print.
Insert Table box: Columns and Rows
Right-click inside a table for the commands below. Outside a table they are grayed out. Each one is a single Undo. Deleting the last row or the last column deletes the table.
Insert Row Above
Adds an empty row above the row the cursor is in.
Insert Row Below
Adds an empty row below the row the cursor is in.
Delete Row
Deletes the row the cursor is in, with its text.
Insert Column Left
Adds an empty column to the left of the cursor. The column the cursor is in is split in two, so the table keeps its width.
Insert Column Right
Adds an empty column to the right of the cursor, split from the column the cursor is in.
Delete Column
Deletes the column the cursor is in, with its text. The column beside it takes its width.
Delete Table
Deletes the whole table the cursor is in.
Swap Rows
Swaps the row the cursor is in with the row under it. The cursor moves with the row, so pressing it again moves the row on down the table.
Copy Rows
Copies the row the cursor is in, or every row the highlight touches, for Paste Rows Above and Paste Rows Below. Works in a read-only job.
Cut Rows
Copies the row the cursor is in, or every row the highlight touches, and deletes them from the table. Cutting every row deletes the table.
Paste Rows Above
Puts the rows from Copy Rows or Cut Rows above the row the cursor is in. The rows must have the same number of columns as the table.
Paste Rows Below
Puts the rows from Copy Rows or Cut Rows below the row the cursor is in.
Split Table
Makes two tables, starting the new table at the row the cursor is in. Both keep the same column widths until one is changed. The cursor cannot be in the first row.
Join Tables
Joins the table the cursor is in with the table under it. Both must have the same number of columns, with nothing but blank paragraphs between them. The joined table takes the column widths of the top one.
Insert Image
Puts a picture on its own paragraph under the cursor. Pick a PNG, JPEG or BMP file. StarCAT copies it into the job folder's images folder. The picture is as wide as the paragraph at most, and half a page tall at most.
Right-click a picture to open its menu: Cut, Copy, Paste, Image Size…, Align Left, Align Center, Align Right, Wrap Text and Delete.
Right-click menu on a picture
Image Size
Sets how many lines tall the picture at the cursor stands. Open Edit > Insert > Image Size…, or right-click the picture and select Image Size…. Type the lines and press Enter. The width follows the picture's shape, no wider than the paragraph. A picture stands 2 lines at least and half a page at most; a number outside that is kept to it, and the status bar says so. Ctrl+Z puts the picture back as it was.
A seal 12 lines tall, Image Size 6: the seal stands 6 lines tall and half as wide.
Image Size at the right click, 6 typed
On the Includes menu, put the cursor on the {Image} line and use Image Size the same way. A picture that came in from an include or a dictionary entry is not resized in the job, and the status bar says so.
Align Image Left
Stands the picture at the cursor against the left margin. Right-click the picture and select Align Left. Pictures are on the left when inserted.
Align Image Center
Stands the picture at the cursor in the middle of the line. Right-click the picture and select Align Center. A centered picture does not wrap.
Align Image Right
Stands the picture at the cursor against the right margin. Right-click the picture and select Align Right.
A seal on the left, Align Right: the seal stands against the right margin, on the same lines.
On the Includes menu, the three Align commands work on the {Image} line under the cursor.
Wrap Text
Turns text wrap on and off for the picture at the cursor. Right-click the picture and select Wrap Text; a check mark shows when it is on. On, the words after the picture are set beside it for the lines it stands: on its right for a picture on the left, on its left for a picture on the right. Print, PDF, RTF and Word keep the same line breaks. Ctrl+Z turns it back.
A seal 6 lines tall, aligned right, Wrap Text: the words after it run beside the seal, on its left, for the seal's 6 lines.
Wrap Text on a seal aligned right
Text does not wrap:
Beside a centered picture. Wrap Text is gray on its menu. Align it left or right first.
When fewer than 20 columns are left beside the picture. The picture stands on its own lines.
Beside a picture that came in from an include.
Find
F5F (RocketKeys)
Opens the Find bar. The search can be limited to a paragraph type, a kind of mark, or paragraphs with a print command. See Find and replace, Replace and Find Steno.
Up and Down arrows: Previous and Next. Enter is Next.
List: lists every hit in the Unresolved panel, by page and line.
Aa: match case. It turns on when you type a capital.
"w": whole words only.
Steno: finds by Steno. Replace works on words, not Steno.
Any words dropdown: only Untranslates, Phonetic translations, Conflicts, and the other kinds it lists.
No pattern dropdown: a shipped pattern, instead of typing one.
Anywhere dropdown: only Questions, Answers, Colloquy, Parentheticals, Speakers or Plain text.
Any command dropdown: only paragraphs with Page breaks, Layout changes or Includes.
Replace with, Replace and All: replace this hit, or every hit.
Find dog: 2 hits
Find Steno
Opens the Find bar set to search by Steno.
Click keys on the Steno keyboard to build a stroke. Each stroke has its own keyboard, with a blank one after it.
Or type Steno or sounds in the box. A space is the slash between strokes. For sounds, the bar says Finding and the Steno. For neither, it says That is not steno.
List, Aa, "w" and the dropdowns are gray, and the Replace row is hidden.
Click Steno to turn it off.
Replace
Ctrl+H
Opens the Find bar. The cursor is in the Replace with box when Find has text, and in Find when it is empty. Enter in Replace with does Replace. See Find and replace. A search by paragraph type alone can't replace, and the bar says Replace needs words to find.
dog replaced with hound by All
Find Next One
Ctrl+L
Goes to the next hit of the last search.
Find One Before
Ctrl+Shift+LShift+F (RocketKeys)
Goes to the previous hit of the last search.
List What Find Found
Lists every hit of the current search in the Search results panel, by page and line. Steno searches are not listed. With no search yet, the Find bar opens. The Search results panel is the Unresolved panel.
Delete False Start
Deletes from the start of the paragraph to the cursor. The paragraph and its Q or A stay. Whole strokes are deleted, so a cursor inside a word deletes that word.
Cursor after --
Repeat Prior Sentence
Repeats, at the cursor, the sentence before the cursor. With no sentence before the cursor in the paragraph, the last sentence of the paragraph above is used, without its ending punctuation. A number from 1 to 9 repeats that many sentences.
Cursor after right?
Put in Time
Puts in the time the last word before the cursor was written. Text given on the key or macro step, such as a closing parenthesis, goes directly after the time.
Cursor after at
Insert Time/Date
Alt+Shift+ICtrl+Alt+Shift+I
Opens the Insert Time/Date box at the cursor. The time and date start at the time the word at the cursor was written, or now when there is none. Change either before it goes in.
Preset formats lists the formats, each showing what it writes.
The Format box takes codes such as %H:%M. Pick a code in the list under it and click Add to put it in at the cursor.
The Output shows what goes in. Click Insert or press Enter. A selection is replaced.
The format is kept for the next time until StarCAT closes.
Search the Web
Opens your browser on a Google search for the selected words. Only the selected words are sent, and only when you use it. Right-click a word for Search the Web too.
Copy
Ctrl+CB C (RocketKeys)Ctrl+Insert
Copies the selection.
Cut
Ctrl+XB S (RocketKeys)B T (RocketKeys)Shift+Delete
Cuts the selection.
Delete
Deletes the selection without putting it on the clipboard, the same as the Delete key.
Paste
Shift+InsertCtrl+VB P (RocketKeys)
Pastes at the cursor, or over the selection. Line breaks in the pasted text become spaces.
Keep Steno on Paste
Turns Keep Steno on Paste on and off. On, words copied from a transcript paste with their Steno. Off, they paste as typed text. On by default.
Paste Words Only
Pastes as typed text, without the Steno, whatever Keep Steno on Paste is set to.
Clipboard
Opens and closes the Clipboard panel. The panel lists the last ten copies and cuts, newest first, each with Paste and Lock. A locked item is not pushed out by newer items and is kept after StarCAT restarts. Unlock All unlocks every item. Clear All empties the list.
Three copies, newest first
Paste Clipboard Item
Pastes a numbered item from the Clipboard panel. Item 1 is the newest.
Track Changes
Turns Track Changes on and off for the open job. On, each edit is recorded under the Editor ID in the Track Changes pane.
Display Changes
Turns Display Changes on and off. On, tracked changes are colored on the page by editor.
Track Changes Pane
Opens and closes the Track Changes pane.
Accept Change
Keeps the picked change, or the change at the cursor, and takes its color off.
Reject Change
Undoes the picked change, or the change at the cursor. The Steno translates as it did before.
Accept All Changes
Keeps every change in the job and takes the colors off.
Reject All Changes
Undoes every change in the job.
Mistran Watch
Searches the transcript for every entry on the three Mistran Watch lists. Hits are listed in the Search results panel.
Send to Mistran Watch
Adds the word at the cursor, or the selected phrase, to the user Mistran Watch list, which applies to every job.
Send to Case Mistran Watch
Adds the word at the cursor, or the selected phrase, to the Case Mistran Watch list.
Send to Job Mistran Watch
Adds the word at the cursor, or the selected phrase, to the Job Mistran Watch list.
Open Mistran Watch List
Opens the user Mistran Watch list in the default text editor, one entry per line.
Open Case Mistran Watch List
Opens the Case Mistran Watch list in the default text editor. For a job in no case, opens the job's list.
Open Job Mistran Watch List
Opens the Job Mistran Watch list in the default text editor.
Delete Pages
Deletes whole pages by number. Type pages and ranges separated by commas, such as 5, 15-20, 29. Later pages move up and renumber. One Undo restores all of them.
The menu shows how many pages the transcript has. Delete is gray until the box holds valid pages, then reads Delete and the count.
Delete Pages menu
Delete Next Word
Ctrl+Delete
Deletes the word after the cursor.
Delete Previous Word
Deletes the word before the cursor.
Cursor after the second ran
Delete Word
D (RocketKeys)Ctrl+Backspace
Deletes the whole word the cursor is in, on or nearest, wherever in the word the cursor is. With a selection, deletes the selection.
Extend Sentence
X (RocketKeys)
Takes the ending punctuation off the sentence at the cursor and opens Edit at Caret where it stood. Type the rest of the sentence and its punctuation, then press Enter. Esc leaves the sentence as it was. A sentence with no ending punctuation is extended at its end.
Check Word
Alt+S
Opens the spell check box on the word at the cursor. The box closes after one answer. A word spelled right shows Spelled right: and the word on the status bar.
Replace with: the new word. Type it, or pick a numbered suggestion below. Press a digit to pick one, 0 for the tenth, or use the up and down arrows. Enter does Change.
Change: changes this word.
Change All: changes every instance in the job, with an E-Define.
Ignore: leaves this word.
Ignore All: leaves the word for the rest of this job.
Add: stops flagging the word, in every job.
Delete: flags the word from now on, in every job.
Definition: looks up the word in the browser. The box stays open.
Global…: opens the Define box.
Pause: closes the box and keeps the place. Run the command again to go on from there.
Cancel: closes the box.
At a proofreading stop, Change All, Add, Delete, Definition and Global… do not show.
Delete Line
Ctrl+Y
Deletes the line at the cursor.
Delete to Start of Line
Ctrl+Shift+Backspace
Deletes from the cursor to the start of the line.
Delete to End of Line
Alt+Y
Deletes from the cursor to the end of the line.
Delete to End of Paragraph
Alt+Shift+Y
Deletes from the cursor to the end of the paragraph.
Delete Next Character
Shift+D (RocketKeys)Delete
Deletes the character after the cursor.
Delete Character Before
Backspace
Deletes the character before the cursor.
Tab to Next Stop
Tab
Inserts a tab. The text moves to the next tab stop set in the paragraph style.
15Word Fixes
One command fixes a word in place, without retyping it. Most of them act on the word at the cursor, or on the selection. Assign the ones you use to a stroke and fix words as you write.
Spelling: swap their for there, swap two words, change capitals.
Joining and splitting: stitch, hyphenate, join two words, split one.
Marks around words: quotes, parentheses, dashes, possessives.
Endings and punctuation: add or take off an ending, change the period.
Numbers and citations: rewrite a number, format a rule citation.
Find and change: replace a word behind the cursor from the writer.
A command that takes a count reaches back that many words. With no count it takes one word, or the selection.
Each entry is a command. Assign any of them to a key or a stroke, or add it to a toolbar: see Keys and Macros.
Correct a word from the writer:
Write the wrong word again.
Write the correct word.
Write the stroke for Fix Last Word. The last occurrence of the wrong word behind the cursor is replaced, and the two words just written are removed.
dog written again, then cat, then KHA*EUPBG for Fix Last Word: dog becomes catDog and cat written, then Fix Last Word
Change a marked block with one key:
Select words inside one paragraph.
Press a key: - - stitches the words with hyphens: matter of fact becomes matter-of-fact. On one word it stitches the letters: Smith becomes S-m-i-t-h. - . stitches with periods the same way: S.m.i.t.h. - Space takes the spaces out: 555 1212 becomes 5551212. - , puts commas around the block: I said Smith then becomes I said, Smith, then. - " puts double quotes around the block.
Press the same key again to undo it. The block stays selected.
A letter typed on a block replaces it, as before. A block that runs into the next paragraph is replaced by any key.
Alternate Spelling
Ctrl+Alt+A
Replaces the word at the cursor with the next spelling in its alternate list: their becomes there, then they're. The lists are on Edit > Spelling > Word Lists > Alternate Words. After the lists come words that sound the same, such as sum and some. A word with neither is not changed.
Their becomes There
Find Next Alternate
Turns alternate searching on and off. On, when the word at the cursor has no alternate, Alternate Spelling changes the next word in the paragraph that has one. Off by default.
On, with the cursor after The: their is the next word with an alternate, and becomes there
Alternate Words
Ctrl+Alt+X
Opens the Alternate Words menu. Each row is a list of spellings that Alternate Spelling steps through, words or phrases. The menu starts with the shipped lists. A list removed from the menu is no longer used.
Alternate Spelling three times on Their: There, They're, and back to TheirAlternate Words menu
Alternate Words: one set a line, in turn order: to too two. For a set with phrases, put each one in angle brackets: <to><too><two>. ~ closes up a space.
Search: finds a line. Enter goes to the first one found.
Save: keeps the box. Nothing else here is kept until you click Save.
Import: adds the lines of a .txt file to the box.
Export: saves the box to a .txt file that Import can read.
Restore Defaults: puts the shipped sets back in the box as they ship. Lines you added stay.
Swap with Previous Word
Ctrl+Alt+T
Swaps the word at the cursor with the word before it: dog red becomes red dog. Punctuation does not move.
Cursor on red: dog red becomes red dogCursor on he: said he, becomes he said, and the comma stays
Swap with Next Word
Ctrl+RShift+R (RocketKeys)
Swaps the word at the cursor with the word after it: red dog becomes dog red. Punctuation does not move.
Rewrites the number behind the cursor, or at the end of a selection, in another format. Pick the format from the Number Format button on the toolbar, or right-click the number and point to Number Format. Each row shows what the number becomes before you pick it. A format that does not fit the number shows nothing.
Right-click on 2500, then Number Format
The formats, with examples:
Format
Written
Becomes
Figures
three
3
two hundred
200
Words
25
twenty-five
$25
twenty-five dollars
Money
2500
$2,500
1.5
$1.50
Cents
25
25 cents
Percent
40 percent
40%
Two Decimal Places
1.5
1.50
25
25.00
Fraction
three and a half
3 1/2
one quarter
1/4
Date
91826
9/18/26
10152026
10/15/2026
Month and Day
January 62019
January 6, 2019
Time
1015
10:15
three
3:00
Phone
2125551212
(212) 555-1212
5551212
555-1212
Ordinal
25
25th
three
3rd
Ordinal Words
25
twenty-fifth
Roman
1999
MCMXCIX
Roman Lowercase
12
xii
Federal Rule
45D3A4
45(d)(3)(A)(iv)
Money on a number followed by cents keeps the amount: 25 cents is $0.25. Press it again for 25 cents. Otherwise Money and Cents keep the figure and write over the word after it: 25 dollars under Money is $25, and $50 under Cents is 50 cents.
Pick the same format again for the next reading of the same digits. A date of five or seven digits can be read more than one way: 91826 becomes 9/18/26, then 91/8/26. A format with only one reading goes back to the digits.
A percent sign, an ordinal ending or a Roman numeral that came from your Steno stays when you pick another format. One that a format wrote is taken off again.
Words: 25 becomes twenty-five
Convert Numbers
Ctrl+Shift+3
Opens the Number Format list at the cursor, the same list as the Number Format button. Each row shows what the number becomes. Does nothing when the cursor is not on a number.
Format Federal Rule
Formats a rule or statute citation written as one run, with the levels in parentheses. Fingerspell the citation as one run, then pick Federal Rule from Number Format. Works on the word just written or the word at the cursor.
12B6 becomes 12(b)(6), as in Fed. R. Civ. P. 12(b)(6).
26A2B becomes 26(a)(2)(B), as in Fed. R. Civ. P. 26(a)(2)(B).
45D3A4 becomes 45(d)(3)(A)(iv), as in Fed. R. Civ. P. 45(d)(3)(A)(iv).
56A becomes 56(a).
The levels, in order: the number as written, (a) lowercase letter, (1) number, (A) capital letter, (i) lowercase Roman numeral, (I) capital Roman numeral. A letter takes its level's case, whatever case you wrote it in.
Two numbers in a row cannot be told apart, so put a hyphen before a sixth level: 401A9B4-2 becomes 401(a)(9)(B)(iv)(II), as in 26 U.S.C. § 401(a)(9)(B)(iv)(II). A hyphen between any two levels is allowed.
The section sign (§) is not written by this format. To put it in, open Edit > Insert > Special Character (Ctrl+W), click § in the Marks row, and press Enter.
Special Character: § in the Marks row
A word that is not a citation is not changed.
Stitch Letters
Ctrl+Alt+H
Stitches the word at the cursor, or a run of single letters: Mary becomes M-a-r-y, and B R A U N becomes B-R-A-U-N. Use it again to remove the stitch. Numbers and hyphenated words are not changed.
A witness spelling a name for the record: fingerspell the letters, then stitch them.
BROWN fingerspelled, then stitched to B-R-O-W-N
Sticky Space
Shift+` (RocketKeys)Ctrl+Shift+Space
Changes the space at the cursor to a sticky space, which keeps the two words on the same line. Use it again to change it back. On the Edit > Word menu. Dictionary entry: {@RUN(spaces)}.
To write a sticky space from the writer, write a stroke defined as {~} between the two words, or put a caret in an entry: St.^Louis.
Toggle Apostrophe S
Ctrl+Alt+P
Adds or removes a possessive: dog becomes dog's, and back. A word ending in s takes the apostrophe alone: witness becomes witness'. A contraction is not changed.
dog becomes dog's
Cycle Possession
Alt+A` (RocketKeys)
Steps the word through singular, singular possessive, plural possessive and plural: dog, dog's, dogs', dogs, dog. A capitalized name is treated as a singular. A word with no plural is handled as Toggle Apostrophe S.
dog, dog's, dogs', dogs, and back to dog
Contraction
Ctrl+Alt+N
Opens a contraction into its words, or closes two words into a contraction: do not becomes don't. Use it again for the next reading: she'll becomes she will, then she shall, then she'll. Only pairs on the shipped contraction table are changed.
Changes the case of the word at the cursor. With no case given, steps through initial cap, all caps and lowercase: doctor becomes Doctor, then DOCTOR, then doctor.
doctor, then initial cap, all caps and lowercase
Cap Previous Words
Initial-caps the words behind the cursor. Give it a count for a name or title: united states of america with a count of 4 becomes United States of America.
A count of 2: john smith becomes John Smith
Move to Next Word on Capital
Turns capital stepping on and off. On, Cap Word moves the cursor on to the next word, so pressing it again caps that one: john smith takes two presses to become John Smith. Only when you have put the cursor in the text, not while you write. Off by default.
Move to Next Word on Punctuation
Turns punctuation stepping on and off. On, the cursor moves to the end of the next word after Punctuation or Ending Punctuation, so pressing it again marks that word. Only when you have put the cursor in the text, not while you write. Off by default.
Lowercase Capital You Type in Front Of
Turns capital dropping on and off. On, a word typed in front of the first word of a sentence takes the capital, and the old first word drops to lowercase. On by default.
On: Then typed in front of The, and The drops to the
Auto Capitalization on Delete
Turns Auto capitalization on delete on and off. On, deleting the capital letter of a sentence's first word capitalizes the next letter. Off, the next letter keeps its case, as in Notepad. Off by default.
Quote Last Words
Ctrl+Alt+'
Puts double quotes around the words behind the cursor. Give it a count for more than one word, or use it again to take in one more word. With a count of 5 after boy, He said the dog was a good boy. becomes He said the "dog was a good boy."
A count of 5, with the cursor after boy
Quote Back to Start of Sentence
Puts double quotes from the cursor back to the start of the sentence. With the cursor after boy, He said the dog was a good boy. becomes "He said the dog was a good boy."
Cursor after boy
Single Quotes Round Last Words
Ctrl+Alt+Shift+'
Puts single quotes around the words behind the cursor, or around the selection. Give it a count for more than one word. With cat selected, the cat sat becomes the 'cat' sat.
Parentheses Round Last Words
Ctrl+Alt+9
Puts parentheses around the words behind the cursor. Give it a count for more than one word. With a count of 2 after cold, The room was very cold that day. becomes The room was (very cold) that day.
A count of 2, with the cursor after cold
Dashes Round Last Words
Ctrl+Alt+=
Puts reporter dashes (--) around the words behind the cursor. Give it a count for more than one word. With a count of 2, The car I think was red. becomes The car -- I think -- was red. Use it again to take the dashes off.
A count of 2, with the cursor after think
Hyphenate Back to Space
Ctrl+Alt+-
Changes the space behind the cursor to a hyphen: well known becomes well-known. Give it a count to hyphenate more words.
Cursor after known
Squish
Ctrl+Alt+Shift+-
Removes the space behind the cursor: boiler plate becomes boilerplate. Give it a count to join more words.
any one becomes anyone
Split Word
Ctrl+Alt+S
Splits a compound word in two: greenhouse becomes green house. Use it again for the next split, notice becomes no tice, then not ice, and again to rejoin the word. Both halves must be in the spelling dictionary, unless the split is on the Split Words menu.
Offer This Split First
Adds the split shown at the cursor to the Split Words menu, so it is offered first for that word. The text is not changed.
Never Offer This Split
Adds the split shown at the cursor to the Split Words menu as excluded, so it is never offered for that word. The text is not changed.
Split Words
Opens the Split Words menu. The menu shows two lists, Offered first and Never offered, one row each in the form notice=not ice. Click Save to keep changes.
Split Words menu
Put Ending on Word
Adds the named ending to the word at the cursor and corrects the spelling of the root: run becomes running. An ending already there is removed; a different ending is replaced. If the result is not a word, nothing changes.
Ing ending: walk becomes walking
Remove Suffix
Removes one ending from the word at the cursor, shortest first: wanderings becomes wandering, then wander. Nothing is removed unless the rest is a word.
Shave Current Word
Shift+S (RocketKeys)
Removes the last letter of the word at the cursor.
Shave Previous Word
S (RocketKeys)
Removes the last letter of the word before the cursor.
Untranslate Word
Ctrl+F7Shift+U (RocketKeys)
Changes the word at the cursor, or the word before it, back to its raw steno, ready to define or global.
Prefix/Suffix
Ctrl+KW (RocketKeys)
Opens the ending keys as a list at the cursor. Press the letter of an ending to put it on the word at the cursor; spelling is adjusted where required. Settings opens the Prefix/Suffix Keys menu.
Prefix/Suffix Keys
Ctrl+Alt+E
Opens the Prefix/Suffix Keys menu, Edit > Word > Prefix/Suffix Keys, which lists the ending keys. Each key is a Ctrl+Alt+Shift chord and a suffix. A suffix followed by ^, such as un^, is a prefix and goes on the front of the word.
Key and Suffix: type a letter and a suffix and click Add.
Turn Off: the key does nothing now. A shipped suffix moves to the Off: list.
Off: lists what is turned off, under Suffixes, Prefixes and Hyphen. Turn On gives it a key, shown on the list at the top. Turn On is gray when no letter is free.
Prefix/Suffix Keys menu
Punctuation
Puts the named punctuation mark at the cursor. A different mark there is replaced. The same mark there is removed.
Changes the ending punctuation of the sentence at the cursor. With no mark named, steps through period, question mark, exclamation point and reporter dash. With a mark named, puts that mark.
A period named, with the cursor after room
Take Last Mark Off
Ctrl+Alt+Backspace
Removes the nearest punctuation mark behind the cursor. With a mark named (comma, dash, period), removes the nearest mark of that kind.
Dash after there, then taken off
Accept Guess
Alt+Enter
Accepts a Phonetic translation, a misstroke read from the nearest entry or a folded ending, and removes its mark. Works on the word at the cursor, or the last one behind it.
Fix Last Word
Replaces a wrong word written earlier. Write the wrong word, write the correct word, then write the stroke for Fix Last Word. The last occurrence of the wrong word behind the cursor is replaced, and the two words just written are removed.
Search and Delete
Deletes a word written earlier. Write the word, then write the stroke for Search and Delete. The last occurrence of the word behind the cursor is deleted, and the word just written is removed.
Replace Last Untranslate
Replaces the last Untranslate. Write the correct word, then write the stroke for Replace Last Untranslate. The word replaces every stroke of the last Untranslate behind the cursor, and is removed from where it was written.
Apply Universal Table
Applies the Universal Table to the open job: Edit > Transcript > Apply Universal Table. The Universal Table is a list of Globals kept apart from any job, the way Case CATalyst's Xtra Global Table is. Use it for fixes you make in every job, such as a scopist fixing the same misstroke in every job a reporter sends.
To add a Global to the table, check Add to Universal Table in the Define box.
Only the Globals the job does not have yet are made, so applying it again after a few more defines adds just the new ones.
No Dictionary changes.
To see or remove the table's entries, open Globals and click Show on the Universal Table row.
User Definitions
Opens the User Definitions menu. Each row is a word, a definition and alternate spellings. The definition shows in the Infobar when the cursor is on the word, and in the Spell Check box. Spell check offers the alternate spellings first.
Filter: shows the rows with the text in the word, the definition or an alternate spelling.
Entry type: Any, Numbers (a word with a digit) or Phrase (a word with a space).
New: adds a row. It is kept once it has a word.
Delete: deletes the row.
User Definitions menu with three words
16Marks
A mark flags words by how they were written or changed. Mark colors are set on the Writing window tab of Settings > Appearance.
Clear marks:
Open View > Panels > Unresolved. Every Untranslate, Scan stop, Conflict and Phonetic mark is listed in page order, with its page and line.
Click a row to go to it; double-click it to hear it. Click Define on an Untranslate or a Phonetic mark, Pick on a Conflict, or Replace on a Scan stop.
The row leaves the list when the mark is gone. Edit > Go to > Scan goes from one mark to the next.
Untranslate
Marks Steno with no Dictionary entry. The Unresolved panel offers Define.
An Untranslate in a sentenceBefore and after Define: STRUFRPD becomes Stafford
Stop
Marks words printed by a Dictionary entry such as {U:CHECK SPELLING}. Scan stops on them. Not counted as an Untranslate. The Unresolved panel offers Replace.
Conflict
Marks Steno with more than one Translation in the Dictionary and none picked. The Unresolved panel offers Pick.
A Conflict: SKP-FBZ, and because of
Phonetic
Marks a word read phonetically by Phonetic translation from a stroke with no Dictionary entry. The Unresolved panel offers Define.
A Phonetic translation: TPHRAPB, flan
Resolved
Marks a Conflict picked by Answer conflicts the way you answered them before. Scan still stops on it. Click it to pick a reading. The mark stays until you do.
Folded
Marks a word whose stem came from the Dictionary and whose ending was added from the stroke. The result can be a different word.
A folded ending: TPHAOEUTDZ, at nights
Misstroke
Marks a stroke read as the Dictionary entry one key away, by Use closest guess from dictionary on misstroke.
A misstroke fix: KAULGD, called
Edited
Marks typed text that no stroke wrote.
Outside typed at the head of the line
Stale
Marks words you typed over a translation when the strokes under them now translate differently, for example after a Dictionary change. Your typed words stay. Right-click the mark and pick History to see what changed, and fix the words if they are no longer right.
Blank
Marks an unfilled field, such as [DATE], or an unfilled [ ] blank.
Filled
Marks a filled field. The text changes when the field is answered again.
Spelling
Marks a word the spelling dictionary does not have, with a wavy red underline.
Bench
Marks the text between {@BENCH(ON)} and {@BENCH(OFF)}, or {@BENCH(TOGGLE)}. The text stays in the job and goes to no Realtime output.
Unresolved
Shows and hides the Unresolved panel. Lists every Untranslate, Scan stop, Conflict, Conflict answered for you and Phonetic mark in page order, with page, line and a Define, Replace or Pick button. Also shows search results sent to it, and Marks goes back to the marks.
Menu opens the Scan Stops menu. Right-click the panel for Hide Type and Hide Page and Line, which read Show once hidden.
Unresolved panel with one Untranslate
17Suggestions/D-Briefs
D-Briefs shows a brief for a word or phrase written in two or more strokes when a Dictionary has a shorter entry for it. It shows during Realtime, as the words are written.
Live Suggestions are guesses at what an Untranslate should be, offered during Realtime: Dictionary entries one key off its Steno, alone or joined with the word before or after it, and the words its Steno sounds like. KOPB/TKPWHROFPL/RAT offers conglomerate.
The job and the Dictionary do not change until a suggestion is taken.
Replace with Live Suggestion, Define Live Suggestion and Stop Suggesting Last One have no key until you give them one. Assign them to a key or a stroke; see Keys and Macros.
Take a Live Suggestion:
Write past an Untranslate. After four more translated words, the Live Suggestions for it appear in the D-Briefs column, numbered.
Double-click a suggestion, or use Replace with Live Suggestion with its number. The Untranslate is replaced. The suggestion taken is highlighted and the others are struck through.
To keep it, use Define Live Suggestion with the same number.
Suggestion 1 taken: jumped is highlighted, the other two are struck throughSame, with the steno boards off
Stop a brief being suggested:
Write the phrase the long way. A brief you will not use shows in the D-Briefs column.
Use Stop Suggesting Last One. That brief is not offered again.
Ask for suggestions on a word already written:
Select the Untranslate, or the words it should be.
Choose Realtime > Request Live Suggestion. The set appears in the D-Briefs column, numbered, and Replace with Live Suggestion takes one by its number.
One set shows at a time; a newer Untranslate replaces it. The number shown, 2 to 5, is set in Translate options.
D-Briefs column: three Live Suggestions for SKWRUPLD, then briefs for phrases written in full
D-Briefs
Ctrl+Shift+B
Opens the D-Briefs menu, Dictionary > D-Briefs. Lists briefs in the Dictionaries for phrases written out the long way in this job, ranked by strokes saved. Word List reads a .txt file, one word or phrase to a line, and lists briefs for it.
Below them, in a second color, Suggestions lists made-up one-stroke briefs for phrases written out that no brief covers: the longest phrase only.
On each row, the buttons are:
Define: on a Suggestion, opens Define with its Steno and Translation.
Stop Suggesting: stops offering the phrase. The phrase moves to Not suggested under the list. Press it there to bring it back.
Reject Outline: stops offering that outline. The outline moves to Outlines not offered under the list. Press it there to bring it back.
Click anywhere else on a row to open Look Up on the phrase.
Suggest after sets how many times a phrase is written before it is suggested: Off, or 2 to 5 times. The default is 2.
Max words sets the longest phrase listed, 1 to 10 words. The default is 6.
One stroke only lists only one-stroke briefs, in both sections.
Both settings also apply to the D-Briefs column. Neither applies to words you select and ask about.
A Suggestion translates as soon as it is offered, so you can write it right away. When you write one, it is copied to the job dictionary with the comment D-Brief. A job with no job dictionary keeps it in this job only, and the status bar says so. To keep them, open Define and set Add to to job Dictionary. Pick a job dictionary, or a new one for this job, and click Use. The Suggestions you wrote go into it. The settings are in the left column: see D-Briefs Settings.
A word you fingerspell is suggested the first time, at the top of the column. When every one-stroke brief for it is taken, the Suggestion is its opening sounds written twice: Pindrel is PEUPBD/PEUPBD. A Suggestion for the first word of a sentence is defined lowercase, unless the word's own entry is capitalized.
A Suggestion only uses a stroke that no loaded Dictionary defines and that does not start a longer entry, so it never takes a stroke you already write. Suggestions are one stroke where they can be, and never use the number bar.
D-Briefs with steno boards on: TPRO*PLT = from pig to man was written and is checkedSame D-Briefs column with steno boards offEdit Dictionaries, job dictionary: TPRO*PLT = from pig to man, comment D-BriefD-Briefs: phrases written in full, with the brief for each
D-Briefs Panel
Turns the D-Briefs column on and off, View > Panels > D-Briefs. The column shows briefs for phrases as they are written, and the Live Suggestions.
Each brief is one line, Steno = Translation, such as KA = cardiologist. The steno is in its kind's color, and each kind has a faint row color:
Reminder: a brief already in a loaded Dictionary, for words you wrote out the long way.
Suggested: a made-up brief that is in no Dictionary yet.
Written: a brief you wrote or accepted after it was offered. It turns gray, moves to the Written rows and gets a check mark.
The three kinds go Suggestions, Reminders, Written. D-Briefs Settings sets the order and how many rows of each.
Right-click the column, away from a Live Suggestion, for Show Row Colors (or Hide Row Colors) and Translation First (or Steno First). Both are remembered. Row Colors start off. The colors are on the Frame tab of Appearance.
D-Briefs Settings
Opens the D-Briefs menu, whose left column is D-Briefs Settings: Settings > D-Briefs Settings, the D-Briefs tab of Settings > Settings, or right-click the D-Briefs column.
Panel and Infobar. A table of Rows and Order for each kind, Reminders, Written and Suggestions, once for the D-Briefs panel and once for the Infobar. Rows is how many of the newest rows of that kind show. 0 hides the kind. Order sets which kind comes first. The panel and the Infobar start at 3 Reminders, 1 Written and 3 Suggestions.
Panel font and Infobar font: Default, or one of the fonts the steno board offers, such as Courier New or Verdana. Verdana by default.
Panel font: Default, Courier New, Verdana, Georgia, Times New Roman
Panel size and Infobar size: Smaller, Normal, Large, Larger, Largest, or Twice normal. Large by default.
Panel Bold and Infobar Bold print the rows in bold. On by default.
Panel Bold off, then on
Panel spacing and Infobar spacing: the space between the rows, 0 to 8 pixels. 1 by default.
Transparency lets what is under the panel show through when it is popped out. 0 by default.
Pin New Briefs keeps the new briefs you write in the Written rows until the job closes, past the Rows count: a Suggestion you wrote, or a D-Brief you accepted. Briefs already in your Dictionaries keep the count. It is on by default.
Show briefs phonetically shows each brief with its common chords as letters: TKPWHRO shows as GLO, AO*EUPLTS as AO*IMTS, PWAPBLG as BAJ. EU shows as I. The asterisk and the other vowels stay as written. Point at the letters to see the steno. On by default.
Show briefs phonetically off, then on: HRAEUPBLG shows as LAIJ
Phonetic Letters is the list Show briefs phonetically reads, one chord a line: STKPW = Z. A right-hand chord starts with a hyphen: -PBLG = J. Where two chords fit, the longer one is used.
Reminders.
Minimum savings is how many strokes a brief must save over what you wrote before it is a Reminder, 1 to 5. The default is 2.
Avoid number bar shows a Reminder only for an outline without the number bar. When every outline for the words uses it, there is no Reminder. It is off by default.
Suggestions.
Suggest after and Max words are the same settings as on the D-Briefs menu.
Minimum keys is the fewest keys each stroke of a Suggestion has: Any, or 2 to 6. The default is Any.
One stroke only lists only one-stroke briefs.
Confirm in Define: a Suggestion does not translate when you write it. Use Accept D-Brief, which opens it in Define, and press Enter. Off by default.
Write Twice to Define: off, a Suggestion you write translates and is copied to the job dictionary with the note D-Brief. On, writing it once translates it but copies nothing. Write it twice in a row to copy it: the two strokes translate as one and the Translation shows once. Off by default. With Confirm in Define on, it does nothing.
For example, with from pig to man offered as TPRO*PLT, write TPRO*PLT/TPRO*PLT. The transcript reads from pig to man, once, and TPRO*PLT is in the job dictionary. - Allow numbers suggests briefs for phrases with numbers in them, such as May 12, 2007. It is off by default. - Archive all suggestions saves every Suggestion offered to *jobname*_AB.json in the job folder.
D-Briefs Settings: Rows and Order for the panel and the Infobar, Pin New Briefs onD-Briefs Settings, lower down: Reminders and Suggestions
Accept D-Brief
Opens the Suggestion at the top of the D-Briefs column in Define, Dictionary > Accept D-Brief. Nothing is defined until you press Enter. It works with the column shut. With no Suggestion, the status bar says No D-Brief to accept. Eclipse's {ABACCEPT} runs it, and {ABREJECT} runs Stop Suggesting Last One.
Stop Suggesting Last One
Stops the most recent suggestion in the D-Briefs column from being offered again.
Replace with Live Suggestion
Replaces the Untranslate with the Live Suggestion of the given number. Double-clicking a suggestion in the column does the same.
Request Live Suggestion
Requests Live Suggestions for the highlighted words. The set appears in the D-Briefs column, which opens if closed.
Define Live Suggestion
Defines the Live Suggestion of the given number. The entry goes to the Dictionary set in Translate options under Live Suggestion defines, the job Dictionary by default.
Show Live Suggestions
Turns Live Suggestions on and off. On by default. The switch is Show Live Suggestions on the Input tab of Realtime > Translate Options. Or right-click the D-Briefs column and click Hide Live Suggestions (or Show Live Suggestions).
Off, the D-Briefs column shows no Live Suggestions and an Untranslate stays as written. Replace with Live Suggestion and Define Live Suggestion still work by number. Request Live Suggestion does nothing, and the status bar says Live Suggestions are hidden. Turn on Show Live Suggestions in Translate Options.
The other Live Suggestion settings are under it on the Input tab. All of them are User settings.
Live Suggestions: how many show, 2 to 5. The default is 3.
Live Suggestion defines: the Dictionary Define Live Suggestion writes to: the job dictionary, This case (the case dictionary, shared by every job in the case), or the Main Dictionary. The default is the job dictionary. This case, for a job with no case, writes to the job Dictionary.
Oops on replace: Replace with Live Suggestion puts an Oops mark on the word it writes, so you can find it again. On by default. Example: replacing SKWRUPLD with uphold leaves uphold marked Oops. See Oops.
Translation first: for a word Phonetic translation wrote, that word is Live Suggestion 1. Off, the Phonetic word is left out of the list. On by default.
Translate Options, Input tab: the Live Suggestion settings
18Paragraphs
The paragraph style sets the indent, the speaker name and the line numbering. Change the style instead of typing spaces.
Each entry is a command. Assign any of them to a key or a stroke, or add it to a toolbar: see Keys and Macros.
Change a paragraph style:
Put the cursor in the paragraph.
Press the key for Change Paragraph Style, with the style set on the key or macro step. The paragraph is reformatted and the paragraphs below renumber.
Question and Answer have their own commands, listed below.
Fix a Question written as an Answer:
Put the cursor in the paragraph.
Open Edit > Paragraph > Swap Q and A. The A becomes a Q; the words do not change.
Break a long Answer where the witness paused:
Put the cursor where the pause was.
Press the key for Continuation Paragraph. The rest of the Answer starts a new paragraph, indented, with no second A.
Start day two at page 1 of volume 2:
Put the cursor in the first paragraph of the day.
Press the key for Volume from Here and type 2.
Press the key for Page Number from Here and type 1. Later pages count up from 1; the pages above keep their numbers.
Page numbers, volumes, paragraph numbers and page layouts are attached to a paragraph, not a page number, so they keep their place when the transcript repaginates.
Make Question
Shift+Q (RocketKeys)
Changes the paragraph at the cursor to a Question. Words and punctuation are not changed.
Line 1 made a Q
Make Answer
Shift+P (RocketKeys)
Changes the paragraph at the cursor to an Answer.
Line 2 made an A
Make Colloquy
Changes the paragraph at the cursor to Colloquy.
Swap Q and A
Changes a Question to an Answer, or an Answer to a Question. Other paragraphs are not changed; use Change Paragraph Style.
A switched to Q
Quote Paragraph
Alt+Shift+Q
Changes the paragraph at the cursor to its quoted twin: a Question to Question (quoted), which prints "Q., and the same for Answer, Continuation and Colloquy. With a block over several paragraphs, all of them change. Shift+Alt+Q on the Eclipse map.
The twins are set in Translate Options > Advanced > Quoted text paragraph map, one paragraph=quoted twin per line. Empty puts back the map Eclipse ships.
Unquote Paragraph
Alt+Shift+N
Changes a quoted paragraph back to its plain style. With a block, every paragraph in it changes. Shift+Alt+N on the Eclipse map.
Certify Question
Ctrl+Shift+Q
Starts a new paragraph at the cursor and puts the Certified question include in it: (Question certified.) The first time, the include is saved to Edit > Insert > Includes, where its wording can be changed. The sample Certified questions index line lists each one by page and line. Ctrl+Shift+Q on the Eclipse map.
Interrupted Q and A
Shift+B (RocketKeys)
Marks an interruption: reporter dashes at the end of the paragraph cut off and at the front of the paragraph where the same speaker resumes. Works on Questions, Answers and colloquy; colloquy pairs by speaker name. The cursor can be in either half or the paragraph between. A pair already dashed is not changed; use Undo to remove the dashes.
Interrupted Q and A used on the A: dashes after the and before store
Question/Answer Segue
Marks a Question that runs straight into its Answer: reporter dashes at the end of the Question and at the front of the Answer. The cursor can be in either paragraph. A pair already dashed is not changed.
Question/Answer Segue: dashes after store and before Yes
Join to Previous Paragraph
Ctrl+J
Joins the paragraph at the cursor to the paragraph before it.
A joined to the paragraph above
Start New Paragraph
Ctrl+PEnter
Starts a new paragraph at the cursor with the text after the cursor. With no style named, the new paragraph continues the current one. With a style named, it takes that style.
New paragraph at I
Continuation Paragraph
Starts a continuation paragraph at the cursor: a second paragraph of the same Question or Answer, indented, with no Q or A.
Continuation paragraph at Later
Change Paragraph Style
Ctrl+1 → S 1Ctrl+2 → S 2Ctrl+3 → S 3Ctrl+4 → S 4Ctrl+5 → S 5Ctrl+6 → S 6Ctrl+8 → S THE COURTCtrl+0 → S THE WITNESS
Changes the paragraph at the cursor to the style set on its key or macro step: Question, Answer, Colloquy, a style, or a speaker. With a selection, every paragraph in it changes.
Insert/Modify Paragraph
F8
Opens the paragraph style list at the cursor. Type the letter beside a style, or click it. Inside the words, the paragraph splits at the cursor and the words after take the style. At the start of a paragraph, the paragraph changes. With a selection, every paragraph in it changes. The last row is [Set paragraph status], which opens the status list.
Starts a paragraph of the style set on its key, at the cursor: Question, Answer, Colloquy, Parenthetical, Fixed, Centered or Right Flush. Inside the words, the paragraph splits at the cursor and the words after take the style. At the start of a paragraph, the paragraph changes.
Insert Speaker
F2Ctrl+9
Lists the job's speakers at the cursor, each with its Shortcut: the one set on the Speakers menu, or else its number. Type the Shortcut or click the name to start that speaker's paragraph at the cursor. At the start of a paragraph, the paragraph changes. To add a speaker, pick the last row, [Speakers], to open the Speakers menu.
Typing picks at once when what you typed is a whole Shortcut and no longer Shortcut starts with it. Otherwise the highlight moves to the first Shortcut or name that starts with what you typed, and Enter takes it: with speakers 1 and 12, typing 1 waits. Case does not count. Backspace takes back a character.
Toggle Paragraph Style
Switches a paragraph between the two styles set on its key or macro step, for example Answer and a speaker. A paragraph in neither style takes the second.
Page Break
Ctrl+Shift+Enter
Puts a page break above the paragraph at the cursor. On a paragraph that has one, removes the page break.
Page Layout from Here
Opens a list of page layouts. The layout applies from the paragraph at the cursor to the next layout change, and starts a new page. Pick The job layout to return to the job's own layout.
Page Layout from Here, on The job layout
First Line Indent
Sets the first line indent of the paragraph at the cursor, in inches from the left margin. Only that paragraph changes. Leave it blank to return to the style's indent.
Line Numbers on This Page
Turns line numbers off on the page at the cursor, such as a title page or an index page, and back on at the top of the next page. Use it again to turn them back on. The setting is attached to the paragraph, so it keeps its place when the pages move.
Align Left
Lines up the paragraph at the cursor, or every paragraph in the selection, on the left, in the center or on the right. Align Left returns the paragraph to its style. A Dictionary entry with {Centered} or {Right Flush} does the same as Center or Align Right.
Paragraph Status
Sets the status of the paragraph at the cursor, or of every paragraph in the selection: Rough, Scoped, Edited, Proofread, Final, Reverted or Broadcast. A status is a tint behind the paragraph on the screen, so a team can see what has been done to each part. Nothing prints. One status at a time: the next replaces it, and Off removes it. A Dictionary entry with {Status Rough} does the same.
Status Graph
Opens the Status Graph: a line for each paragraph status, with the job from start to end. Each line is filled in the status color where paragraphs have that status, with the percent of the job beside it. Click a line to go to that paragraph.
Paragraph Bar
Shows the first letter of each paragraph's style in a square at the left of the line numbers: Q, A, C. Click a letter to put the cursor at that paragraph and open the paragraph style list. On by default.
Single spaces the paragraph at the cursor, or every paragraph in the selection. Use it again to return to double spacing.
Page Number from Here
Sets the number of the page at the cursor and starts a new page number section. Later pages count up from that number. Leave it blank to remove the number.
Delete Page Number Section
Removes the page number section at the cursor. Its pages count on from the page above.
Volume from Here
Starts a new volume at the page at the cursor. The page number does not reset; set it with Page Number from Here. Leave it blank to remove the volume.
Delete Volume
Removes the volume at the cursor. Its pages return to the volume above.
Paragraph Number from Here
Sets the number of the next numbered paragraph, from the cursor on. A numbered paragraph is one whose style has a Paragraph number (in) in the print layout, often the Questions. Type 40 and that paragraph prints 40. Later paragraphs count up from that number. Leave it blank to remove the number.
Number Paragraph
Numbers the paragraph at the cursor, for a colloquy paragraph that needs a number where the Questions are numbered. Use it again to remove the number.
19Formatting
Character formatting applies to the selected words. Each format command is a toggle: use it on formatted words to remove the format. The format is attached to the strokes, so it stays through a Retranslate.
Each entry is a command. Assign any of them to a key or a stroke, or add it to a toolbar: see Keys and Macros.
The Codes panel shows each format as tags around the words, such as <Bold>Smith</Bold>. To remove a format, click its tag in the panel and press Delete. See Panels.
Codes panel: doctor in Bold and Italic
Bold, italic or underline a word:
Select the word, or put the cursor in it.
Open Format > Bold, Italic or Underline, or press Ctrl+B for Bold. On the StarCAT map, Ctrl+I and Ctrl+U are Italic and Underline.
To remove the format, select the word and use the same command again.
Keep the page and line numbers after a late correction:
Make the correction. The line wraps and the lines below move.
Select the words pushed onto the next line.
Press the key for Keep on Line Above. The words stay on their line, past the margin, and the page and line numbers below do not change.
Bold
Ctrl+B
Applies bold to the selected words. The mark is Bold.
doctor selected, then Bold
Italic
Applies italic to the selected words. The mark is Italic.
doctor selected, then Italic
Underline
Applies underline to the selected words. The mark is Underline.
doctor selected, then Underline
Superscript
Raises the selected words above the line, at full size, and replaces a subscript. The mark is Superscript.
doctor selected, then Superscript
Subscript
Lowers the selected words below the line, at full size. The mark is Subscript.
doctor selected, then Subscript
Strikeout
Draws a line through the selected words. The mark is Strikeout.
doctor selected, then Strikeout
Plain
Ctrl+Space
Removes all formatting from the selected words, including redaction and font color. Keep Capitals and Keep on Line Above are not removed.
A font color removed
Font Color
Colors the selected words with the color set on the key or macro step, as #RRGGBB. none removes the color. With no color set, the color picker opens.
doctor set to #c00000
Highlight
Puts a color behind the selected words, like a highlighter. The color is set on the key or macro step, as #RRGGBB. none removes it. With no color set, the color picker opens.
Keep Capitals
Ctrl+Shift+C
Keeps the capitals of the selected words in output set to all caps: select Mac in MacDonald and the name prints as MacDONALD. The mark does not print and has no effect on other output. The mark is Literal.
Redact
Redacts the selected words. In every printout and export each character, spaces included, becomes an X, so page and line numbers do not change. The words in the job are not changed. The mark is Redacted.
doctor redacted
Keep on Line Above
Keeps the selected words on the line above, past the right margin, instead of wrapping them. Use it to keep page and line numbers after a late correction. The mark is Release.
Timestamps
Opens the Timestamps menu: whether the margin shows the time of day or the time elapsed from the start of the job, and how often.
Timestamps menu, showing the time on screen
Where the times show. All three are off to start with:
On screen: in the margin of the transcript.
On the printed page: on paper and in a PDF.
Beside the raw steno: beside each stroke on the Raw steno panel.
How a time reads:
Show: Time from the start of the job or Time of day. Time of day by default.
Hours, for the time of day: 12 hour, with AM and PM, 12 hour, no AM or PM, or 24 hour. 24 hour by default.
Seconds: No or Yes. No by default.
Time zone, for the time of day: Yes adds the computer's time zone, such as 10:32 AM EDT. No by default.
Separator: the one character between the hours and the minutes. A colon by default: 10:32. With a period, 10.32.
Size, under Printed page: Same as the text, or 8, 9 or 10 point.
Font, under Printed page: Same as the text, or a font on this computer. A font this computer does not have says (not on this computer).
Bold, Italic and Underline.
Where they print:
One on: Every paragraph, Every line, The first line of a page, or Every so many lines. Every line by default. Lines apart, for Every so many lines, is counted down the page from its first line. 5 by default: lines 1, 6, 11 and on.
Paragraphs: All of them, or Only these. Only these shows a box for each paragraph style of the job's layout, such as Question and Answer. The times print only on the ones checked. With none checked, nothing gets a time, and the menu says so.
Side: Left, in the gutter or Right, past the text.
Column: where the time starts, in inches from the left edge. 0.1 by default. In the gutter, it must fit before the line numbers. A time that runs into the line numbers, the text, or off the paper is named under the fields.
Under the fields, a line shows how the first line of the job prints and how a line two hours in prints.
Set the clock to a start time:
The time of day is the time the job opened plus the time of each stroke from then. To match another clock, such as the videographer's, set the time the job opened by that clock. Every time of day moves by the same amount.
Open Format > Timestamps. Start time shows when the job opened by this computer, such as 9:00:00 AM.
Type the time by the other clock, such as 9:01:35 AM.
Click Set.
A line written at 9:00:40 AM then prints 9:02:15 AM, and every other time moves 1 minute and 35 seconds too. Back to When the Job Opened takes the start time off. It shows only once a start time is set.
Retime Selection
Alt+Shift+C
Changes the timestamps of the selected words. Enter the time of the first stroke, or click Now. The other strokes in the selection move by the same amount. Take Back Every Retime removes all retimes in the job.
Retime with three strokes selected
Set Elapsed Clock
Sets the elapsed clock on the line at the cursor. The rest of the job counts on from there. The time-of-day column is not changed.
Start Elapsed Clock Over
Restarts the elapsed clock at 0:00:00 on the line at the cursor. The time-of-day column is not changed.
Pause Elapsed Clock
Stops the elapsed clock at the line at the cursor, or starts it again if stopped. The time-of-day column is not changed.
20Print Layout and Includes
The Print Layout menu sets how a page prints.
The Includes menu keeps the title page, the certificate and other text you put in every transcript.
A layout is a set of page settings with a name: the paper, the margins, the lines on a page, the line numbers, the header and footer, and the paragraph styles. Every job has its own copy of a layout.
Pick a layout for a job:
Open Format > Print Layout.
Pick a layout from the Layout list. The job changes at once. Press Ctrl+Z to change it back.
Create a layout:
Open Format > Print Layout and pick the layout closest to what you need.
Change the settings. The sample page shows each change.
Type a name in Save as, such as Smith Reporting 25, and click Save.
Your layout is listed with (saved) after its name. Saving a layout does not change any job already made. To use it in a job, pick it from the list in that job.
Print Layout
Opens the Print Layout menu. On the right is a sample page. Each field has a small number that matches a number on the sample page. Click a paragraph on the sample page to pick its style. The −, Full Page and + buttons, or Ctrl+Minus, Ctrl+0 and Ctrl+Plus, zoom the sample page.
Print Layout menu, with the numbers on the sample page
Changes on this menu change the open job only. To keep them for other jobs, save them as a layout.
Layout
Layout: the layouts StarCAT ships, then the ones you saved.
Save as and Save: saves the settings under a new name. With Save as empty, Save writes over your layout. A layout StarCAT ships cannot be written over.
Delete: deletes a layout you saved. A layout StarCAT ships cannot be deleted.
Measure in: Inches, Centimeters, or Lines and spaces. Changes only how the numbers on this menu read. A User setting, not part of the layout.
The layouts StarCAT ships:
25 lines, 9 pitch: Letter paper, 25 lines, 9 characters to the inch. This is what a new job uses.
25 lines, 10 pitch: the same, 10 characters to the inch.
28 lines, 10 pitch: 28 lines, 10 characters to the inch.
24 lines, 9 pitch: 24 lines, 9 characters to the inch.
Texas, 9 pitch and Texas, 10 pitch: the Texas page, with a box around the text and tab stops for Q and A.
Federal: the federal court page (Guide to Judiciary Policy, volume 6, chapter 5, section 520). Left and right marginal lines, 25 lines, 10 characters to the inch, Q and A at the margin.
New York: 22 NYCRR 108.3. A double line on the left, a single line on the right, 25 lines, Q and A five spaces in, colloquy 15 spaces in.
California: the Minimum Transcript Format Standards (16 CCR 2473). 25 lines, 60 characters to the line, no box. A county that asks for more lines is one number changed on the menu.
California, Los Angeles: the Los Angeles Superior Court Master Format Manual. A box, 28 lines, 56 characters to the line, Q and A at the margin with no period, tabs at 7 and 14 spaces, parentheticals 14 spaces in from both margins. The manual also asks for capitals; that is your writing, not the layout.
California, Orange County: the Orange County guidelines. A box, 26 lines, 14 point Courier, the state rule for everything else.
California, Solano County: the Solano Minimum Transcript Format Standards. 28 lines, 64 characters to the line, Q and A at the margin with the words two spaces after, colloquy 7 spaces in, no box.
Florida: Rule of Judicial Administration 2.535(f). 25 lines, 60 characters to the line, no box.
Illinois: Administrative Regulations for Court Reporting Services, section 7. 24 lines, left margin 1.5 inches, right margin 0.75, Q and A five spaces in, paragraphs ten, no box.
These are built from the published rules. Check one page against your court's rule before you file.
Paper
Size: Letter (8.5 x 11 inches), Legal (8.5 x 14), A4 (8.27 x 11.69), or Other. Letter by default.
Font: Courier by default, then the fixed-width fonts on this computer. A font this computer does not have says (not on this computer).
Width (in) and Height (in): the paper size. 8.5 and 11 by default.
Pitch (cpi): characters to the inch. 9 by default; 10 is common.
Lines to the page: 25 by default.
First line (in): where the first line prints, from the top edge. 1 inch by default.
Last line (in): where the last line prints, from the top edge. 10 inches by default. This is the line's place, not a gap up from the bottom.
Line numbers end at (in): where the line numbers end, from the left edge. 0.95 inch by default.
Gutter (in): extra room for binding. The whole page moves over, or down when the page is bound at the top. None by default.
Bound at: The side or The top.
Break a line at a hyphen: on, cross-examination can break after cross-. Off, the whole word moves to the next line. Off by default.
Every measurement runs from the top or the left edge of the paper. Its label ends with the unit Measure in is set to: (in), (cm), or (spaces) and (lines).
Line numbers
Print line numbers: on by default. Off, the page prints with no line numbers.
Numbers from and Numbers through: the first and last line numbers. 1 through 25 by default.
Numbers on: Every line, Every 5th line, or Every 10th line.
Numbers as: 1, 2, 3; a, b, c; A, B, C; i, ii, iii; or I, II, III. Index references cite the line the same way.
Blank print line: what prints on the numbered lines below the last line of the transcript. A slash is usual.
Format box
Draws rules around the text, as on a Texas page. The box sits outside the text and the line numbers.
Left rule (in), Right rule (in), Top rule (in), Bottom rule (in): where each rule prints. Empty means no box.
Style, a row with a box under Left, Right, Top and Bottom: None, 1 Line, or 2 Lines. A side set to None does not print, but still marks where the other sides start and stop.
Thickness (in), the row under it, for each side. Empty is a hairline.
Header text interrupts box and Footer text interrupts box: the rule breaks around the header or footer text.
The box prints and goes into a PDF. RTF and Word files do not get it.
Texas layout: the Format box rules, and the box drawn on the sample page
Header and footer
Each of the header and the footer has three boxes: Header left, Center and Right, and Footer left, Center and Right. Type text in a box, or click a box and pick from the Field... list under it to put in a field. A field fills in on each page.
Header and footer section
Page number: [page]
How many pages: [pages]
First page in section and Last page in section: [firstpage], [lastpage]
First indexed word and Last indexed word: [firstword], [lastword]. Filled on index pages only.
Volume: [volume]
Job Name: [job]
Case: [case]
Date: [date]
Under these, Job fields lists the fields the job's includes ask for, such as WITNESS. One goes in as [!WITNESS] and prints what was filled in for it.
For example, a footer center of Page [page] of [pages] prints Page 12 of 140.
Add a Header Line and Add a Footer Line add a line, up to 7 each. The boxes of a second line read Line 2 left, Center and Right.
The settings for each of the header and footer:
Prints at (in): where it prints, from the top edge. Empty is one line out from the text.
Starts at (in): where it starts, from the left edge.
Across: The margins, The paper, or The box. The left, center and right boxes spread across this width. The margins by default.
Size: Same as the page, or 6 to 24 points.
Font: Same as the page, or a font on this computer.
Bold, Italic and Underline.
Numbered lines (header only): puts the header on the numbered lines, from line 1 down, instead of in the top margin.
A warning shows when a header or footer is too wide for its width.
Page numbers
Page numbers: prints a page number in the top margin, at the right edge. On by default. If the header has a [page] field, turn this off, or the page number prints twice.
Page numbers start at: 1 by default.
Volume numbers: 1, 2, 3; I, II, III; or i, ii, iii. How a [volume] field prints, and the volume in an index reference. Page numbers stay 1, 2, 3.
Paragraph styles
Each kind of paragraph has a style: where its lines start and end, its Q. or A., its spacing. Pick a style from the buttons, or click a paragraph on the sample page. Compare All Styles shows every style in one table.
Paragraphs section with the Question style pickedCompare All Styles
The styles StarCAT ships, on a 25 line, 9 pitch page:
Question and Answer: Q. and A., text at 1.7 inches. A second paragraph inside one is set in Continuation.
Continuation: first line at 2.2 inches, the rest at 1.7.
Colloquy: first line at 1.7 inches, the rest at 1.2.
Speaker: like Colloquy, with the speaker's name in front, such as MR. SMITH:.
ByLine: BY MS. JONES:. Keep whole is 2.
Paren: a parenthetical, such as (Recess taken.). Keep whole is 3.
Centered: each line centered.
NewLine: any paragraph with no other style.
Index: index pages.
Caption and CaptionIndent: the caption on a title page, ending at 4.25 inches with a ) at the end of each line.
The fields for the picked style:
Name: custom styles only. A style StarCAT ships cannot be renamed or deleted. A style used in the open job cannot be deleted.
Behaves as: Normal, Question, Answer, Colloquy, Speaker, Parenthetical, or Fixed. Tells StarCAT what kind of paragraph the style is. A custom style such as Sworn Examination set to Question gets a question mark when written with none. Fixed is a line you set the words of: its first word is not capitalized.
Ending punctuation: the mark used when a paragraph is written with none: Automatic, None, period, question mark, exclamation point, colon, or --. Automatic uses Behaves as: a Question gets a question mark.
Symbol: what prints in front, such as Q. or A.
Symbol at (in): where the symbol prints. Empty is 2 spaces ahead of the first word.
First line (in): where the first line starts.
Left (in): where every line after the first starts. A first line left of Left makes a hanging indent.
Right (in): where every line ends.
Characters: the characters between Left and Right. Typing it moves Right.
Paragraph number (in), Before number and After number: numbers each paragraph in the style. With [ before and ] after, the third paragraph prints [3]. Empty means no number.
Bird cage: a character printed at the right edge of every line, such as ).
Keep whole (lines): the lines kept together on one page. 0 lets the paragraph break anywhere.
Spacing: Double, or Single. Single puts two lines of text on each numbered line.
Alignment: Left, Center, Right, or Justified. Center sets each line in the middle, between Left and Right. Right sets each line against Right. Justified widens the gaps between words so every line but the last runs from Left to Right. A line with a tab in it, and a table row, are not justified. Left by default.
Continued in: the style for a second paragraph inside this one.
Tab stops (in): up to ten, separated by spaces. Empty is a stop every fifth space.
Table: on, a long cell wraps under its own column.
Text capitalized: the words of the style print in capitals, on paper and in every export. The screen shows them as written. Off by default.
Auto-punctuate: on, a paragraph in this style ends on the mark a Dictionary entry asks for, such as do you{>?}. Off, it ends only on its Ending punctuation. On by default.
Label Font: Regular, Bold, Italic, or Bold Italic. The typestyle the Q. or A. prints in, on the screen and in every export.
Text Font: the same four. The typestyle the words of the style print in. Bold or italic put on by hand still shows.
For the whole layout:
Paragraph numbers start at: 1 by default.
Bird cage line above and Bird cage line below: None, underscores, dashes, or equals signs across the caption.
Create a paragraph style:
Click New Style.
Type the name in New Paragraph Style Name, such as Exhibit List.
Pick the style to copy in Base values taken from. Question by default.
Click Add, then change the fields.
Page Elements
Opens Format > Page Elements. It lists the pages that print differently from Print Layout: a custom header or footer, or a header, footer, page numbers, line numbers, timecodes or the text box left off. Pages in a row that print the same way show as one range. Click a range to go to its first page.
Add a range:
Click Add Range. The form opens on the page the cursor is on.
In Pages, type the pages, like 5-20.
For each element, pick Default, Hide, or, for the header and footer, Custom.
Click Apply.
Pages 2-3 with a Custom footer, Volume II, and the page numbers hidden
A Custom header or footer has Left, Center and Right boxes, Bold, Italic and Underline, a Size and a Font. It starts from the Print Layout header or footer, and prints in its size and font where those are left at Default. [page] in a box prints the page number. A header on numbered lines prints at the page size and font. Add a Footer Line adds a line under the last one, up to seven, as in Print Layout.
Edit opens a range in the same form. Change Pages to make the range longer or shorter: the pages it leaves go back to Print Layout. To take a range off, click Restore Defaults on the form, which sets every element to Default, then click Apply. Restore Defaults under the list takes every range off, and the entry codes below too: click it, then Confirm Restore.
Timecodes set to Hide come off those pages in the writing window too.
A range is page numbers, kept with the job. Nothing is written into the text, so when an edit moves text onto or off a page, the range stays on the pages you typed. RTF exports leave ranges out.
Entry codes set the same elements in the text, from where they are written, and can go in a Dictionary entry or a macro: {H}, {F}, {Job Header}, {Job Footer}, {Omit} and {Resume}. See Entry codes: Paragraphs. In a {H} or {F}, bars split the words into left, center and right, and a fourth piece sets the look: {F Volume II | Page [page] | | bold 10}. Two bars start the next line: {F Volume II || Sealed}. On a page in a range, the range wins.
Includes
Opens the Includes menu. An include is text you keep once and put in many jobs by name: a title page, an appearance page, a certificate, a standing parenthetical. Each place it is put in stays linked to it, so a correction to the include corrects every job that has it. Exported files get the text as it reads.
Title page sample in the box, with the Preview beside it
Each include is a file in the includes folder. Copy a file into the folder and it is on the menu.
Includes menu, with the Certificate page sample in the box
Library
Lists the includes, with the layout of each, how many blanks it has, whether it is in this job, whether it prints on its own page, and whether it is offered while you write.
Insert at: The caret, The start of the transcript, or The end.
Insert: puts it in the job, at Insert at.
Edit: opens it in the box below.
Define a Stroke: opens Define with the include filled in, so a stroke puts it in.
Delete: takes it out of the library. A transcript still naming it says so on the page.
Write an include:
Type a Name, such as Certificate.
Pick a Sample to start from, or start with an empty box.
Type one paragraph a line. Put a style in braces at the start of a line, such as {Centered}, and a blank in brackets, such as [WITNESS].
Check the Preview.
Click Save.
The settings for an include:
Layout: Default, or a named layout. A named layout sets its own margins.
Its own page: starts a new page before and after, so it prints alone.
No line numbers: prints the include with no line numbers, as on a title page. The transcript after it is numbered again.
Offer it while I write: when you write its first words, it is offered on the Includes Matching panel. Or define a stroke as {@RUN(writematch 1)} to write it without the panel.
The toolbar over the box: Sample, Style (the layout's styles, plus New Page and Tab), Bold, Italic, Underline, Field and Insert for a blank, Image… for a picture on a line of its own, and Caption Table.
An example, a line from a title page: {Caption}COUNTY OF [COUNTY] prints COUNTY OF JEFFERSON in the Caption style, once COUNTY is answered. {New Page} on a line by itself starts a page.
Signature
Signature image: the file, or none. Choose… picks a PNG, JPEG or BMP. Remove clears it.
Sign on white paper, scan or photograph it, and save the picture. Then {Signature} on a line of its own prints the picture there: the line stays empty and the picture stands on it, two and a half lines tall, as wide as its shape makes it. It prints in the PDF and on paper. Without a picture the line prints blank, so the certificate still has room for a signature.
The Certificate page sample ends with three lines: {Signature}, then {Centered}______________________________, then {Centered}[REPORTER]. The signature sits over the rule, with the reporter's name under it.
Samples
StarCAT ships no includes. The samples fill the box, and are kept only when you save them.
Title page: the court and county, the caption with the plaintiff, the defendant and the case number, DEPOSITION OF the witness, the date, and who took it, where and when. On its own page.
Appearance page: APPEARANCES, then FOR THE party:, with the attorney, firm, address, phone and email. On its own page.
Title and appearance page: the two on one include.
Off the record: (Discussion off the record.) Offered while you write.
Back on the record: (Back on the record at 10:42 a.m.) Offered.
Recess: (Recess taken at 12:01 p.m.) Offered.
Exhibit marked: (Exhibit 3 marked for identification.) The number counts up each time. Offered.
Certificate page: the reporter's certificate, with the witness, the first and last page, and the date it prints. On its own page.
Certified question: (Question certified.) What Certify Question puts in.
Objections index, Instructed not to answer index and Requests for production index: each one line that indexes the matching colloquy under the attorney who spoke. Certified questions index lists each certified question by page and line. See Index lines.
Blanks
A blank is a name in brackets. Answer it once and every place that names it fills in. A line with only blanks, all answered empty, is left out.
[WITNESS]: a blank. The same name twice is one answer.
[Plaintiff|Defendant]: a choice between words.
[WITNESS^]: prints in capitals.
[EXHIBIT+]: counts up by one each time the include goes in.
[CASE:20]: 20 characters wide.
[PAGE:5>]: lined up on the right within its width.
[ATTORNEY1@ATTY]: picked from the ATTY field list.
[DEPONENT=WITNESS]: fills from the WITNESS answer.
[TOTAL: (PAGES - FORMPAGES) * PAGERATE]: worked out from the other answers, for a billing page. A colon and a space, then the arithmetic: add, subtract, multiply, divide, parentheses. It fills in once every name in it has an answer, and is never asked for itself.
The blanks StarCAT knows:
Appearance: SPEAKER1 (appearing for), FIRM1, ATTORNEY1, ADDRESS-A1, ADDRESS-B1 (the second address line), CITY1, STATE1, ZIP1, PHONE1, EMAIL1. For a second attorney, copy the lines and use ATTORNEY2, FIRM2 and so on.
The case: CASE (the case number), COURT, COUNTY, JUDGE, PLAINTIFF, DEFENDANT.
The proceeding: WITNESS, DEPONENT, DATE, TIME, PLACE, REPORTER.
Pages, filled in by StarCAT: FIRST PAGE, LAST PAGE, PAGES (how many), FIRST PAGE IN SECTION, LAST PAGE IN SECTION.
Current, changes each time the job opens: CURRENT DATE, CURRENT TIME, CURRENT YEAR.
Static, set once: STATIC DATE, STATIC TIME, SEAL DATE, SEAL DATE WITH DAY. Each is a set date or time: the time of the stroke that first wrote the field into the job. It never changes after that, unlike CURRENT DATE and CURRENT TIME, which change each time the job opens. Use STATIC TIME for the time in a recess parenthetical: (Recess taken at 10:42.) SEAL DATE reads 1st of November 2026; SEAL DATE WITH DAY reads 1st day of November 2026. A read-only job sets none of them.
When it started and ended: JOB START TIME, JOB END TIME.
Blanks in this transcript lists the blanks not yet answered. Type each answer in its box. To answer a blank empty, press Enter on its empty box: the blank prints nothing. Answered blanks are listed below, each with Unanswer.
Field lists
A field list is a list of answers you use again, one entry a line, such as every attorney you write for. [ATTORNEY1@ATTY] picks from the ATTY list and fills the blanks after it: firm, address, phone and email.
An ATTY entry, with the columns in order:
kurk@Anna Kurkowski+Kurkowski & Kohlmeyer LLP+200 West Adams Street+Suite 1400+Chicago+IL+60606+312-555-0101+akurkowski@kurkowski.example
+ moves to the next blank.
kurk@ at the start gives the entry a short name, kurk.
_ makes the next character plain, so a + in a name stays a +.
A line starting with ; is a note. ; SORT keeps the list sorted.
Import vCard adds contacts from a vCard file; you can also drop the file on the box.
StarCAT ships sample lists, ATTY, FIRM, PARTY, COURT, JUDGE and PLACE, with made-up names.
Insert Include
Puts the named include in at the cursor. A Dictionary entry {INCLUDE:Title page} puts in the Title page include. An include that starts a paragraph must go at the start of one.
Write Matching Include
Writes out the rest of a started include. The number given picks one of the offered matches; with no number, the first is used. Text already written stays.
Fill in the Blanks
Ctrl+EE (RocketKeys)
Goes to the first unfilled blank and opens it for an answer. After each answer the cursor moves to the next blank. Used on a blank, it starts from that blank.
The box for a blank has:
Fill In: takes the answer and goes to the next blank. With the box empty it goes on and leaves this blank.
A button for each choice, on a blank with choices.
Today, on a date blank: today's date, in the format set under Date fields.
The entries, on a blank with a list. Typing narrows them. Enter takes the lit one, or the typed words when none match.
Add to field list: keeps the answer on a list named for the field, so a plain [COUNTY] keeps its answers on a list called COUNTY.
A row for each blank left. Click a row to go to that blank.
Add Blank
Ctrl+AShift+E (RocketKeys)
Inserts a blank at the cursor. Type the field name, or pick one the job already uses. The blank shows the name until it is filled, and one answer fills every blank with that name.
Convert Fields to Text
Converts filled fields to plain text, so they no longer change with their answers. Converts the fields in the selection, or every field in the job when nothing is selected.
21Transcript Index
The index lists the witnesses, examinations and exhibits, with the page and line of each. Exports and prints can carry it on its own page at the end.
Build the index:
Put the cursor on the line to index.
Choose Realtime > Index Entry. Select the category, enter the item and the action, and click Save. For a range of exhibits, choose Realtime > Mark Run of Exhibits.
Open View > Panels > Index. The entries are listed by category, with the page and line of each.
On the Index panel, click Insert to put the index in at the cursor's paragraph. Or click Attach the Indexes to the Transcript on File > Export to add it on its own page. In a job with an Appearance include, the index goes on the page after the appearances; the word index goes at the end.
Change how the index prints:
An index template sets the layout of the PDF index and of the attached index: the title, the column heads, and one line for each entry.
Open Edit > Insert > Includes. Under Write an include, set Type to Index Template.
Select a sample in Sample..., such as Exhibit index or Witness index. To change a saved template, select it in Template instead.
Edit the text. Style... lists the codes below and Field... lists the index fields. The preview shows this job's index printed through the template. A job with no index entries is previewed with sample entries.
Type a name in Name and click Save. Delete removes the template selected in Template.
Open File > Export, select PDF index, and select the template in Index template. Built-in is the standard layout. Attach the Indexes to the Transcript also uses the template you select.
Table of contents sample and its preview on Index Sample Trial
See what a code does:
Each picture below is one short template typed into the box, and its preview on Index Sample Trial. To try one:
Open Index Sample Trial and click Find on the Index panel.
Open Edit > Insert > Includes and set Type to Index Template.
Select all the text in the box and type the template from the picture. The preview changes as you type.
A category with no section of its own prints after the template's sections in the Built-in layout. That is the PROCEEDINGS list under some of these previews. Add {Section *} to print them in the template instead.
Sections and rows.{Section EXHIBITS} starts the part for one category. {Section *} prints every category not named in its own section. {Row} starts the line printed once for each entry. {Centered} centers its line. {None} is printed when the category has no entries.
{Section}, {Centered}, {Row} and {None}: the witnesses, then the exhibits
Tabs and leaders.{Tabs 24 56} sets the tab stops, in characters from the left margin. {TL:1} puts what follows it at stop 1, flush left. {TR:2} puts what follows it flush right on stop 2, so page numbers line up on their last digit. {Leaders} before a tab fills the gap with dots. A field longer than its column wraps inside the column. A line whose fields are all empty is left out, so a witness with no cross-examination prints no Cross line.
{Tabs}, {TL:1}, {TR:2} and {Leaders}: each witness with Direct and Cross pages
Sort and group by side.{Sort} sorts the entries: witnesses by last name, exhibits by side, Plaintiff's before Defendant's, then by number. {Group}FOR THE [SIDE]: is printed above the first entry of each side: the side that called the witness, or the exhibit's owner (Plaintiff's 4).
{Sort} and {Group}: the exhibits by side, with number, description and page marked
Only some entries.{Only ADMITTED} prints only the entries that fill that field. Plaintiff's 11 was refused and Defendant's B was withdrawn, so neither is listed.
{Only ADMITTED}: the exhibits admitted, with their pages
Empty fields and two pages.{Empty --} prints -- in a page or volume field with nothing in it. {Separator /} goes between two pages in one field: Peter Jones was cross-examined on page 16 and again on page 20, so CROSS prints 16/20.
{Empty --} and {Separator /}: the Direct, Cross, Redirect, Recross table
Each examination.{Exam} is printed once for each examination, in order. [EXAMINATION NAME] is its name and [BY] the attorney. With no attorney filed, BY [BY] is left out.
{Exam}: each examination by name and attorney, with its page
Each attorney.{By} is printed once for each attorney who examined the witness. [PAGES] is every page of that attorney's examinations.
{By}: each witness with one line per examining attorney
Exhibit fields. One line for each field an exhibit can have. A line whose field is empty is left out: Plaintiff's 2 was not offered on its own, so it prints no Offered line.
Exhibit fields: number, side, description, and the page of each action
Also: {Continued} is printed at the top of each later page, and {New Page} starts the section on a new page.
Fields: - [ITEM] the witness or exhibit; [NUMBER] the exhibit number alone (4 for Plaintiff's 4); [SIDE] PLAINTIFF or DEFENDANT; [DESC] the description. - [PAGE] the first page; [PAGES] every page; [LINE]; [VOL]. - The page of each action: [MARKED], [OFFERED], [ADMITTED], [REFUSED], [WITHDRAWN], [DIRECT], [CROSS], [REDIRECT], [RECROSS], [VOIR DIRE]. A further cross prints in [CROSS]. - [EXAMINATION] is the page of an examination with no kind, as in a deposition. - [EXAMINATION NAME], on an {Exam} line, is the examination's name. - [BY] the examining attorney.
A job field such as [CASE NO] prints the job's value. A field StarCAT does not know prints as written, and the Includes menu lists it under the text. An empty field takes the space or dash before it, so an exhibit with no description prints 5, not 5 -.
The samples:
Witness index, Exhibit index, Exhibit list: one category each.
Examination table and Examination table with attorneys: a witness per row, a column per examination.
Deposition index and Full deposition index: the witnesses with each attorney's examination, then the exhibits.
Hearing index: each examination by name and attorney, then the exhibits.
Master index: the LA Superior Court layout. Witnesses in order, then sorted, then the exhibits, each on its own page.
Table of contents: the Alaska layout. The proceedings with their pages, the witnesses by side in a Direct, Cross, Redirect, Recross table, and the exhibits admitted.
Requests and instructions: the information requested and the instructions not to answer.
Today's index: the Built-in layout, to start from.
A name ending (Unspaced) is the same layout titled INDEX, not I N D E X.
Export the witness and exhibit index:
Open File > Export and select PDF index in Format.
Pick an Index template, or leave Built-in and set the options below. A sample index beside the options shows each change.
Click Export…. Or click Attach the Indexes to the Transcript to put the index in the job as text.
PDF index: the index options, with the sample index beside them
The options, for Built-in. A template sets most of them itself, so with a template picked they are hidden.
Leaders draws a line from each item to its page and line. On by default. Leader character is what it is drawn in, such as _ or -. Empty is dots. It shows only with Leaders, so not on the word index or with a template picked: a template's leaders are dots. The index attached to the transcript always uses dots.
Actions in columns (WITNESS, Direct, Cross, Redirect, Recross): a category with examinations prints as a table, a column for each action, with the pages under it. Off by default.
Description in a column (EXHIBITS, Description, Page): a category whose items have a description prints as a table: the item, the description beside it, and the pages. Off by default.
Sort items: Off keeps the order the items were filed in. Every category puts the items in order, numbers as numbers: Exhibit 2 before Exhibit 10. Witnesses go by last name. All but witnesses sorts the other categories and keeps the witnesses in the order they were called.
Page only, no line (12, not 12/5): each page is cited once, however many lines on it are indexed. Off by default.
Number items (1, 2, 3 in each category): numbers the items in the order they print, starting at 1 in each category. Off by default.
Reference separator: what goes between two references to one item. A comma and a space by default: 12/5, 30/2. With a slash and a space, the same item prints 12/5/ 30/2.
Always print, (none) when empty: a category checked here prints even when nothing is filed under it, with (none) under the heading. The list is EXHIBITS, WITNESSES, INFORMATION REQUESTED and INSTRUCTED NOT TO ANSWER, then the categories of the open job. The check marks are kept for every job.
Each category starts a new page. Off by default.
Number the index separately, beside Attach the Indexes to the Transcript, starts the attached index at the end of the job on page 1. The transcript's page numbers do not change.
Export the word index:
The word index lists the words of the transcript, A to Z, with the page and line of each. It is also called a concordance.
Open File > Export and select PDF word index in Format.
Set the options below.
Click Export…. Or, to put the word index at the end of the job as text, click Attach the Indexes to the Transcript. The button changes to Press again to attach; click it again within 4 seconds.
PDF word index: the word index options
How it looks:
Style: page and line cites each line as 12/5. Supreme Court prints the index the way the Supreme Court's transcripts do, and fills in 100 in Or … + total occurrences.
Columns: 2 to 5. 4 by default.
Font: the transcript by default, or a font on this computer.
Size: in points. 7.5 by default.
Line spacing: single, one and a half, or double. Single by default.
Margin: in inches, all four sides. 1 by default.
Print the header on every index page: prints the job's header on the index pages. Off by default.
Print words: as written prints each word with the capitals the transcript uses most. lowercase or UPPERCASE prints them all one way.
Compress occurrences (13/2, 7, 27): after the first line on a page, the next lines on that page print as the line alone. 13/2, 13/7, 27/4 prints 13/2, 7, 27/4. Off by default. Not on the Supreme Court style.
First indent (in) and Other indent (in): Where an entry's first line starts, and where the lines after it start. Empty lines the other lines up under the first page number. Not on the Supreme Court style.
What it leaves out:
Leave out words over *n* times, every *n* pages: leaves out a word that is on more lines than that across the pages indexed. Over 1 times every 2 pages, in a 100 page job, leaves out a word on more than 50 lines. Empty, the default, leaves nothing out. Both boxes need a number.
Or *n* + total occurrences: leaves out a word used that many times or more in the job. Every use counts, not the lines. Empty by default.
Never index: words never indexed, such as objection. Type them with a space or a comma between them. The list is kept for every job.
Phrases: words indexed together as one entry, such as St. Louis. One a line. The words of a phrase are indexed alone only where they are used alone. The list is kept for every job. Add to Phrase List adds the words selected in the transcript.
Leave out words of *n* characters or fewer: 1 by default, so a, I and Q are left out.
Leave out numbers: words with no letter in them, such as 1987. On by default.
Leave out words with a digit (2nd, W-2): off by default.
Leave out the first *n* and last *n* pages: leaves out pages at the start and the end, such as the title page and the certificate. 0 by default.
The words left out by the first three are printed at the end of the index, under Words left out, so a reader can see what is not in it.
PDF words to check prints, in the same shape, the words of the transcript that may be misspelled, with the page and line of each, to look over before the transcript goes out. It takes Columns, Font, Size, Line spacing, Margin and Print the header on every index page. It leaves nothing out.
Index lines:
A line in an include can file an index entry each time the include goes in. The line prints nothing. Its form:
{Index Category|Item|Role|Description}
Item, Role and Description are read off the paragraph after the line. A line at the end of the include reads the first paragraph after the include, such as the by-line under an examination heading. In them:
* is any text, and is kept.
[text] must be there, and is left out of the entry.
<text> is put in as written.
M:* is the paragraph's label, the speaker; C:* is the same in capitals.
_ before [, ], < or > makes it a plain character.
The entry is read when the index is drawn, so a blank filled in or a name fixed later shows in the index. A blank not yet answered files nothing. On the Index panel, a row filed this way names its include in place of Attach, Edit and Delete.
A fifth part, a regular expression, makes the line index every paragraph in the transcript that matches, once each:
{Index EXHIBITS|\1|Marked||\(Exhibit (\d+) was marked}
\1, \2 in Item, Role and Description are what the pattern's groups found.
{N} is a paragraph break, so DIRECT EXAMINATION{N}BY (.*): reads the by-line under the heading.
^ and $ are the start and end of a paragraph: ^Okay$ finds a paragraph that is only Okay.
Capitals count. A pattern with an error files nothing.
The include must be in the job; an include of only such lines prints nothing. An Eclipse index line, with its Format and Location parts, is read too: the pattern is kept and Format and Location are dropped.
The samples Objections index, Instructed not to answer index and Requests for production index are each one such line. Each files the attorney's colloquy that matches under the attorney's name. Certified questions index files each (Question certified.) paragraph under one item; a reporter who rewords that include rewords the line too.
Index
Turns the Index panel on and off. The panel lists exhibits and witnesses by category, with the page and line of each. Click a row to go to it. Indexed lines have a star in the margin.
Each row has Attach, Edit and Delete. A row from an include shows the include's name instead: change it in the include. A row with a file has a button with the file's name, which opens it.
Attach keeps a file with the exhibit, such as a scan or a PDF:
Turn on the Index panel.
On the exhibit's row, click Attach and pick the file.
Double-click the star beside the exhibit's line to open the file. Point at the star to see the file's name.
The file is copied into the job's exhibits folder, so it stays with the job.
Every other place the transcript names the exhibit opens the same file: Ctrl+click Exhibit 58, Exhibit No. 58, Plaintiff's 58 or State's Exhibit 58 anywhere in the job. The words StarCAT reads before the number are Exhibit, Plaintiff's, Defendant's, Defense, State's, People's, Government's, Joint, Respondent's and Petitioner's.
An exported PDF includes the files too. Click a mention in the PDF to open its file, or open the reader's attachments list. A PDF/A copy includes none.
A web address or email address in the transcript, such as www.example.com or jane@firm.com, is a link in the exported PDF. Click it to open it. Nothing is set up: the address is the link. A PDF/A copy has none.
Index panel after Find: the witness, Direct, Cross and three exhibits
Index Entry
Alt+Shift+X
Opens the Index entry menu. Set the category, the item, the action (Marked, Offered, Admitted, Refused, Withdrawn, Voir dire, Direct, Cross, Redirect or Recross) and an optional description, and click Save. The entry is placed at the cursor.
Index entry menu
Mark Run of Exhibits
Indexes a range of exhibits at the cursor. Enter the range as 1-20, A-F, 1A-1F or numbers separated by commas. Put a name containing a hyphen in quotes.
Find Index Entries
Finds the witnesses, examinations and exhibits the transcript names and adds them to the index. Also the Find button on the Index panel.
A witness: a name in capitals that starts a paragraph saying sworn or affirmed, such as JANE DOE, having been first duly sworn.
An examination: a heading paragraph in capitals, such as CROSS-EXAMINATION, FURTHER REDIRECT EXAMINATION or VOIR DIRE EXAMINATION.
An exhibit: a parenthetical such as (Plaintiff's Exhibit No. 4 was marked for identification.) - Words between the number and the verb are the description: (Exhibit 4, a letter dated May 1, 2024, was marked.) A description already on the entry is kept. - The action: marked or identified is Marked; offered is Offered; received or admitted is Admitted; not admitted, refused or excluded is Refused; withdrawn is Withdrawn. Marked and received files both. - (Exhibit 5 was previously marked.) files nothing.
A part of the proceedings: a heading in capitals such as JURY VOIR DIRE, OPENING STATEMENT, CLOSING ARGUMENT, JURY INSTRUCTIONS or VERDICT, filed under PROCEEDINGS.
The side: a heading such as PLAINTIFF'S CASE, or a sworn paragraph saying called by the Defendant, gives the side for each witness after it, until (The Plaintiff rests.).
Entries already in the index are not added twice. The status message reads "3 index entries found." Remove a found entry the same way as one you marked.
Mark Next Exhibit
Marks the next exhibit. Fills a blank in the paragraph, or inserts the line (Exhibit No. [ ] marked for identification.), uses the next number entered, and files the entry as Marked. Esc files nothing. The category is given on the key or macro step; EXHIBITS by default.
Put Index in Transcript
Ctrl+I
Inserts the index at the start of the cursor's paragraph as editable text: the category named on the key or macro step, or all categories.
What Indexes This Line
Says which index entries point at the cursor's line, in the status message: the category, the item and the action, such as EXHIBITS Exhibit 4, Marked. Use it on a line with a star in the margin to see what the star is without opening the Index panel. A line with none says "Nothing indexes this line."
Attach Indexes
Adds the indexes to the transcript, on pages of their own, as text that exports include. Where they go:
In a job with an Appearance include, the witness, examination and exhibit indexes go on the page after the appearances. The word index goes at the end.
In a job with no Appearance include, every index goes at the end.
Running it twice adds a second copy. The Export menu also attaches and removes them.
22Numbers
StarCAT turns numbers you write in words into figures as you write: fifty dollars becomes $50, May four becomes May 4. This chapter covers every conversion StarCAT does by default, with examples.
Number settings are per job. A new job starts with the settings you last saved. Until you turn numbers on once, a job converts nothing.
The settings are in Translate Options, on two tabs:
Numbers: when a number is written in figures or in words, digit grouping, and the words numbers are written in.
Keywords: words such as dollars, Exhibit and phone number that decide how the number near them is written.
Turn numbers on
Open Format > Numbers. Translate Options opens on the Numbers tab.
Check Write numbers as figures.
Each change is saved to the job when you leave the box. The sample at the top of the tab shows the result as you type.
Numbers
Opens the Numbers tab of Translate Options, Format > Numbers.
Numbers tab, turned on, with the default settings
Quantities, Money and Ordinals
The grid at the top of the tab has a row for each kind of number:
Quantities: a count or an amount. six people, twelve thousand five hundred.
Money: a number with dollars or cents after it.
Ordinals: first, second, twenty-first.
Each row has three settings:
Spell out: the numbers written in words. Every other number is in figures.
Spell out at the start of a sentence: the numbers written in words when they start a sentence. Empty uses Spell out.
Back to words at: from this size up, a round number of millions, billions or trillions ends in a word. thirty five million is 35 million, not 35,000,000.
Type a range, a list, or both: 1-9, 1-12, 20, 30, 40, 0-10, 20, 30. Empty means never.
The defaults:
Quantities: spell out 0-10, at the start of a sentence 0-100, back to words at a million.
Money: never spelled out, back to words at a million.
Ordinals: never spelled out, at the start of a sentence 0-10, never back to words.
Quantities, with the defaults:
there were six people: There were six people.
there were eleven people: There were 11 people.
he was twenty one: He was 21.
one hundred forty eight people came: 148 people came.
twelve people came: Twelve people came. It starts the sentence and 12 is in 0-100.
it cost thirty five million: It cost 35 million.
the city has two million three hundred thousand people: The city has 2,300,000 people. It is not a round number of millions.
Quantities, with other settings:
Spell out1-9: there were ten people: There were 10 people.
Spell out0-10, 20, 30: there were twenty people: There were twenty people.
Spell out empty: there were six people: There were 6 people.
Spell out at the start of a sentence empty and Spell out1-9: twelve people came: 12 people came.
Back to words at never: it cost thirty five million: It cost 35,000,000.
Back to words at a billion: it cost thirty five million: It cost 35,000,000. it cost two billion: It cost 2 billion.
Money, with the defaults:
he paid fifty dollars: He paid $50.
he paid four thousand dollars: He paid $4,000.
he paid five million dollars: He paid $5 million.
he paid four dollars and fifty cents: He paid $4.50.
it was fifty cents: It was 50 cents.
Money, with other settings:
Spell out1-10: he paid five dollars: He paid five dollars.
Back to words at never: he paid five million dollars: He paid $5,000,000.
Ordinals, with the defaults:
on the sixth page: On the 6th page.
the twenty first witness: The 21st witness.
sixth on the list: Sixth on the list. It starts the sentence.
Ordinals, with Spell out1-9:
on the sixth page: On the sixth page.
the twenty first witness: The 21st witness.
Digit grouping
Group digits from: the number of digits that gets a separator. five digits is the default: 4500 has none, 12,500 has one. four digits writes 4,500. never writes 12500.
Separator: comma (12,500), period (12.500) or space (12 500).
Always group money, whatever the width: on by default. $4,000 has a comma even though it is four digits. Off, it is $4000.
Other switches
Read "and" as part of a number: on by default. one hundred and forty eight people came: 148 people came. Off: 100 and 48 people came.
Add comma to date after month: on by default. January six two thousand nineteen: January 6, 2019. in March ninety eight: in March '98. Off: January 6 2019 and March 98.
Read "oh" as a zero between two numbers: on by default. nine oh five p.m.: 9:05 p.m. Off: nine oh 5 p.m. An oh with no number on both sides is always a word: oh, I see stays Oh, I see.
Keep ordinal suffixes lowercase under Caps lock: off by default. On, 21st stays 21st in text written with Caps lock on. Off, it is 21ST.
Numbers in a series go into figures: off by default. On, numbers in words joined by and, or, through, to or a comma go into figures: I waited two to four weeks: I waited 2 to 4 weeks. Not at the start of a sentence. Off, a series goes into figures only when part of it already is: ten to fifteen minutes, with fifteen written as 15, is 10 to 15 minutes.
Vocabulary
The words numbers are written in, for a job in another language or a house with its own spelling. Each box shows what the job uses now.
Value and Word: pick a number in Value and type its word in Word. 40 is forty.
Decimal word: the word that starts a decimal. three point one four: 3.14.
Grouping word: the word inside a number. one hundred and forty eight.
Decimal symbol: the period in 3.14.
Time symbol: the colon in 9:05. Type a period for 9.05.
Ordinal suffixes (0 to 9): the ten suffixes, by last digit, 0 first. 11, 12 and 13 take the one for 0.
Date fields
Date fields picks how a date field writes today's date, and how the Today pick on a date blank writes it. The choices, for January 6, 2019: January 6th 2019 (the default), January 6, 2019, Sunday, January 6, 2019, 6 January 2019, 01/06/2019, 1/6/2019 and 01/06/19. The list shows them with today's date. A date already filled in keeps its format.
Keywords
A keyword is a word or phrase near a number that decides how the number is written. Keywords are on the Keywords tab of Translate Options. Show at the top picks the table: Keywords, Rules, Templates or Currencies.
Each row has:
Keyword: the word or phrase. The check box in front turns the row off without deleting it. Keywords with the same Where, Rule and switches share one row, which shows the first two and a count (January, February +6). Click it to see each keyword, with its own check box and Comment, and + Add Keyword. The × on a keyword removes it. A keyword alone on its row has a + beside it that adds one with the same rules.
Where: where the keyword sits. before the number (Exhibit 5), after the number (fifty dollars), or trigger.
Rule: the format the number is written in. One is the usual case. + Add Rule adds another, and the × on a rule removes it. Several are tried in order, and the first that fits the number is used. A second rule only matters when the first can turn a number down: Ordinal takes only numbers said as ordinals, MonthDay only 3, 5 or 6 digits. Generic, Figures and Money take any number.
Example: what the row writes, worked with Numbers on.
Comment: a note for you. StarCAT does not read it.
Add a Keyword adds an empty row at the bottom, Rule Generic, Where after.
Remove on a row deletes it. Click More on a row for its switches, and Less to put them away:
The keyword joins the number: the keyword becomes part of the figure. fifty dollars is $50, with no dollars after it.
Cap the keyword: highway 66 is Highway 66.
Match its case: the row only matches the keyword with the same capitals. May on the May row, not may.
Cap words in front: the number of words before the keyword to capitalize. 1234 red pine avenue is 1234 Red Pine Avenue.
Words between: how many words can stand between the keyword and its number, 0 to 4. At 0 the keyword is right next to the number. It never reaches past another number.
Money symbol: the symbol a money row writes. Empty is $.
Symbol before the number: on writes $50. Off writes the symbol after the number with a space: 50 USD.
Type in Try it to see what the table does with a sentence before you leave the tab.
Keywords tab: he paid fifty dollars on May four at eight oh seven p.m. becomes he paid $50 on May 4 at 8:07 p.m.
Before, after and trigger
before: the keyword comes before the number. Exhibit five: Exhibit 5. With Words between at 1, Exhibit No. five is Exhibit No. 5.
after: the keyword comes after the number. fifty dollars: $50. fifty US dollars stays 50 US dollars: a row that joins the number, like Money, always has to be right next to it, whatever Words between says.
trigger: the keyword sets the format of the next number, however many words later it comes. The phone number is usually in the answer, not right after the words phone number: What is your phone number? (212) 555-1212. A trigger looks forward only, into the next paragraph at most, and the keyword has to be in the last 12 words of its own paragraph. Another trigger replaces it.
Default keywords
Money. Rule Money, after, joins the number:
dollar, dollars: fifty dollars: $50. four dollars and fifty cents: $4.50.
Cents. Rule Cents, after, joins the number:
cent, cents: fifty cents: 50 cents.
Percent. Rule Generic, after:
percent: ninety nine percent: 99 percent. The word stays.
Clock times. Rule Time, after:
a.m., p.m., A.M., P.M., a.m, p.m, am, pm: eight oh seven p.m.: 8:07 p.m. three thirty three a.m: 3:33 a.m.
o'clock: five o'clock: 5 o'clock.
in the morning, in the afternoon, in the evening, at night: five thirty in the afternoon: 5:30 in the afternoon. two in the afternoon: 2 in the afternoon.
am on its own is only a keyword right after a number: I am here stays I am here.
Months. Rules Ordinal, MonthDay, Generic, before:
January through December: May four: May 4. May fourth: May 4th. January six two thousand nineteen: January 6, 2019. March ninety eight: March '98.
March, May, April and August are on Match its case, so only the capitalized word is a month: a protest march one day stays a protest march one day.
References. Rule Generic, before. The number is always in figures:
Section: Section 2002, never Section two thousand two.
phone number, telephone number, cell number, cell phone number. Rule Phone: seven digits are 555-1212, ten are (212) 555-1212, eleven are 1-800-555-1212.
social security number. Rule Social: 123-45-6789.
zip code, postal code. Rule Zip: five digits are 34994, nine are 34994-0625.
A trigger with a number that does not fit its rule writes the digits as they are. Twelve digits after phone number are 123456789012.
Rules
When more than one thing could set a number's format, the first of these wins: a {# format from a Dictionary entry, then a trigger, then a keyword beside the number (an after keyword wins over a before one), then the Numbers tab.
The Rule column takes these names. Set Show to Rules to see each one on a sample number.
Quantity: by the Quantities settings. 12500: 12,500.
Figures: always figures, with grouping. six: 6.
Generic: always figures, no grouping. 12345: 12345.
Ordinal: by the Ordinals settings. twenty one: 21st.
Money: dollars. fifty: $50.
Cents: fifty: 50 cents.
Words: twelve: twelve.
OrdinalWords: 33: thirty-third.
Roman: three: III. RomanLower: three: iii.
Percent: 40: 40%.
Decimal: two places. 1.5: 1.50.
Fraction: three and a half: 3 1/2.
Time: 1015: 10:15. A number no clock can show, such as 1275, stays as it is.
Date: 91826: 9/18/26. 10152026: 10/15/2026.
MonthDay: the digits after a month, written on the number bar. January 62019: January 6, 2019.
Phone, Social, Zip: as under Triggers.
Custom formats
Set Show to Templates for custom formats, such as a docket number. Remove on a row deletes it. Click Add a Template, type a name in Template and the shape in Shape. So shows the shape on a sample.
# is a digit. Everything else is written as it is.
< at the start fills the shape from the right.
[ and ] around a part that is left off when there are not enough digits.
Examples:
##-#### named Docket: one two three four five six: 12-3456.
###-###: one two three four five: 123-45.
<###-###: one two three four five: 12-345.
#####[-####]: 34994 is 34994, 349940625 is 34994-0625.
Use the name as a Rule on a keyword row, or in a Dictionary entry. For a number said digit by digit, make the row a trigger. With a row for docket number, trigger, Rule Docket: the docket number is one two three four five six: The docket number is 12-3456.
Currencies
Set Show to Currencies for the money a Dictionary entry can name. It starts with dollars (D) and cents (C). Add a Currency adds a row, and Remove on a row deletes it.
Letter: the letter after {#M}. E is {#ME}.
One and Many: the currency's name, as in Euro and Euros.
Symbol: ^ is where the number goes. $^ is $50, ^ EUR is 50 EUR.
Unit: Main has cents, Hundredth is a smaller unit such as cents or pence, Whole has no decimals, such as the yen.
Importing your Eclipse settings brings your Eclipse Currency list in.
Format a number from a Dictionary entry
Put {# and a format name in an entry to set the format of the next number. Use it for one-off formats, such as a juror number or a roman volume number.
{#R}: Roman. Volume {#R} three: Volume III.
{#r}: roman, lower case: Volume iii.
{#W}: words. chapter {#W} twelve: chapter twelve.
{#N} or {#G}: figures, no grouping. code {#N} six: code 6.
{#Q}: by the Quantities settings.
{#M}: money. paid {#M} fifty: paid $50.
{#C}: cents. {#C} fifty: 50 cents.
{#M and a Letter from the Currencies table}: that currency. With a Euro row on E, {#ME} fifty: 50 EUR.
{C: and a One or Many name}, after the number: fifty {C:Euros}: 50 EUR. With no number in front it writes the name.
{#O}: ordinal. {#O} twenty one: 21st.
{#D}: date. {#D} nine one eight two six: 9/18/26.
{#T}: time. at {#T} ten fifteen: at 10:15.
{#P}, {#S}, {#Z}: phone, Social Security, zip.
{#Docket}, or any name in the Rules list or Custom formats.
{#R} sets only the next number. Add >> to keep it on until an entry with {#} turns it off:
volume {#R>>} one and volume two then volume three {#} and volume four: volume I and volume II then volume III and volume 4.
Change one number after it is written
To write one number another way, use Write Number As: right-click the number and point to Number Format. See Write Number As.
23Keys and Macros
Every command can be assigned to a key, or added to a macro or a toolbar.
Change a key:
Open Settings > Keyboard.
In Find, type the command name. The command is listed with its key in each mode.
Select the key beside the command and press the new key. Esc leaves the key unchanged. The change is kept in the keyboard shown in the Keyboard field.
Assign a command that takes a parameter to a key:
Some commands take a parameter: a number, some text, or a choice. Quote Last Words takes how many words.
Open Settings > Keyboard and type the command name in Find.
Select the key beside the command. The menu asks for the parameter.
Fill it in and click Set the Key. Cancel leaves the key alone.
Press the key.
Examples:
Quote Last Words, How many words 3: the key puts quotes around the last 3 words.
Mark Line, Why Check: the key marks the line with the word Check.
Type in Some Text, The words Thank you.: the key types Thank you.
Change Paragraph Style, Which style Question: the key makes the paragraph a Question.
In a Dictionary entry, the parameter goes after the command's name, inside the parentheses:
{@RUN(quote 3)} puts quotes around the last 3 words.
{@RUN(mark Check)} marks the line with the word Check.
{@RUN(type Thank you.)} types Thank you.
{@RUN(parastyle Q)} makes the paragraph a Question.
Every command that takes a parameter, and which one, is in the Command List.
To keep a second keyboard, such as one for writing and one for editing, type a name in Save as and click Save. Coming from loads the keys of another CAT program: StarCAT, Eclipse, Case CATalyst or digitalCAT. A new install starts on Eclipse, with StarCAT's keys where Eclipse has none. Pick StarCAT for StarCAT keys. Every key on both maps is in Key Mappings.
Import Eclipse Keys reads your keys from an Eclipse .set or .ini file: its StandardKey, HyperKey and Macro lines, and its AutoReplace, Normalization and Prefix/Suffix lists, and the settings StarCAT has too: Tuck Punctuation Inside Quotes, the number settings and words, and AutoBrief's Maximum phrase words and minimum times written. A report lists each one as Imported, Partly Imported, Not Supported or Off.
Use These Settings applies them as Eclipse (Imported), and Undo puts back what you had.
Leave It changes nothing.
Print the Keys prints every key on the map as a grid: the key, then the command. Each mode gets pages of its own first, then the regular keys, then the pedal. Keys are grouped and shaded by job: Moving, Editing, Paragraphs, Audio and Realtime, Dictionary, and View, File and Settings.
Print the Keys: the Eclipse keyboard, Moving keys first
Print Key Grid prints the keys across in keyboard order, F keys included, one row of keys for each combination: Shift, Ctrl and the rest, then keys pressed after another key. Each key shows its command, colored by the same groups. Combinations with no commands are left out.
Print Key Grid: the F keys, each with its commands under it
Print Keyboards draws a keyboard for each combination, with each key's command on it. A command too long for its key is set smaller until it fits. A key that starts a two-key command and also has a command of its own shows its command, ringed in black.
Print Keyboards: the Eclipse keyboard, each key alone, shaded by jobDefine typed in Find
Set up a mode:
A mode makes plain keys into commands while it is on. RocketKeys is one.
Open Settings > Keyboard. The Modes table lists each mode with its name, its key, how many keys it has, and where it shows.
Click Add a Mode to create a new one. Type its name in the Name box.
Click the button in the Key column and press the key that turns the mode on and off.
In Shows, pick Badge, Button, Badge + button or Neither. The badge sits over the transcript; the button goes on the toolbar. With any of them, even Neither, the mode's name shows in the status bar while the mode is on.
Set keys for the mode in its own column of the key list. Those keys work only while the mode is on.
Remove deletes a mode you added. Built-in modes cannot be removed.
While a mode is on, its name shows in the status bar at the bottom. Click the name to leave the mode. INI CAPS (a capital on every word, from {@CAPWORD(ON)}), ALL CAPS and NUMS show there too; a click writes your Steno for turning that one off. If no Steno in your dictionaries turns it off, a note says so. CAPS and NUM LOCK show while Caps Lock or Num Lock is on.
Build a macro:
A macro is a list of steps. Each step is one command, and the steps run in order, top to bottom, as if their keys were pressed one after another.
Open Settings > Macros and click New Macro.
Type a name in Name. With status messages on, the name shows in the status message when the macro runs.
On the right, type part of a command's name in Find, select the command in Add a step, and click Add. Clicking Type in Some Text or Key Press adds that step.
If the step has a parameter, such as the count for Select Previous Word or the ending for Put Ending on Word, set it in the step's row. A row with nothing set is marked red.
Use the up and down arrows to change the order. The X removes a step.
Click Save.
Example: Bold the last two words is Select Previous Word with a count of 2, then Bold. With the cursor after "contract.":
The witness signed the contract. becomes The witness signed the contract.
Bold the last two words in the Macros menuBeforeAfter
Run a macro:
From a key. In the macro, click Set a Key and press the key.
From the writer. Type the Steno in Steno, pick the dictionary beside it and click Define. Plays this macro lists every Steno that runs it.
From the list. Click the play button beside the macro.
From a toolbar or a pedal button. See Toolbar and Keyboard below.
Repeat Last Macro runs the last macro again.
Make the steps work together:
Each step works on what the step before it left: the cursor, or a selection. A step given the wrong one does nothing.
A step like
Works on
Put this step before it
---|---|---
Bold, Italic, Underline, Cut, Copy, Delete
a selection
Select Word, Select Previous Word, Select Paragraph
Put Ending on Word, Punctuation, Hyphenate Back to Space, Take Last Mark Off and the other steps in the Word group
the word at the cursor, or one selected word
Previous Word, Next Word, Previous Untranslate, or a select step for one word
Cap Word, Delete Previous Word, Delete Next Word
either
either
Examples:
Select Previous Word, then Put Ending on Word set to s: The witness signed the contract. becomes The witness signed the contracts.
Previous Word, then Bold: nothing is bold. Previous Word moves the cursor and selects nothing. Use Select Previous Word.
Select Previous Word with a count of 2, then Put Ending on Word: nothing changes. A Word step takes one word, not two.
Plural the last word, after
When a step does nothing:
A step that does nothing does not stop the macro. The steps after it still run.
When every step ran, the status message is the macro's name, with status messages on. When a step did nothing, the message says how many ran, either way:
To find the step, run the macro's steps one at a time from their keys, on the same text.
Ask for a parameter while it runs:
In the step's row, check Ask.
Type the question in the box beside it.
When the macro reaches that step, it stops and asks. The answer is the parameter.
Example: Put an ending on the last word is Previous Word, Put Ending on Word with Ask checked and the question "Which ending?", then Back to Writing. Run it, type ed and press Enter:
The witness signed the contract. becomes The witness signed the contracted.
Ask checked on Put Ending on WordAsk popup
Macros to run while writing:
A macro run from the writer during realtime should not open a menu or leave the cursor away from the writing. The Macros menu warns when one would: Not one to fire while you are writing., followed by the step that moves the cursor or opens a menu.
Warning, on Define the last two words
End a macro that goes back into the text with Back to Writing. If the cursor was at the writing when the macro began, it goes back there.
To define while writing, use a Define Slot instead of Define. A slot opens no menu. See Defining.
Things a step cannot do:
Find and Replace open the Find bar. A step cannot type a word into it. To change a word everywhere, use Replace by hand.
A count goes up to 9.
Hyphenate Back to Space puts in one hyphen. To hyphenate three words, use two Hyphenate Back to Space steps, as Hyphenate the last three words does.
A macro cannot run another macro, and cannot repeat itself.
Share macros:
Copy makes a copy of the macro under a new name.
Save to a File saves one macro. Save All to a File saves every macro.
Add from a File adds the macros in a file saved this way.
Add the Ones We Ship adds the macros StarCAT comes with.
Print the Macro List prints every macro with its key and its steps.
Record a macro:
Open Settings > Record Macro. The status message reads "Recording a macro."
Run the commands for the macro. Each command is one step.
Open Settings > Stop Recording. The Macros menu opens with the recorded steps.
Name the macro, give it a key or Steno if wanted, and save it.
If nothing was run during the recording, no macro is made.
Remove: deletes the selected keyboard. The one in use can't be removed.
Save as and Save: saves the keys under a new name.
Coming from: loads the keys of another CAT program, and keeps the keys you set.
Import Eclipse Keys: reads keys from an Eclipse .set or .ini file.
Add a Mode: adds a mode to the Modes table.
Find: finds a key or command in the Keys list.
Print the Keys prints every key, with the pedal buttons in a section of their own.
Print Key Grid and Print Keyboards print the keys as a grid in keyboard order and as drawn keyboards.
A pedal button can run a macro. Under Pedal, pick the macro in Add a button for (macros are in their own group) and click Set the Button. One press runs every step, for example Faster then Play from Cursor. On a button's row, click press or let go to choose when it fires. Remove takes the button off.
Keyboard menu
Next Keyboard
Switches to the next saved keyboard. The keyboard's name appears as a status message, with status messages on. With one keyboard, nothing changes.
RocketKeys
Turns RocketKeys on and off. In RocketKeys, single keys run commands without Ctrl or Alt. Alt+Z enters and leaves the mode. On the Eclipse map, the default, G runs Define. On the StarCAT map, the key is the command's usual key with the modifier left off, so D runs Define where Ctrl+D does outside the mode.
Quick Shift (Toggle)
Changes the case of the text at the cursor. Use it once for the letter, twice quickly for the word, three times for the line. Text with a lowercase letter becomes uppercase; text with none becomes lowercase. With text highlighted, the highlight is changed. In RocketKeys the command is on a tap of either Shift key.
Arrows Exit RocketKeys
Makes an arrow key leave the mode. The arrow still moves the cursor. The switch is Arrows Exit RocketKeys, on Settings > Keyboard under Modes. Off by default.
Cheat Sheet
Ctrl+/
Shows and hides the cheat sheet, a list of commands with their hotkeys and Steno. On a held key, the cheat sheet shows while the key is down and closes on release. Opened from the menu, it stays open until closed with the X, a click outside it or Esc. Choose its commands on Edit Cheat Sheet.
Cheat sheet
Edit Cheat Sheet
Chooses the commands on the cheat sheet.
Search: finds a command in the list.
The list: check a command to show it on the sheet. The preview is on the right.
Print: prints the sheet.
Clear My Picks: returns to the default list.
Assign Ctrl+/: assigns the key to the cheat sheet. It shows when no key opens the sheet and Ctrl+/ is free.
Cheat sheet menu, with the sheet previewed
Macros
Ctrl+Alt+Shift+M
Opens the Macros menu. A macro is several commands under one name, run in order from one key or one Steno entry. The menu builds, records, copies, saves to a file, and adds macros from a file.
Add from a File and Save All to a File: see Share macros.
Add the Ones We Ship: adds the shipped macros you do not have.
Print the Macro List: makes a page of the macros to print.
In the builder, Name names the macro and Category files it. Set a Key saves the macro and assigns a key, and Clear removes the key. Type a stroke in Steno, select a Dictionary and click Define: this saves the macro and writes an entry that plays it, {MACRO:name}. Save keeps the macro. Cancel closes the builder and drops changes made since the macro last saved. Copy, Save to a File and Delete act on a saved macro.
Macros menu
Record Macro
Starts recording a macro. Use it again to stop. It has no default key, so stop with Settings > Stop Recording, or Stop Recording on the Infobar. The status bar counts the steps. Recording stops at 100 steps. The steps open on the Macros menu to edit and save. See Record a macro.
Repeat Last Macro
Runs the last macro again, however it was started. The last macro is remembered until StarCAT closes. A macro cannot repeat itself.
Edit Right-Click Menu
Chooses the commands on the right-click menu. Searching, pinning and moving rows work as on Edit Infobar. Change This Menu…, the last row of the right-click menu, opens this menu on the place clicked.
Place selects the cursor position, since the menu offers different commands on, for example, a Conflict or an Untranslate.
Number of alternates: how many other translations of the word at the cursor the menu offers, 0 to 9, 4 by default. 0 shows none.
Number of commands: how many commands the menu lists, 1 to 30, 10 by default.
Right-Click Menu with Place set to Question
Edit Toolbars
Ctrl+Shift+F1
Opens the Toolbar menu. Sets the commands on each toolbar, where each bar sits, and how its icons are drawn. Add a Bar adds a toolbar, either Empty or a set such as Formatting, Editing or Most used. Remove on a bar's row takes it off, and is gray with one bar. See Set up the toolbars.
Toolbar menu
24Realtime Output
Outputs are set on the Output tab of Translate Options. Several outputs run at once, each with its own connection and delay.
Each entry is a command. Assign any of them to a key or a stroke, or add it to a toolbar: see Keys and Macros.
Open Realtime > Realtime Output. The Output tab opens.
Click Add an Output.
Type a Name, such as Courtroom. In Down, select Caption Wire.
Type the Code from your Caption Wire account page.
Click Add. The next stroke goes out, and the row shows Now and how many words were Sent.
The output sends whichever job is open, fixes included. Clear Send corrections to leave sent words as they were sent.
Hold the words back:
On the Output tab, click the output's row, then Change.
In Hold back, type how much to hold, and in Counted in select words, milliseconds, lines or strokes. Three words gives you a stroke or two to fix a word before the viewers see it.
Quiet time is the flush delay: what is held is sent after that many milliseconds without a stroke. Maximum WPM caps how fast text leaves.
Click Save. Send What Is Held sends the held words now.
Read back and return to the writing:
Write. The transcript follows the writing: this is the default.
Click in the transcript where you want to read. It stops following and stays there while you write.
Press Follow Realtime (Ctrl+Alt+L). The cursor goes to the writing and the transcript follows it again.
Press Follow Realtime again to go back to where you were reading.
Realtime Output
Opens Translate Options at the Output tab. Each output has a name, a format and a destination: Caption Wire, a serial port, a network address, a file, another program as keystrokes, or a display window.
Serial port: Port and Speed. Refresh reads the ports again.
Network address: Address and Port. User name and Password are sent when the connection opens. Leave User name blank for a receiver that doesn't ask for one.
File: type it in File, or click Browse….
Caption Wire: Site and Code.
Send corrections sends fixes. To Caption Wire, a fix changes the word on the viewer's screen; off, sent words stay as sent. Anywhere else, a fix goes out as backspaces and a retype. Most caption standards want it off. On by default.
Click an output's row, then a button under the list:
Switch Off keeps the output and stops it. Its row says switched off. Switch On starts it again.
Stop Sending keeps the connection open and sends nothing. The row says nothing sent and counts what was skipped. Send Again sends from the next stroke on; nothing written while it was stopped goes out.
Change opens the output's settings. Remove deletes the output and lets go of its connection.
Send Raw Bytes sends codes down the cable once, such as a code an encoder needs. Type them in Bytes and click Send. ^C is Ctrl+C, ^^ a caret, \xC7 one byte. The bytes as they will be sent show under the box. They are never on the page and cannot be undone. Only for an output that is running.
Send What Is Held sends the held words now, without waiting for Quiet time.
Sends picks the format: Bridge, the realtime format Eclipse, DigitalCAT, StenoCAT and SmartCAT read, or Plain text for anything else, such as Case CATalyst.
With Sends set to Bridge, two more switches show:
Deny saving: the receiver may not save a copy. Sent again every 30 seconds. Off by default.
Send the time: the time of day goes in front of the words. On by default.
Send in all caps sends the words in capitals. A Caption Wire output first set up with a Job and a Captioner key, before codes, still shows those two boxes instead of Code.
Add an output, set to Caption Wire
Send What Is Held
Shift+Enter
Sends held words to the outputs now, without waiting for the flush delay, Quiet time.
Send Raw Bytes
Sends raw codes to one output, for an encoder or display that takes its own codes. On the key or in the Dictionary entry, give the output name, a bar, then the codes, such as Captioning|^C^A3^M. The output's connection must be open.
Follow Realtime
Ctrl+Alt+L
Switches the cursor between the writing and the place you were reading.
While you write, the transcript follows the writing by default: each stroke keeps the line being written in view. Click in the transcript, select, or jump somewhere, and it stops following, so you can read back while the writing goes on. Follow Realtime then takes the cursor back to the writing, and following starts again. The place you were reading is kept: press Follow Realtime again to return to it. With no place kept, it goes to the start of the job.
End of Transcript (Ctrl+Page Down, or Ctrl+End on the StarCAT map), or scrolling to the bottom of the transcript, also starts following again.
Mark Line
Ctrl+Alt+Shift+F12Shift+X (RocketKeys)
Marks the cursor's line, or removes the mark. A mark can have a word, such as Check or Quote. Marked lines are listed in the Marked Lines panel. To color marks by word, see Color your marks.
Quick Issues
Opens the Quick Issues menu: ten rows, each a color and a word. A marked line whose word is on the list shows that row's color in the line number column. Marks with any other word, or no word, show no color. Each row also shows the Hotkey and Steno that mark a line with its word, the Dictionary the steno is in, and the Command, such as {@RUN(mark Check)}. Click Set and press a key to give a row a hotkey, or × to take one off. The key is on the Keyboard menu too. Type a stroke in Steno, pick the Dictionary and click Save. A key or stroke that already does something else asks before it is moved. Clear Steno and click Save to take the entry out of the Dictionary. Clear a row's word to turn the row off.
Color your marks:
Open Realtime > Quick Issues. Type a word on a row, such as Check on the red row and Quote on the orange one. Click Save.
While writing, press Mark Line to mark the line: Ctrl+Alt+Shift+F12 on the Eclipse map, F5 on the StarCAT map. On the StarCAT map, Ctrl+F5 marks it Check and Shift+F5 marks it Quote. To mark with any other word, put Mark Line on a key or stroke with the word, such as {@RUN(mark Exhibit)}.
The line number turns the word's color. Renaming a row recolors every mark with that word, even ones written an hour ago.
After the job, open View > Panels > Marked Lines to see them all, or open Edit > Go to > Next Marked Line. Press Mark Line on a marked line to take the mark off.
Quick Issues menu
Time on Record
Ctrl+Shift+K
Says in the status message how long the job has been on the record, and how long off it once there has been a break. Nothing to start or stop: a gap of more than one minute between two strokes counts as off the record.
Picks Translation N of the last Conflict behind the cursor. With no number, picks the other Translation of a Conflict with two. The pick applies for the rest of the job.
Written from the writer, it looks back only as far as Realtime reach on the Input tab of Realtime > Translate Options: 20 lines by default, 0 for no limit. A Conflict farther back is not picked, and the status bar says No conflict in the last 20 lines. From a key or a click there is no limit. Realtime reach is a User setting.
Realtime Statistics
Shows and hides the Realtime Statistics panel: strokes, words, Untranslates, Conflicts, auto-picked Conflicts, strokes and words per minute, time on and off the record, and time per speaker. Click Choose to pick the lines shown, then Done. Right-clicking the panel offers the same. Double-click a speaker's time to edit it: type h:mm:ss, minutes, or +5 or -5 to add or take off minutes.
Realtime Statistics panel
25CART Window
Show the job in a CART window:
The CART window, StarCAT CARTView, shows the job in big text in a window of its own, for a second screen, a projector or a screen the client reads.
Open Realtime > Realtime Output and click Add an Output.
Type a Name, such as Projector. In Down, select a display window.
Click Add. The CART window opens with the job so far, and the row's Now reads showing.
Write. New text comes in at the bottom of the window and older lines go off the top.
Hold back, Quiet time, Maximum WPM, Send corrections and Send in all caps work in the CART window as in any output.
Add an Output, set to a display windowCART window at its first size, 900 by 300, with the job's text
CART window on a second screen:
Point at the top of the CART window. A strip, the window's title bar, appears across the top.
Drag the strip onto the second screen.
Right-click the window and click Full Screen, under Snap Size. To leave full screen, click Full Screen again.
Switched off and on, the CART window opens where it was.
Change how the CART window looks:
Right-click the CART window to show its settings. Right-click again, press Esc or click Done to hide them. Each change shows at once, and the CART window opens with the same settings in every job.
While the CART window is open, StarCAT has an icon in the Windows notification area, CARTView settings. Click it to open the same settings in a window of their own, on the StarCAT screen, so the room does not see them.
Text size: 12 to 400. 48 by default.
Font: Segoe UI, Arial, Verdana, Tahoma, Calibri, Times New Roman, Georgia, Consolas or Courier New. Segoe UI by default.
Text color and Background: white on black by default.
Background transparency %: 0 to 100. Above 0, what is behind the window shows through.
Outline width and Outline color: an outline around each letter, 0 to 20 pixels wide. 0, no outline, by default.
Text transparency %: 0 to 90.
Alignment: Left, Center or Right. Left by default.
Line spacing: 0.8 to 3. 1.3 by default.
ALL CAPS: shows every letter as a capital.
Fit to lines: sizes the text so that many lines fill the window. 0 is off. On, Text size is grayed out.
Letter spacing px: -1 to 4.
Paragraph gap px: space between paragraphs, 0 to 64.
Line width %: how much of the width the text uses, 10 to 100. Under 100, Alignment also places the text left, center or right.
Margins (px): Left, Right, Top and Bottom. 24, 24, 12 and 12 by default.
Snap Size sizes the window on the screen it is on:
Width: the full width of the screen, at the same height.
Bottom: the full width and the bottom third of the screen, above the taskbar.
Full Screen: fills the screen. Click again to leave.
Unsnap: back to 900 by 300, in the middle of the screen.
Layouts saves a look under a name. Type a name in Save as and click Save. Select a layout in the list to use it again, or click Delete to remove it.
Reset puts every setting back to its default.
Layouts and Reset leave the window's size and place as they are.
CART window's settings, shown by a right-click
Close the CART window:
Point at the top of the CART window and click the X at the right end of the strip. The window closes and the row's Now reads window closed. The output stays on.
To open the window again, open Realtime > Realtime Output, click the row, then click Switch Off and Switch on.
To close the window and stop the output, click the row and Switch Off. Now reads switched off.
26Team Editing
Team Editing
Opens Team Editing, for editing one job on two computers at once, such as you and your scopist. Every edit shows on both screens. Nothing locks. When both computers edit at once, the host's edit goes in first and the other goes in after it, so neither is lost.
The second computer needs StarCAT installed too. Install it the same way, from the same installer. Your Dictionaries and the job are sent when the second computer joins.
Team Editing menu before a session: Host this job, or Join one
Host a job:
Open the job.
Open File > Team Editing.
Type a password and click Host This Job.
The menu shows a code, such as KPRMXTWB, and your network address. Send the other person the code and the password.
Team Editing menu while hosting, with the code and address
Join a job:
On the second computer, open StarCAT.
Open File > Team Editing.
Type the code (or, on the same network, the address) and the password.
Click Join. The host's job opens.
The code works from anywhere. The address works only on the same network.
The other person's cursor shows on the page, with their name above it. The menu lists where each person is; click Find beside a name to go there.
Audio the host records during the session reaches the other computer every few seconds, in the format the host records in. So do exhibits the host attaches. If the host's connection cannot keep up with the audio, the menu says so. Record in MP3 or Opus to send less: Audio > Recording, Format.
Chat
The Team Editing menu has a chat. Select Everyone or one person in To, type, and press Enter. A message from someone else also shows in the Infobar. When the session closes, the chat is saved in the job folder as a text file named after the job, ending in _chatlog.txt.
A chat message to Everyone
Click End the Session (host) or Leave (guest) to stop.
27Export and Print
Printing and exporting use the job's print layout unless another layout is selected.
Print a transcript:
Open File > Print.
Select the Printer and the number of Copies.
Under Print, select Full transcript, This page or These pages, and type pages with commas and spans, such as 5, 15-20, 29, or odd or even. A job split into volumes with Volume from Here also offers These volumes: type volume numbers the same way, such as 2 or 1, 3.
Under Sides, select one side or both sides.
Click Print.
The settings under Options do not change the job: Page numbers, All caps, Print colors and Watermark. Page numbers, Format box, Headers and footers and Timestamps show only when the job has them. The printer, copies, sides and watermark are kept for the next print. Click Save Settings to keep the options too.
Export a transcript:
Open File > Export.
Select the Print Layout and the Format.
In Pages, type the pages to export, or leave it blank for the whole transcript.
Set the format's options, then click Export… and choose where to save the file.
Export several files at once:
A bundle is a saved set of formats written together into one folder.
Open File > Export and select the first Format and its options.
In Bundle, choose New bundle…, type a name in Call it, and click Save ... as a new bundle.
Select the next format and click Add ... under the bundle. Repeat for each format.
Select the Jobs to export. Under Recipients, type the addresses the bundle goes to, or click Find Emails to collect them from the open job.
Click Export the Bundle….
To send the files, click E-mail Them under the list of files written. A new e-mail opens in your mail program, addressed to the Recipients, with the files attached. With no mail program, the folder with the files opens instead.
A bundle of three formats, with a recipient
Formats
The ASCII formats write plain text:
Page Image: a line-for-line copy of the printed page.
Compressed: as Page Image, with blank unnumbered lines removed.
DiscoveryZX: line numbers and text only.
CaseView: text flush left, saved as .v1.
Summation: a five-digit page number in column 1.
Amicus: a four-digit page number flush left.
Raw: one line per paragraph.
The other formats:
RTF/CRE transcript and RTF/CRE notes: include the Steno and times, to open the job in another CAT program.
PDF transcript, PDF condensed and PDF notes. A PDF can be saved as PDF/A, bookmarked from the index, digitally signed, or encrypted with a password. PDF/A is the archive kind of PDF, with its fonts inside it, so it looks the same on any computer years from now. Some courts and e-filing systems ask for it.
Word transcript (.docx), laid out by the Print Layout. Word sets its own page breaks, so it takes no page range.
HTML transcript.
PDF index, PDF word index and PDF words to check.
SRT captions, WebVTT captions, SCC captions and SMPTE-TT captions: the transcript as a caption file for a video. Each caption is shown at the time its first word was written, two lines of 32 characters at a time, with the paragraph's label in front: Q., A., or the speaker's name. SRT opens in every video player and on video sites; WebVTT is the same file for a web page; SCC is the file a television station or a caption encoder uses; SMPTE-TT (.ttml) is for web video that asks for Timed Text. SCC has no codes for some characters, so it writes ± as +/-, ¼ as 1/4, ¾ as 3/4, € as EUR, § as Sec., … as ..., × as x and • as ·. Offset (seconds) is added to every time, so the first caption lands on the first frame of the video. A negative number is allowed. A caption stays up until the next one, at most 7 seconds. Capitalize everything writes the captions in capitals.
Export captions for a video:
Open File > Export.
In Format, select SRT captions.
Play the video and note the time the first word is said. In Offset (seconds), type that time minus the time of the first caption. For a first word said at 12 seconds and a first caption at 00:00:05, type 7.
Click Export… and save the file beside the video. A player opens the captions when the two files share a name: meeting.mp4 and meeting.srt.
Sign or encrypt a PDF:
Open File > Export and select PDF transcript, PDF condensed or another PDF in Format.
Check Digitally sign and select the Certificate. Type a Reason for signing, such as I am the reporter of this transcript, and Your location, such as the city. Both are optional and go into the signature.
Check Encrypt and type a Password. Check Allow printing or Allow copying for what anyone may do without the password.
Click Export….
A PDF transcript, signed and encrypted, printing allowed
Bookmarks from the index, on PDF transcript only, makes the PDF's bookmarks from the job's index: each category, each item under it, and under an item each role, such as Direct or Cross. On by default. Turn it off for a PDF with no bookmarks.
Certificate lists the certificates on this computer that can sign. With none, the menu reads "No certificate on this computer can sign." A certificate authority issues one. The certificate, reason and location are kept for the next export.
Password is the one that lifts the limits. The PDF opens for anyone without it, and printing and copying are allowed only when checked. With no password, the limits stay on and nobody can lift them.
A PDF/A file cannot be signed or encrypted. With PDF/A checked, both are gray.
Export a condensed transcript:
A condensed transcript prints several pages on each sheet of paper.
Open File > Export and select PDF condensed in Format.
Set Pages across and Pages down, 1 to 16 each. 2 and 2 is four pages on a sheet.
Set the options below, then click Export….
PDF condensed, 2 across and 2 down, a note box on the right edge
Print the header on every page of the sheet: the condensed pages leave out the page header. Check it to print the header on each one. Off by default.
Full size first and Full size last: the number of pages at the start and the end printed one to a sheet, full size, such as the title page and the certificate. 0 by default.
Page order: Down, then across or Across, then down.
Landscape turns the sheet on its side.
Note box: a blank box for notes, on the Left edge, Right edge, Left and right edges, Bottom edge or Lower right corner. The corner takes the place of the last page on the sheet, so a sheet of one page has none. None by default.
Width (in): how wide the note box is, 0.25 to 4 inches. On the bottom edge, how tall. 1.5 by default.
Ruling height (in): a ruled line across the note box every so many inches. 0 rules no lines. 0.25 by default.
Outline box draws a border round the note box. On by default.
Print steno notes:
Open File > Notes. The open job's steno shows as paper tape.
To print another notes file, click Open Notes File and choose a .stn, .not or .ecl file. This Job goes back to the open job.
In Beside the steno, select Translation or Phonetics to print it next to each stroke, or Nothing for steno only.
In Timestamps, select Time from the first stroke or Time of day, or Off.
Set Columns, 1 to 6, and turn Lines between columns on or off.
Click Print Preview to see the pages, or Print.
Notes menu, with Translation beside the steno
Export
Ctrl+Shift+D
Opens the Export menu. Files go to C:\StarCAT\Exports. To change the folder, open Settings > Backups and Users and click Change on the Exports row. The options shown change with the format.
Volumes shows on a job split into volumes with Volume from Here. Type the volumes to export, such as 2 or 1, 3. Blank is every volume.
Hold sworn blurbs, by-lines and headings on one page keeps those lines from breaking across a page.
Timestamps, on the text formats, puts the job's timestamps in the left margin. The option shows when timestamps are on for the job. A program that reads the file by column may read a time as text, so leave it off for those.
Columns of steno, on PDF notes: 1 to 5 columns of strokes on a page. 3 by default.
Print the time beside every stroke, on PDF notes. Off by default.
Renumber Paragraphs, on HTML transcript: numbers the paragraphs again, from First Paragraph Number, in this file only. The job keeps its own numbers. Off by default; First Paragraph Number is 1.
Opens the Print menu. See Print a transcript. Preview shows the pages before they print.
Check Watermark to print text across each page. Watermark text is the text, and Size, Direction and Shade set how it looks.
Under Sides, Default leaves the choice to the printer. The others are Both sides, flip on the long edge, Both sides, flip on the short edge and One side.
Timestamps prints the time from the start of the job, the time of day, or none.
Print menu
Preview
Alt+F1
Shows the whole transcript as it will print, in its own window.
Print preview: page 1 with its line numbers
Print This Page
Alt+F2
Prints the page at the cursor on the default printer with the job's print layout. No menu opens. The status message reads "Page N sent to the printer."
Notes
Shift+F7
Opens the Notes menu: the steno of the open job or a notes file as paper tape, to view, preview and print. See Print steno notes. The translation comes from your dictionaries as they are now. Nothing in the job changes. The default is 3 columns, with lines between them. Font and Size set the type on the page; a blank Size is Auto.
The highlighted stroke is the cursor. The arrow keys, Page Up, Page Down, Ctrl+Home and Ctrl+End move it. The line above the tape gives its stroke number, fold and time. A fold is a block of strokes, like one fold of paper tape: 100 by default, set in Fold Size. Stroke 250 is in fold 3. Go To takes a stroke or fold number. Find takes steno; Locate Next and Locate Previous find it again.
Hold Shift while moving, or Shift+click, to mark strokes. Esc clears the mark.
Block Write (Alt+W) copies the marked strokes to a .stn notes file. Type a new name, or pick a file to add them to its end. The notes they came from do not change.
Block Read (Alt+R) inserts one or more notes files in front of the cursor stroke. It works on a .stn file you opened with Open Notes File, not on This Job: a job's notes are its stroke record.
Global opens Define with the marked strokes, or the cursor stroke, in Steno.
28Scopists and Proofreaders
Send a job to a scopist in parts while you write, or to a proofreader who reads it in a browser.
Hand a job to a scopist during Realtime:
Open Realtime > Scopist Hand-Offs. Set Folder and, for timed hand-offs, Every, in minutes. 0 is off.
Put the cursor where the part ends, then open Realtime > Send to Scopist. Two files go into the folder, named for the job with the part number: Smith_1.rtf, the job so far as an RTF for a scopist on any CAT program, and Smith_1.scjob, the job itself with its Dictionaries and Includes, for a scopist on StarCAT. Each part holds the whole job so far; the scopist takes up from where the last part ended.
The scopist on StarCAT opens the .scjob with File > Restore Job. It opens as a new job, and no job already on that computer changes.
The shading on sent writing
Writing sent to a scopist is shaded, from the top of the job down to where the last part ended, and the status bar says SENT TO SCOPIST. The shading stays when the job is closed and opened again. To take it off, click SENT TO SCOPIST on the status bar and click Take Back on each part in the list.
Send a whole job to a scopist:
Open File > Send Job to Scopist.
Choose where to save the .scjob file. It holds the job, the Dictionaries that are on, and the Includes.
Send the file. The scopist opens it with File > Restore Job.
Scopist Hand-Offs menu: a Folder set, and a part every 15 minutesRealtime menu, with Send to Scopist and Scopist Hand-Offs
Send to Scopist
Sends the job up to the cursor to the hand-off folder as the next numbered part. With no folder set, no file is written. A timed hand-off ends at the last finished paragraph; this one ends at the cursor.
Scopist Hand-Offs
Opens the Scopist Hand-Offs menu.
Folder sets where part files go. Click Choose to pick it. With no folder, nothing is written out.
Every sets timed hand-offs, in minutes, up to 999; 0 is off.
Counted, From the last one: counts from the last hand-off. Every 15 minutes after one at 9:08 is 9:23.
Counted, On the clock: counts on the wall clock. Every 15 minutes is 9:15, 9:30, 9:45, whatever time the job started.
Send to Scopist: sends everything down to the cursor. See Send to Scopist.
The list shows each hand-off with its time, page and line, and Take Back.
Scopist Hand-Offs menu
Import Proofreading
Imports proofreading from a PDF of the job. Export a PDF transcript with File > Export and send it to the proofreader, who highlights words and adds notes in any PDF reader. Open File > Import Proofreading and pick the PDF they send back. Each highlight and note becomes a mark on its word, with the note as the mark's word. The marks are listed in the Marked Lines panel. A PDF whose page count differs from the job is refused; export it again. Password-protected PDFs are refused.
Send to Proofreader
Sends the job to a proofreader, who opens it in a phone or computer browser, fixes words and leaves notes. Your computer can be off.
Send gives a 10-letter code, a link and a QR code; give the proofreader any one of them. What they send back comes in the next time you open the job.
Get Changes Now brings in what they sent back at once. Fixes go in as edits, and Undo takes them back.
Send Again sends the job as it is now.
Stop Sharing brings in what came back, then deletes the copy from the server.
The server deletes a copy after 30 days. The copy is locked with the code; the server cannot read it.
29Audio
Each recording is a file in the audio folder inside the job's folder. Each Record and stop makes a new file. A job can have many recordings.
Record a job:
Open Audio > Recording and pick the Microphone.
Click the level meter on the Recording panel and speak. The meter moves when the microphone hears you.
Click Record. The time readout starts counting.
Click Record again to stop. The recording is listed on the playback strip.
Recording Panel
Shows and hides the Recording panel, Audio > Recording Panel. The panel shows:
Record: starts and stops a recording. Point to it to see how much room a recording takes: the size for an hour, for an eight hour day, and the space free on the drive.
Level meter: opens the microphone without recording, to check it. It does nothing while recording.
The live picture of the sound and the time recorded.
The Recording panel and the Playback panel dock at the foot of the window by default.
Pop Out floats a panel; drag it by its title.
Own window opens it in a separate window.
Menu opens the Recording menu.
Recording panel while recording
Playback Panel
Ctrl+Shift+A
Shows and hides the Playback panel, Audio > Playback Panel. The panel shows the playback strip, and the waveform fills the height the buttons leave. Drag the grip under the waveform to make it taller or shorter.
The strip, left to right:
Play, Pause, Stop, Back and Fwd. Pause remembers where it stopped; Stop forgets. Back and Fwd show the seconds they move. Right-click either one to change it.
Which recording: the recordings in the job, numbered in recording order. Pick one while playing and it plays from the start. Pick one while stopped and the cursor moves to its first word. A combined file is listed instead of the recordings it was made from.
The waveform, or a plain bar when the waveform is off.
The time: where you are, and the length of the recording.
Speed: 0.25x to 4x in quarter steps. The pitch does not change.
Follow, Waveform, Steno, Skip Quiet and Pause on Typing.
Sync, Keys, Combine and Remove.
Keys opens the Keyboard menu at the keys and pedal buttons that drive playback.
Remove removes the recording from the strip; the file stays in the job folder. Removing a combined file removes its recordings from the strip too.
Playback strip with the waveform and steno
Waveform
The Waveform button shows the recording as a waveform. On by default. The part already played is a darker color. While you record with nothing playing, the waveform shows the sound live.
Click the waveform to play from that point.
Turn the mouse wheel to zoom in and out around the pointer. The closest zoom is 5 seconds across the strip; the farthest is the whole recording.
Hold Shift and turn the wheel to scroll along the recording.
While the recording plays, the waveform turns the page when the playhead reaches the edge. If you scrolled away, it stays where you put it.
Steno and Translation on the waveform
The Steno button puts each stroke on the waveform at the second it was written. Click it again for Translation, the words instead of the steno, and again to turn it off. Steno is on by default.
The stroke being heard is lit.
Point to a stroke to see its steno and Translation together.
Click a stroke to play from it. The cursor moves to its word.
Strokes too close together stack in rows, up to three, and the strip grows to fit them. When three rows are not enough, the labels go and the strip says Zoom in to read the steno. The marks stay, and pointing to one still names it.
Translation on the waveform
Playback Bar
Shows and hides the playback strip by itself, above the paper. Listed on the Audio menu only when the job has audio. Close it with the X at its right end.
Playback Bar at Bottom
Moves the Playback Bar from above the writing window to below it. Off by default.
Attach Recording
Attaches a recording to the job. The file is copied into the job and shown on the playback strip. It is not lined up until you use Sync.
To keep the job small, check Convert attached audio to Opus in Recording. An MP3 or WAV you attach is then also saved as Opus, and Play uses the Opus copy. Converting to Opus shows how far it has got. StarCAT then asks whether to delete the original from the job's audio folder: Delete sends it to the Recycle Bin, Cancel keeps it. The file you picked is never touched. Off by default.
Video
Opens the Video menu: the picture, with its own play, pause, seek, speed and volume. The video is the job's recording: attach an MP4, MOV or MKV file with Attach Recording, and its picture plays here, a silent copy in step with the recording. Pop Out moves it to its own window. The captions over the picture show the transcript up to the word being heard. With nothing playing, they show the last lines of the job, so on a live job they follow the Translation as you write.
Video menu, paused: play, seek, volume and full screen. Speed is under the three dots
Play from Cursor
Alt+JShift+\ (RocketKeys)
Plays from the cursor. If no recording reaches the cursor, plays the file shown on the strip. With no cursor, resumes or starts at the top of the file. When a recording ends, the next recording plays.
Pause, or Resume
Alt+KShift+] (RocketKeys)
Pauses or resumes playback. Does nothing when playback is stopped.
Stop
Alt+H
Stops playback.
Back Few Seconds
Alt+Up ArrowAlt+Shift+Up Arrow → 10
Moves playback back by the Audio step, 5 seconds by default, and keeps playing. A macro step can give a number of seconds.
Ahead Few Seconds
Alt+Down ArrowAlt+Shift+Down Arrow → 10
Moves playback ahead by the Audio step, 5 seconds by default, and keeps playing. A macro step can give a number of seconds.
Slower
Alt+Left Arrow → 5
Lowers the playback speed by 0.25x. The slowest is 0.25x.
Faster
Alt+Right Arrow → 5
Raises the playback speed by 0.25x. The fastest is 4x.
Normal Speed
Shift+[ (RocketKeys)
Returns playback to 1x.
Follow On and Off
Turns following on and off. On, the transcript scrolls with playback and the word being heard is lit, with its strokes on the steno tape. On by default.
Sync at Cursor
Lines the recording up with the Translation. Play the recording. When you hear a word you can find, click Pause, put the cursor on that word, then click Sync. The button shows Synced or Not synced.
One Sync is enough. StarCAT saves the audio from one second before the press, so Play starts just ahead of the word.
The first Sync sets how far the recording is behind the writing.
A second Sync more than 10 minutes away also corrects for drift.
On an attached file, the Infobar says whether the file started before the writing or partway into the job.
The cursor must be on a written word. A word typed with no steno under it cannot be lined up.
Sync to Timecode
Lines the recording up by the videographer's timecode instead of by ear. Put the cursor on a word, click Audio > Sync to Timecode, pick the recording, and type the timecode where the word is said, such as 10:32:15. Press Enter or click Sync.
Recording Starts At is the timecode at the start of the file. Leave it empty for a file whose timecode starts at 00:00:00. StarCAT remembers it for the next time.
Timecodes can be HH:MM:SS, HH:MM:SS:FF (frames, counted at 30 a second) or HH:MM:SS.mmm.
It counts as a Sync: a second one more than 10 minutes away also corrects for drift.
Pause on Typing On and Off
Turns Pause on Typing on and off. On, typing pauses playback, and playback resumes 1.5 seconds after typing stops. Typing in the Define box counts too. Playback you pause yourself stays paused. On by default.
Skip Quiet On and Off
Turns Skip Quiet on and off. On, playback skips silences. While it is on, a slider next to it sets how loud counts as quiet: move it right for a noisy room, left if it skips words. Skip quiet never changes the file. Off each time StarCAT opens.
Combine Recordings
Combine on the strip joins the recordings into one file and leaves out the gaps between them. Use it before sending the audio to a scopist or a client.
Click Combine. The Combine Recordings box shows how many recordings and the total time.
Pick a Format. Each one shows its size for an hour of audio.
Click Combine.
The new file is named combined and saved in the job's audio folder. It replaces its recordings on the strip. The recordings stay in the folder and keep their own sync. Combine needs two or more finished recordings. StarCAT remembers the last format you picked.
Combine Recordings box
The Combine formats, with the size of an hour of audio:
FLAC, 16-bit: 48 kHz about 242 MB; 44.1 kHz about 222 MB; 16 kHz about 81 MB. FLAC loses nothing; its size depends on the sound.
WAV and MP3 open almost anywhere. Opus is the smallest for the same clarity. Pick WAV or FLAC when nothing may be lost.
Redacted audio
When the job has redacted words, the Combine Recordings box shows Silence the redacted words, in a separate file. Check it to create a copy with silence where those words were said. One recording is enough. Check A tone instead of silence as well to put a steady beep there instead, so nobody takes the gap for a dropout.
The copy is named redacted and saved in the job's audio folder. It does not go on the strip, so playback still plays the original. Redact the words first; see Redact in Formatting.
Recording
Opens the Recording menu.
Microphone: the input. Default microphone is the one set in Windows. Names show after the level meter has opened the microphone once.
Readback: the speakers or headphones for playback. Default speakers are the ones set in Windows.
Add Channel: adds a channel, up to 8. Each channel is its own microphone and its own file. Channel 1 is Microphone. On each added channel, select its microphone and its Speaker. Remove takes the channel off.
Ignored: an added channel with this checked is left out when Play channel is All. Selected on its own, it still plays.
Play channel: the channel you hear, or All.
Auto: plays the channel of the speaker the cursor is on.
Windows Sound: opens Windows' own sound settings, where inputs, outputs and their levels are set.
Format: how new recordings are saved. Recordings already made keep their format.
Convert attached audio to Opus: an MP3 or WAV you attach is copied into the Job as Opus. The file you picked is not changed.
Start recording when I write: see below.
Stop the recording after and Seconds: stops a recording that many seconds after the last stroke, 60 by default. The next stroke starts a new recording. Off by default.
Stop the recording after and Seconds of silence: stops a recording that many seconds after the last sound the microphone heard, 60 by default. An empty room ends the recording. The next stroke starts a new recording. Off by default.
Audio step: the seconds that Back and Fwd move, 5 by default.
Audio delay: the seconds Play starts before the word at the cursor, 0 by default.
Recording menu
The recording formats, with the size of an hour of audio:
AAC (.m4a): 192 kbps 86 MB; 128 kbps 58 MB; 96 kbps 43 MB; 64 kbps 29 MB. Listed only when this computer can write AAC.
PCM, 32-bit float, 48 kHz, uncompressed: 691 MB.
The WAV, MP3 and FLAC formats listed under Combine Recordings.
Opus 64 kbps is clear for speech and keeps an eight hour day under 250 MB.
Start Recording When I Write
Turns automatic recording on and off. On, the first stroke opens the microphone and starts a recording. Off by default.
A recording stopped by either Stop the recording after starts again on the next stroke, whether this is on or off. A recording you stop with Record stays stopped.
30PractiCAT
PractiCAT times and scores practice takes, the way NCRA grades its skills tests. Open it with Help > PractiCAT.
PractiCAT
Turns the PractiCAT panel on and off.
PractiCAT panel after a take: 128 WPM, 94.2%, one error
Write a take:
Put the passage in the passage box, or pick one from Library.
Click Start. StarCAT opens a new job in the Practice Case and highlights the passage at the set pace, 120 WPM by default.
Write the take.
Click Stop. StarCAT scores the take.
Panel
Start opens a new job in the Practice Case and starts the take.
Stop scores the take: WPM, accuracy, errors, deletions and words missed. The last 30 takes are listed.
Retake clears the take on the screen and starts it again in the same job, with the passage and pace it was written from. A passage or WPM you change after the take is used instead. Retake shows on any take's job, including one opened from the list.
Clear clears the results from the panel.
History, under the score, lists your takes. Above the list, a line charts the WPM of each take: green dots passed, red dots failed.
Best is your fastest take that passed. A take that beats it says New best.
Print Results, under the score, prints the take: the score, the errors by kind, each minute, the passage marked in your colors, and each error with its steno.
Name, beside Print Results: type your name to print it on the page.
Pass at sets the accuracy a take needs to pass, 95% by default. The score says Pass or Fail.
Test picks an NCRA skills test leg: RPR Literary 180, Jury Charge 200 or Testimony/Q&A 225, RMR 200, 240 or 260, or CRR Q&A 200. It sets the WPM and Pass at (95%, or 96% for the CRR) and ends the take at five minutes. Change either box and the take is practice again.
Score punctuation and capitals, on by default: each missing capital, period or comma is an error, and so is a question mark left off or added. A take in all caps or with no caps fails. A mark left off a word written right shows dropped after it, in brackets: "Absolutely" for "Absolutely!" is Absolutely[!]. Clear the box to grade the words only.
Above the takes, StarCAT adds up your time practiced: today, this week, and the days in a row you have practiced.
Every take also adds a line to the Practice Log, PractiCAT results.txt in the Jobs folder. It opens in a spreadsheet, one column for each score. The Length column is the time from your first stroke to your last, for a school practice log.
Score
After Stop, the passage comes back marked up, each error where it happened:
A wrong word: crossed out, with what was written beside it in red.
A dropped word: in blue brackets.
An added word: in red with a dotted line.
Transposed words: underlined in orange.
The part not reached: in gray.
The same errors are marked on the take in the writing window, until you edit it or open another job. Each color and mark can be changed on PractiCAT Settings.
Under the score, the errors are listed in a table: the Word, the Error, and the Steno in your dictionary that translates to the word, shortest first. The dropdown over the table shows one kind of error at a time: Dropped, Wrong words, Extra/missing space, Untranslates, Added, Endings, Numbers, Transposed, and Punctuation and capitals.
An untranslate is a stroke with no entry in your dictionary. It has a Define button: it opens Define with the word as the Translation, and you write the steno.
Endings are the same word written with or without -s, -ed, -ing, -ly or 's.
A take longer than a minute shows a score for each minute: WPM, accuracy and errors. Each word counts in the minute you wrote it. Right-click a minute and pick Practice this minute to put that part of the passage in the passage box.
Grading
Takes are graded the way NCRA grades its skills tests.
WPM is counted the way NCRA counts it: a word is 1.4 syllables. A long word takes longer to reach on the pacer, and a take full of long words scores faster than one of short words.
Accuracy is out of the same words: errors against NCRA's count of the passage reached, so a 225 WPM test of 1,125 words passes with 56 errors.
A wrong, dropped or added word is one error. So is "do not" for "don't", "drop out" for "dropout", or a word written in the wrong place.
Numbers, money and times written in words or in figures are not errors: "May one, nineteen fifty one" and "May 1, 1951" both score right. A wrong number is one error for each wrong figure.
Q. and A. and speaker names count as words of the passage. A Q or A at the start of a line counts with or without the period.
What to practice from
These are on the panel, and under Source in PractiCAT Settings.
Library lists practice passages for each leg of the RPR: Literary at 180, Jury Charge at 200, and Testimony/Q&A at 225. Click a title to put that passage in the passage box and set the pace to its speed. With a test chosen, the test keeps its own speed. The passages come from public records, with the names and places changed.
Word list practices words and phrases on their own. Paste the list one entry a row, or on one row separated by commas, semicolons, slashes or bars. Pick In order or Random and the minutes, and Start plays the list over and over at the pace until the minutes are filled. Random shuffles each pass. With Read aloud on, each entry is read as its own item. A word list take grades the words only, not punctuation and capitals.
Drill Misses fills the passage with the words the open take missed, each three times. With a job open that is not a take, it uses your last take. Across all your takes, a word you miss counts up and a word you write right counts down; the ten with the highest count show as Missed most under the list of takes.
Read aloud reads the passage at the pace, in a recorded voice, from the start of the take. The pace is counted the NCRA way, so the reading takes as long as the passage takes at that WPM. Short words go with the next word at slow paces. The first take at a new pace waits a few seconds while the voice gets ready. It says Q and A as "Question" and "Answer", and a speaker's name as it is said: MR. SMITH: is "Mister Smith".
Read punctuation says each mark as a word: period, comma, question mark, open quote. Each mark takes a beat, so the reading runs a little longer than the pace.
Dictation picks a recording to write from. It plays from the start when the take starts and stops with the take. Set WPM to 0 to write from the recording alone.
Speakers names the speaker slots for practice. Type the slot number and the name, MR. SMITH, and click Name. Every take starts with those names, so your speaker stroke writes the name in the passage. A slot with no name writes SPEAKER 3: and scores as an error.
Read aloud and Dictation are one or the other. Read aloud and Read punctuation start on, and stay as you leave them from session to session.
To practice from a file (.txt, .asc, RTF/CRE or .ecl), open File > Jobs, click Transcripts..., pick the file, then click Use This Job. A page pasted from a transcript comes in without its line numbers.
Practice from a job's steno
A passage from Use This Job keeps its steno, and the take translates with that job's job dictionary and case dictionary. Nothing you define during the take goes into them.
During the take, a steno board sits under the passage. A stroke that differs from the passage's shows on it: extra keys are red, missed keys are ringed green. Write the delete stroke and the board clears.
After the take, click a word in the errors table to see its steno on the board under it; click it again to close it.
The score also counts strokes right out of strokes written, strokes repeated (backing up and writing them again without deleting) and strokes skipped (jumping ahead to catch up).
Drill a key, missed most names the keys your misstrokes leave out, and added most the keys they put in, when one comes up twice or more. P- 3 means the left P was missing from three strokes. Click a key to drill it: the passage box fills with twenty one-stroke words from your dictionary that use that key, as a word list.
Start or Stop the Take
Starts a take, or stops the one running, as the Start button does. The button reads Stop during a take. Assign it to a key or a steno stroke in your dictionary to start and stop without leaving the writer. Opens the PractiCAT panel if it is closed.
PractiCAT Settings
Sets how a take runs and how it is marked. Open it from Settings on the PractiCAT panel, or from Settings > PractiCAT Settings. Source at the top holds the same controls as the panel: see What to practice from.
PractiCAT Settings
Passage can Highlight at WPM, Show all, or Hide until Stop. Hide until Stop is for a test: you write from the voice alone.
Countdown counts down before the take, in large numbers over the paper. The clock and the dictation start when it ends.
Time limit ends the take after that many minutes. 0 is off. A test is always 5 minutes.
Passage text size makes the passage larger, up to twice its size. It sizes the passage while you write and the marked-up passage after Stop.
Live WPM and errors shows the running score. Clear it to see the time only.
Steno board (passage from Use this job) shows the steno board during the take.
Stop when the last word is written ends the take when you write the passage's last word.
Dictation speed plays a Dictation recording slower or faster, 80% to 120%, without changing the pitch.
Show the steno for missed words lists every steno in your dictionary for each word in the miss list.
Takes listed is how many takes the list and the chart show, 30 by default. Lowering it hides older takes; raising it shows them again.
Daily goal (minutes) sets a goal for each day; the time line says how far along today is, and Goal met once you reach it. 0 is no goal.
Clear Takes empties the list; the takes' jobs and PractiCAT results.txt stay.
Clear Missed Words empties Missed most. Click either Clear button again to put back what it cleared.
Open Practice Log shows PractiCAT results.txt in its folder. It works once there is a take.
Speed building moves the pace after each take: up by After a pass, down by After a fail. The score says the next take's pace, and Retake writes at it. Tests and takes at 0 WPM never move. Leave both at 0 to keep the pace where you set it.
Pass at sets the percent that passes a take.
Marks has a row for each kind of error and a column for each mark: Tint, Line, Strike, Box and Bold. Check as many as you like on each row. Line is an underline, solid, dotted or wavy. The color box at the start of the row sets the color for all of them. The sample shows each one as you change it.
Mark errors on the paper turns the marks in the writing window on and off.
Show dropped words over the gap puts each dropped word above the gap it was dropped from.
Steno board sets the colors of an extra key and a missed key.
31Troubleshooting
For a problem not listed, open Help > Report a Problem and send the report to support@starcatsteno.com. See Bug Reports and Support.
Writer does not connect
Check that the writer is on and not in one of its own menus.
Close any other program that uses the writer, such as another CAT program. A port opens in only one program at a time.
Open Realtime > Writer. Check that the writer selected is the model printed on the machine. Selecting a model sets the protocol and the speed.
Unplug the cable, check the port list, plug the cable back in, and select the port that appears. Pair a Bluetooth writer in Windows before starting StarCAT.
If the writer is not in the port list, click Device Manager on the Writer menu. A writer missing from Device Manager is a cable, driver or Bluetooth problem, not a StarCAT problem. Try another cable or USB port, or pair the writer again.
A Stenograph writer on USB needs Stenograph's USB driver, and USB Communication set to Standard on the writer (Setup, More, Options). Mira Emulation turns its COM port off. The Writer menu says so when it sees one.
If the model is not listed, set the writer to TX Bolt mode in its own setup menu and choose Another writer, in TX Bolt mode, or set it to Gemini PR and choose Another writer, in Gemini PR mode.
The Writer menu remembers the port, the writer and the speed. When the remembered port appears, StarCAT connects to it once. After Disconnect, StarCAT does not reconnect until you click Connect.
Writer is connected but nothing is written
Check the status beside Connect on the status bar. If it reads not translating, open Realtime > Start Translation. With Translation off, the writer stays connected and nothing is written.
Click Byte monitor on the Writer menu. If bytes appear when you write, the cable and port work and the wrong writer is selected. If no bytes appear, the problem is the cable, the port or the writer.
Open Help > License. The Scopist edition does not connect a writer.
Page fills with wrong words or nonsense
Open Realtime > Writer and check the speed. It must match the writer's own setting.
Check that the writer selected speaks the protocol the machine is set to. A machine in TX Bolt mode with a Stenograph model selected writes nonsense or nothing.
Every stroke shows as raw steno
The status bar reads no dictionary loaded, everything untranslates. Open Dictionary > Dictionaries and click Add a Dictionary…, then pick your dictionary file. The job retranslates with it.
Status reads "nothing heard for" a time
The writer is connected but has sent nothing for that long. The next stroke sets it back to writer connected. On a LightSpeed, check that the LightSpeed software is still running: Windows keeps its port open after the software stops, so StarCAT cannot tell the two apart.
STPH appears only after the next stroke
A Stenovations LightSpeed on Bluetooth, in TX Bolt, sends the stroke STPH, with no other keys, as a single code that the Bluetooth link holds until the next stroke. Whatever STPH is defined as, it appears when the next stroke is written. On USB it appears at once. STPH with any other key is not affected.
To see it, open Realtime > Writer, check Byte monitor and write STPH. Its code, 2B, shows only when the next stroke arrives.
Recording does not start
The status bar reads no microphone: and the reason.
Open Windows Settings > Privacy > Microphone and turn on Let desktop apps access your microphone.
Open Audio > Recording and check the Microphone picker. Click Windows Sound to see the inputs Windows has.
A microphone unplugged and plugged back in is opened again on the next Record.
Words run together
The status beside Connect reads Stitch on or Web stitch on: every stroke after the stitch stroke is joined until Stitch is off. Stitch joins the letters with hyphens: S-m-i-t-h. Web stitch joins them in lower case with no spaces, for a web or e-mail address: smith.com. Write the stroke defined as Stitch off, or check the Dictionary entry that turned it on.
Words are written but do not appear in the output
The status beside Connect reads Bench Mode on: the text stays in the job and goes to no output. Press Ctrl+Alt+Esc, the Panic Stroke: it turns Bench Mode off with every other mode. A stroke defined as Bench Mode off ({@BENCH(OFF)}) or Toggle Bench Mode ({@BENCH(TOGGLE)}) does the same.
StarCAT shows "Strokes not saved" or "Changes not saved"
The disk the job is on would not take the last stroke or change. If it reads Disk is full, free some space. If not, check that the drive is still plugged in. Writing goes on, and the next stroke saves once the disk accepts it.
StarCAT shows "settings.json would not read"
The settings file was damaged. StarCAT renamed it settings-unreadable.json and started with the default settings. Open Settings > Backups and Users to restore a backup.
StarCAT shows "The last session ended on an error"
StarCAT closed on an error last time. Open Help > Report a Problem and send the report with the log.
32Frequently Asked Questions
Type in the search box at the top of the window (Ctrl+Shift+P) to find any command, menu or setting by name.
Where is a command, menu or setting?
Type part of its name in the search box at the top of the window; the list shows every command, menu and setting that matches. Open Settings > Settings to open every settings menu in one window, in tabs.
Do I need to save?
No. StarCAT saves every stroke and every edit as it happens. Closing StarCAT also keeps a setting or an edit box you were still typing in.
How do I open a job I had open recently?
Open File > Open Recent and click the job. See jobs.
Open File > Jobs, click the job's name in the list, type the new name, and press Enter. Esc cancels.
How do I delete one character?
Backspace runs Delete Character Before. Delete runs Delete Next Character. See Editing.
How do I stop translating but keep the writer connected?
Open Realtime > Stop Translation. The writer stays connected and nothing is written until Translation is on again. See Translation.
Is there a key or stroke to connect and disconnect the writer?
Click Connect on the status bar. Connect/Disconnect Writer has no key until you give it one: assign a key in Settings > Keyboard, or a stroke with a Dictionary entry. See Your Writer.
Does StarCAT remember my COM port?
Yes. The Writer menu saves the port, the writer and the speed, and connects to that port when it appears. See Your Writer.
How do I edit my Dictionaries?
Open Dictionary > Edit Dictionaries. See Dictionaries.
How do I create a new, empty Dictionary?
Open Dictionary > Dictionaries. In New dictionary, type a name and click Create. See Dictionaries.
Where do job defines go?
Open Dictionary > Job Define to define into the job dictionary. To choose the job dictionary, either:
Open Dictionary > Dictionaries and select Job on its row. Add a Dictionary… adds a new one first.
Open File > Jobs, select the This Job tab, and set Job Dictionary.
Yes. With the Define box open, press Alt+Left, or click + on the left, to add the stroke before. See Defining.
How do I export a Dictionary for my writer?
Open Dictionary > Export Dictionary to RTF/CRE. See Dictionaries.
How do I compare two Dictionaries?
Open Dictionary > Compare Dictionaries. See Dictionaries.
How do I fill in every blank?
Open Edit > Insert > Fill in the Blanks. The cursor goes to the first blank, then to the next as each is answered. See Editing.
What does CAT Scan do?
CAT Scan is a mode. On, defining or answering the mark at the cursor moves the cursor to the next mark. What Scan stops on chooses the marks. See Navigation.
How do I remove the indent from one paragraph?
Put the cursor in the paragraph, then use either:
The ruler. Click This Paragraph on the ruler, and drag the first line indent marker to the left margin. Reset returns to the style's indent. See Ruler.
First Line Indent. It is on no menu: add it to a toolbar, assign it a key, or find it in the search box at the top of the window. Type 0 for no indent, or leave the box empty to return to the style's indent. See Paragraphs.
Can I see headers and footers in the writing window?
View > Split Screen shows two views of the same job. The lower view stays on the writing; the upper view scrolls and edits on its own. See The writing window.
How do I hide or show all side columns at once?
Press Alt+Shift+\ (Collapse All Rails). Press it again to bring them back. To fold one column, use View > Columns. See The writing window.
How do I change the writing window font?
Open Settings > Appearance, click the Writing Window tab and set Font. See The writing window.
How do I put a key press, such as Enter or an arrow, in a macro?
Add the Key Press step to the macro and select the key. Ctrl, Alt and Shift can be held with it. See Keys and Macros.
How do I type a symbol, such as a music note?
Open Edit > Insert > Special Character and select the symbol. Music notes are in the Music group. To write it from the writer, define it into a Dictionary. See Word Fixes.
Can Realtime go to more than one place at a time?
Yes. Open Realtime > Realtime Output and click Add an Output for each one. See Realtime Output.
Where do exported files go?
To C:\StarCAT\Exports. To change the folder, open Settings > Backups and Users and click Change on the Exports row. See Export and Print.
Does my scopist get the audio?
Yes. File > Send Job to Scopist puts the job, its audio and the Dictionaries that are on into one file. See jobs.
Why is some of my writing shaded?
Four things shade writing:
Paragraph status. A status is a tint behind the paragraph on the screen. Off removes it. See Paragraph Status.
Mode. A mode's While on color fills the background while the mode is on. Turn the mode off, or change the color. See Set up the toolbars.
Reporter's Area. The lines written by the last 128 strokes are shaded while Reporter's Area is on. Turn it off to take the shading off. See Reporter's Area.
Sent to a scopist. If the status bar says SENT TO SCOPIST, that writing was sent to a scopist. Click SENT TO SCOPIST and click Take Back on each part to take the shading off. See Scopists and Proofreaders.
Does StarCAT work offline?
Yes, for 14 days at a time. Each check-in with the license server starts the 14 days again. See Licenses and Editions.
Open Help > Report a Problem, email support@starcatsteno.com, or post on the [StarCAT Discord](https://discord.gg/Kx9xmJfpBq). Send job files by email, never on Discord. See Bug reports and support.
33Bug Reports and Support
Send questions, problems and feature requests to support@starcatsteno.com, or post on the [StarCAT Discord](https://discord.gg/Kx9xmJfpBq). Send job files by email, never on Discord.
StarCAT sends a report only when you click Send Report.
Report a problem:
Open Help > Report a Problem. It opens with no job open, so it works when a job will not open.
In What happened, describe the problem.
Leave Send the log with it selected to include the end of trouble.log. The log has no transcript text and no Dictionary entries.
Read the text in What gets copied: the StarCAT version, the Windows version, the date and time, what you typed, and the log.
Click Copy and paste the text into an email to support@starcatsteno.com.
Send a bug report:
A bug report includes an event log so the problem can be reproduced. Bug report mode is on at install: StarCAT records every key press, click and stroke, the cursor position and the words around it, and screenshots, in the Program data folder. Nothing is sent until you send a report.
Repeat the steps that cause the problem.
Open Help > Report a Problem and describe the problem.
Select or clear Include real text and screenshots. Selected, the report includes the real text and screenshots. Cleared, letters are replaced with x; the Steno stays in the report, so support can still read what was written.
Click Send Report. The report goes to StarCAT support with the description and the license number.
To email the report instead, click Create Report File. A .zip file named StarCAT bug report and the date and time is saved in Downloads, and the folder opens. Attach it to an email to support@starcatsteno.com.
The report includes the recorded sessions, trouble.log, the settings file, and the StarCAT and Windows versions. To stop recording, clear Bug report mode on the Report a problem menu.
trouble.log
StarCAT writes problems to trouble.log in the Program data folder, one line each, newest last. The file is plain text. Past 500 lines it is cut to the last 200. If the previous session ended on an error, StarCAT shows "The last session ended on an error. Check trouble.log for more details." at the next start.
Report a Problem
Opens the Report a problem menu. Copies a problem report to the clipboard, sends a bug report, and turns Bug report mode on and off.
Report a problem menu
34Key Mappings
Every key StarCAT ships, on its two key maps. A new install starts on the Eclipse map: Eclipse's keys, and StarCAT's keys where Eclipse has no key. Plain Enter always starts a new paragraph. To use StarCAT's own map, open Settings > Keyboard and pick StarCAT in Coming from. To change a key, see Keys and Macros.
A key written as B then C is two presses: B, then C.
On the Eclipse map, Alt+Z turns RocketKeys on and off. While it is on, these keys run commands with no Ctrl or Alt.
Key
Command
B then W
Save Marked Part as Job
Numpad 1
Infobar Row (0)
Shift+E
Add Blank
B then C
Copy
B then S
Cut
B then T
Cut
Shift+D
Delete Next Character
D
Delete Word
N
Edit at Caret
X
Extend Sentence
E
Fill in the Blanks
F
Find
Shift+F
Find One Before
Insert
Overtype
B then P
Paste
\
Spell Check
Z
Undo
G
Define
Alt+7
Define (2)
Alt+8
Define (3)
Alt+9
Define (4)
Alt+0
Define (5)
Shift+B
Interrupted Q and A
Shift+P
Make Answer
Shift+Q
Make Question
Alt+=
Single Space (off)
Alt+-
Single Space (on)
Shift+X
Mark Line
1
Pick Conflict Choice (1)
2
Pick Conflict Choice (2)
3
Pick Conflict Choice (3)
4
Pick Conflict Choice (4)
5
Pick Conflict Choice (5)
6
Pick Conflict Choice (6)
]
End of Line
Shift+G
Go to Page or Line
R then A
Last A
Shift+Z
Last Edit Point
R then Q
Last Q
V then A
Next Answer
Shift+L
Next Character
C
Next Conflict
V then C
Next Conflict
K
Next Line
H
Next Paragraph
V then Q
Next Question
Shift+K
Next Sentence
V then S
Next Speaker
Shift+C
Next Unresolved Conflict
V then R
Next Unresolved Conflict
U
Next Untranslate
V then U
Next Untranslate
L
Next Word
O
Next Word (2)
Shift+J
Previous Character
R then C
Previous Conflict
I
Previous Line
Shift+V
Previous Marked Line
Y
Previous Paragraph
Shift+I
Previous Sentence
R then S
Previous Speaker
R then R
Previous Unresolved Conflict
R then U
Previous Untranslate
J
Previous Word
Shift+O
Previous Word (2)
T
Scan
V then T
Scan
R then T
Scan Backward
Shift+H
Screen Down
Shift+Y
Screen Up
[
Start of Line
Shift+.
Word After Next Punctuation
Shift+,
Word After Previous Punctuation
M
Block Mark
A
Cap Word (toggle)
Shift+A
Cap Word (upper)
`
Cycle Possession
=
Ending Punctuation (--)
Q
Ending Punctuation (?)
P
Ending Punctuation (.)
W
Prefix/Suffix
Shift+S
Shave Current Word
S
Shave Previous Word
Shift+`
Sticky Space
Shift+R
Swap with Next Word
Shift+U
Untranslate Word
Shift+N
Write Number As (Generic)
Shift+M
Write Number As (Money)
Shift+T
Write Number As (Time)
Shift+W
Write Number As (Words)
Shift+[
Normal Speed
Shift+]
Pause, or Resume
Shift+\
Play from Cursor
RocketKeys: StarCAT Map
On the StarCAT map, Alt+Z turns RocketKeys on and off. While it is on, these keys run commands with no Ctrl or Alt.
Key
Command
/
Cheat Sheet
Shift+/
Cheat Sheet
C
Copy
X
Cut
E
Edit at Caret
F
Find
V
Paste
Y
Redo
Z
Undo
Shift+B
D-Briefs
D
Define
Shift+K
Look Up
Shift+D
Main Define
Shift+J
Join to Previous Paragraph
A
Make Answer
,
Make Answer
Q
Make Question
.
Make Question
P
Swap Q and A
G
Go to Page or Line
Shift+Q
Last Q
K
Next Character
M
Next Line
N
Next Paragraph
U
Next Untranslate
W
Next Word
J
Previous Character
I
Previous Line
Shift+N
Previous Paragraph
Shift+W
Previous Word
Shift+A
Alternate Spelling
Shift+C
Cap Word
=
Dashes Round Last Words
-
Hyphenate Back to Space
Shift+9
Parentheses Round Last Words
Shift+0
Parentheses Round Last Words
Shift+E
Prefix/Suffix Keys
Left Shift
Quick Shift (Toggle)
Right Shift
Quick Shift (Toggle)
Shift+'
Quote Last Words
'
Single Quotes Round Last Words
Shift+-
Squish
Space
Sticky Space
H
Stitch Letters
T
Swap with Previous Word
Shift+M
Take Last Mark Off
Shift+P
Toggle Apostrophe S
B
Bold
Shift+I
Italic
Shift+U
Underline
Shift+R
Ahead Few Seconds
R
Back Few Seconds
Shift+.
Faster
Shift+L
Pause, or Resume
L
Play from Cursor
Shift+,
Slower
S
Stop
35Command List
Every command StarCAT has, and every code an entry can hold. To run a command from a Dictionary entry, use the code in the Translation column as the entry's Translation. Where Parameter has something, add it after the name, as {@RUN(parastyle Q)}. To assign a command to a key, see Keys and Macros.
A command that takes an on/off parameter is a switch:
Translation
What it does
{@RUN(overtype)}
Turns Overtype on and off
{@RUN(overtype on)}
Turns Overtype on
{@RUN(overtype off)}
Turns Overtype off
The other parameters. A command that says required does nothing without it.
Parameter
Translation
What it does
a number
{@RUN(quote)}
Puts quotes around the last word
a number
{@RUN(quote 3)}
Puts quotes around the last 3 words
a number, required
{@RUN(recall 2)}
Types the word in memory 2
text
{@RUN(mark)}
Marks the line, or takes the mark off
text
{@RUN(mark Check)}
Marks the line with the word Check
text, required
{@RUN(type Thank you.)}
Types Thank you.
a key, required
{@RUN(press Ctrl+Home)}
Presses Ctrl+Home in StarCAT
a cap style
{@RUN(caps)}
doctor becomes Doctor, then DOCTOR, then doctor
a cap style
{@RUN(caps initial)}
doctor becomes Doctor
a cap style
{@RUN(caps upper)}
doctor becomes DOCTOR
a cap style
{@RUN(caps lower)}
DOCTOR becomes doctor
seconds
{@RUN(rewind)}
Moves playback back by the Audio step, 5 seconds by default
Takes out the space between the words on either side.
{^text}
Ending
Sticks to the word before it, with no space.
{text^}
Beginning
Sticks to the word after it, with no space.
{^text^}
Middle
Sticks to the words on both sides.
{^ ^}
Space
Writes one space, and nothing else.
{~}
Sticky space
Puts a space between the words and keeps them on the same line.
{TAB}
Tab
Moves to the next tab stop of the paragraph style.
{TR}
Right tab
Ends what follows on the next tab stop. {TR:2} for stop 2.
{TC}
Center tab
Centers what follows on the next tab stop. {TC:2} for stop 2.
{TN}
Decimal tab
Lines up the decimal point on the next tab stop. {TN:2} for stop 2.
Entry codes: Capitals
Code
Name
What it does
{-|}
Cap the next word
Capitalizes whatever is written next.
{>}
Leave the next word alone
Stops the next word being capitalized.
{@CAPWORD(LASTWORD)}
Cap the previous word
Capitalizes the word in front of it, after the fact.
{~|text}
Carry the capital
Text that takes the capital of the word it lands on.
{@CAPWORD(ON)}
Cap every word
Capitalizes every word written from here until it is turned off.
{@CAPWORD(OFF)}
Stop capping every word
Stops it.
{@CAPWORD(TOGGLE)}
Cap every word, on or off
Turns it on and off.
{@CAPALL(ON)}
Caps lock
Puts everything written from here in capitals until it is turned off.
{@CAPALL(OFF)}
Caps lock off
Stops it.
{@CAPALL(TOGGLE)}
Caps lock, on or off
Turns it on and off.
Entry codes: Text
Code
Name
What it does
{b}text{b}
Bold
The words between the two are bold.
{i}text{i}
Italic
The words between the two are italic.
{u}text{u}
Underline
The words between the two are underlined.
{s}text{s}
Strikeout
The words between the two have a line through them.
{bu}text{n}
Combined styles
Any of b, i, u and s together. Plain again at n.
Entry codes: Paragraphs
Code
Name
What it does
{Q}
Question
Starts a question paragraph.
{A}
Answer
Starts an answer paragraph.
{C}
Colloquy
Starts a colloquy paragraph.
{P}
New paragraph
Starts a paragraph in the ordinary style.
{P Quote}
New paragraph in a style
Starts a paragraph in the style you name.
{S Mr. Avery}
Speaker
Starts a colloquy paragraph for the speaker you name.
{New Page}
New page
Starts a new page. What follows it goes to the top of the next one.
{H Volume II}
Header
Changes the header from this page on. [page] in it is the page number. Bars split it into left, center and right, and a fourth piece sets the look, like bold 10.
{H}
No header
Prints no header from this page on.
{F Volume II}
Footer
Changes the footer from this page on. [page] in it is the page number. Bars split it into left, center and right, and a fourth piece sets the look, like bold 10.
{F}
No footer
Prints no footer from this page on.
{Job Header}
Job header
Prints the job's header again from this page on.
{Job Footer}
Job footer
Prints the job's footer again from this page on.
{Omit Header, Footer}
Omit
Leaves these off the pages from the next paragraph on: Header, Footer, Page Numbers, Line Numbers, Timecodes, Text Box.
{Resume}
Resume
Prints again what an Omit left off. {Resume Header} puts back just the header.
{L Certificate}
Page layout
Sets the page layout from here on. Starts a page, because a page holds one layout.
{L}
Back to the job layout
Goes back to the layout the job is set on.
{Single Space On}
Single space on
Puts two lines of text on each numbered line from here on: 1, 1½, 2.
{Single Space Off}
Single space off
Goes back to one line of text on each numbered line.
{Single Space}
Single space
Single spaces the paragraph it is in.
{Double Space}
Double space
Double spaces the paragraph it is in, inside a run of single spacing.
{Line Numbers Off}
Line numbers off
Prints no line numbers from this paragraph on.
{Line Numbers On}
Line numbers on
Prints line numbers again after this paragraph.
{Indent 0}
Indent
Sets the first line indent of this paragraph, in inches from its left margin.
{Indent}
Back to the style indent
Goes back to the first line indent the paragraph style carries.
{Page Number 143}
Page number
Numbers the page this paragraph is on, and counts up from there.
{Volume 2}
Volume
Puts this page and the pages after it in a volume of their own.
{Paragraph Number 1}
Paragraph number
Sets the number of the next numbered paragraph. Later paragraphs count up from it.
Entry codes: Letters and numbers
Code
Name
What it does
{&A}
Spelled letter
A letter or digit that joins the ones on either side of it and keeps its space against a word.
Entry codes: Number formats
Code
Name
What it does
{#Q}
Quantity
The next number is a quantity: five, and 11 and up in digits.
{#O}
Ordinal
The next number is an ordinal: 5th.
{#M}
Money
The next number is money: $5.
{#C}
Cents
The next number is cents: 50 cents alone, or the change after a dollar figure.
{#G}
Generic
The next number is plain digits: 1997.
{#N}
Digits
Plain digits, the same as generic.
{#R}
Roman numeral
The next number is Roman: MCMXCVII.
{#r}
Roman numeral, lower case
The same, in lower case: mcmxcvii.
{#W}
Written out
The next number is words: one thousand nine hundred ninety-seven.
{#T}
Time
The next number is a time: 3:45.
{#D}
Date
The next number is a date: 2/13/80.
{#P}
Phone number
The next number is a phone number: 555-1234.
{#S}
Social Security number
The next number is a Social Security number: 123-45-6789.
{#Z}
ZIP code
The next number is a ZIP code: 12345-6789.
{#R>>}
Keep it on
Every number after it takes the format, not only the next one.
{#}
Stop
Ends a format left on. Numbers go back to the rules.
Entry codes: Numbers already written
Code
Name
What it does
{@RUN(renumber Quantity)}
Write it as a quantity
five becomes 5, and twelve thousand three hundred forty-five becomes 12,345.
{@RUN(renumber Ordinal)}
Write it as an ordinal
five becomes 5th.
{@RUN(renumber Money)}
Write it as money
five becomes $5.
{@RUN(renumber Cents)}
Write it as cents
fifty becomes 50 cents.
{@RUN(renumber Roman)}
Write it as a Roman numeral
nineteen ninety-seven becomes MCMXCVII.
{@RUN(renumber RomanLower)}
Write it as a Roman numeral, lower case
The same, in lower case: mcmxcvii.
{@RUN(renumber Words)}
Write it out in words
1997 becomes one thousand nine hundred ninety-seven.
{@RUN(renumber OrdinalWords)}
Write it out in words, as an ordinal
five becomes fifth.
{@RUN(renumber Generic)}
Write it as plain digits
An identifier, so no separator: 5551234 stays 5551234.
{@RUN(renumber Figures)}
Write it as figures
A quantity that stays in digits however small it is: five becomes 5, not five.
{@RUN(renumber Percent)}
Write it as a percent
25 becomes 25%, and again 25 percent.
{@RUN(renumber Decimal)}
Write it with two decimal places
2.5 becomes 2.50. A longer decimal is left alone.
{@RUN(renumber Fraction)}
Write as fraction
three and a half becomes 3 1/2, and three quarters becomes 3/4. One way: undo takes it back.
{@RUN(renumber Time)}
Write it as a time
three forty-five becomes 3:45.
{@RUN(renumber Date)}
Write it as a date
two thirteen eighty becomes 2/13/80. Again offers the other readings of the same digits.
{@RUN(renumber MonthDay)}
Write it as the day after a month
The digits written after a month name: 62019 becomes 6, 2019.
{@RUN(renumber Phone)}
Write it as a phone number
five fifty-five twelve thirty-four becomes 555-1234.
{@RUN(renumber Social)}
Write it as a Social Security number
Nine digits become 123-45-6789.
{@RUN(renumber Zip)}
Write it as a ZIP code
Five digits, or nine as 12345-6789.
{@RUN(renumber Docket)}
Write it in a custom shape
The name of a template in Format > Numbers. {#Docket} aims the same shape at the next number.
Entry codes: Stitching
Code
Name
What it does
{@STITCHWORD(ON)}
Stitch on
Hyphenates everything written from here, letter by letter, until it is turned off.
{@STITCHWORD(OFF)}
Stitch off
Stops stitching.
{@STITCHWORD(TOGGLE)}
Stitch on or off
Turns stitching on and off.
{@STITCHWORD(ON, .)}
Stitch on, with a separator
Stitches with the character you name instead of a hyphen.
{@STITCHWORD(ON, WEB)}
Web stitch
Joins what follows in lower case with no spaces, for a web or email address, until Stitch off.
{@STITCHWORD(LASTWORD)}
Stitch the previous word
Hyphenates the word already written, letter by letter. Again puts it back.
Entry codes: Corrections
Code
Name
What it does
{@SEARCHREPLACE}
Search and replace
Write the wrong word, then the right one, then this. The last place you wrote the wrong word is corrected and both words come off the paper.
{@SEARCHDELETE}
Search and delete
Write the word, then this. The last place you wrote it is removed, and so is the word you just wrote.
{@REPLACEUNTRANSLATE}
Replace the last untranslate
Write the word the untranslate should have been, then this.
{=STPHAP}
Slop stroke
Reads as that Steno, whatever it says today. For a stroke your hand misses on the way to it.
Entry codes: Punctuation
Code
Name
What it does
{.}
Period
Closes up behind, capitalizes what follows, and replaces a weaker mark already there.
{?}
Question mark
Closes up behind, capitalizes what follows.
{!}
Exclamation point
Closes up behind, capitalizes what follows.
{,}
Comma
Closes up behind and leaves the next word as it is.
{;}
Semicolon
Closes up behind and leaves the next word as it is.
{:}
Colon
Closes up behind and leaves the next word as it is.
{--}
Dash
The interrupt dash, with a space in front of it.
Entry codes: Choices
Code
Name
What it does
[one|two]
Conflict
Two readings for one Steno. The first reaches the paper, marked, and the other is a click away.
Entry codes: Nothing
Code
Name
What it does
{}
Nothing
Writes nothing. Useful in front of a command, the way KPA is a cap with no text. The number rules stop at it: two {} ten dollar bills is two $10 bills, not $210 bills.
{No Auto Convert}
No Auto Convert
Numbers stay as written. In an entry, that entry; alone, the next translation.
Entry codes: Strokes
Code
Name
What it does
{*+}
Repeat last stroke
Writes your last stroke again, as if you had stroked it twice.
{Delete}
Delete stroke
Takes back your last stroke, as the asterisk does.
Entry codes: Marks
Code
Name
What it does
{U:CHECK SPELLING}
Scan stop
Puts your words on the paper, marked, and Scan stops on them. Not counted as an untranslate.
{@RUN(oops)}
Oops
A hidden mark on the words just written, to come back to. Nothing prints. Next marked line with Oops finds them.
{@RUN(indexnext EXHIBITS)}
Next exhibit
Writes the exhibit parenthetical and asks for its number, the next one already filled in: 1, then 2, or A, then B. The number goes in the text and the index.
{@BENCH(ON)}
Bench Mode on
What you write from here stays in the job and goes to no output, until Bench Mode off.
{@BENCH(OFF)}
Bench Mode off
Sends again from here.
{@BENCH(TOGGLE)}
Toggle Bench Mode
Bench Mode on, or off when it is on. One stroke for both.
Entry codes: Commands and macros
Code
Name
What it does
{@RUN(resolve 2)}
Pick a conflict reading
Picks that reading of the last conflict written: 1 for the first, 2 for the second, 3 for the third. The same as clicking it.
{@RUN(connect)}
Connect/disconnect writer
Disconnects the writer. On a machine writer, the same stroke connects it again.
{@RUN(lsreplace 1)}
Replace with Live Suggestion
Puts Live Suggestion 1, 2 or 3 over the untranslate it was offered for.
{@RUN(lsdefine 1)}
Define Live Suggestion
Defines the untranslate as Live Suggestion 1, 2 or 3 in the job dictionary, everywhere in the job.
{@RUN(slotdefine 1)}
Define to Slot
Defines the words behind the cursor to slot 1 to 9, with no box. Dictionary > Define Slots sets each slot up and takes this stroke too.
{@RUN(brief 1)}
Brief Words Behind
Takes that many words behind the cursor, 1 to 9. Write the brief, then write this stroke again: the brief is defined to the words in the Job Dictionary.
{@RUN(briefcap 1)}
Brief Words Behind, Capped
The same, with the words initial-capped: bank of the south is defined as Bank of the South.
{@RUN(name)}
Run a command
Runs a command the way a key bound to it would. The name is the one on the keymap.
{@RUN(name 1)}
Run a command with a number
For the commands that take one: which conflict reading, how many words, which memory.
{#Escape}
Press a key
Presses a key by name, the way Plover writes it. Space and Tab write one instead.
{MACRO:name}
Run a macro
Plays a macro by name.
{@RUN(macro:name)}
Run a macro, the long way
The same thing. What the Copy button on a macro writes, and what an older dictionary holds.